Stripe Integration
Capacity's Stripe integration provides a complete payment infrastructure for your applications, enabling you to accept payments, manage subscriptions, and handle billing with just a few prompts.

What is Stripe?
Stripe is a leading payment processing platform that provides:
- Payment Processing: Accept credit cards, digital wallets, and 135+ currencies
- Subscription Management: Recurring billing with flexible pricing models
- Checkout Sessions: Pre-built, conversion-optimized payment forms
- Customer Portal: Self-service subscription management for your users
- Fraud Prevention: Advanced machine learning for fraud detection
- Webhooks: Real-time payment event notifications
Why Use Stripe with Capacity?
When you integrate Stripe into your Capacity project, you get:
No-Code Payment Setup
- Simply describe your payment requirements in natural language
- Capacity automatically generates the complete payment flow
- No manual API integration or webhook configuration needed
Pre-configured Infrastructure
- Secure payment forms with PCI compliance
- Customer management and billing portal
- Subscription lifecycle handling
- Invoice generation and email receipts
Automatic Credit System
- Credits are automatically allocated based on your Stripe products
- User subscriptions sync with your application's credit system
- Plans and pricing tiers managed through Stripe Dashboard
Built-in Security
- API keys securely stored and managed
- Webhook signature verification
- PCI-compliant payment processing
- Fraud detection with Stripe Radar
Getting Started
Prerequisites
Before setting up Stripe integration:
-
Stripe Account: Create a free account at stripe.com
-
Configure Products: Set up your products and pricing in the Stripe Dashboard
-
Authentication: Your Capacity project should have user authentication enabled using Supabase
Step 1: Add Your Stripe API Key
Note:
Never paste your Stripe Secret Key directly in chat. Always use the secure Environment variables form. Capacity will automatically ask you to add your keys when necessary.
-
In your Capacity chat, type: "I want to add Stripe payments for recurring subscriptions."
-
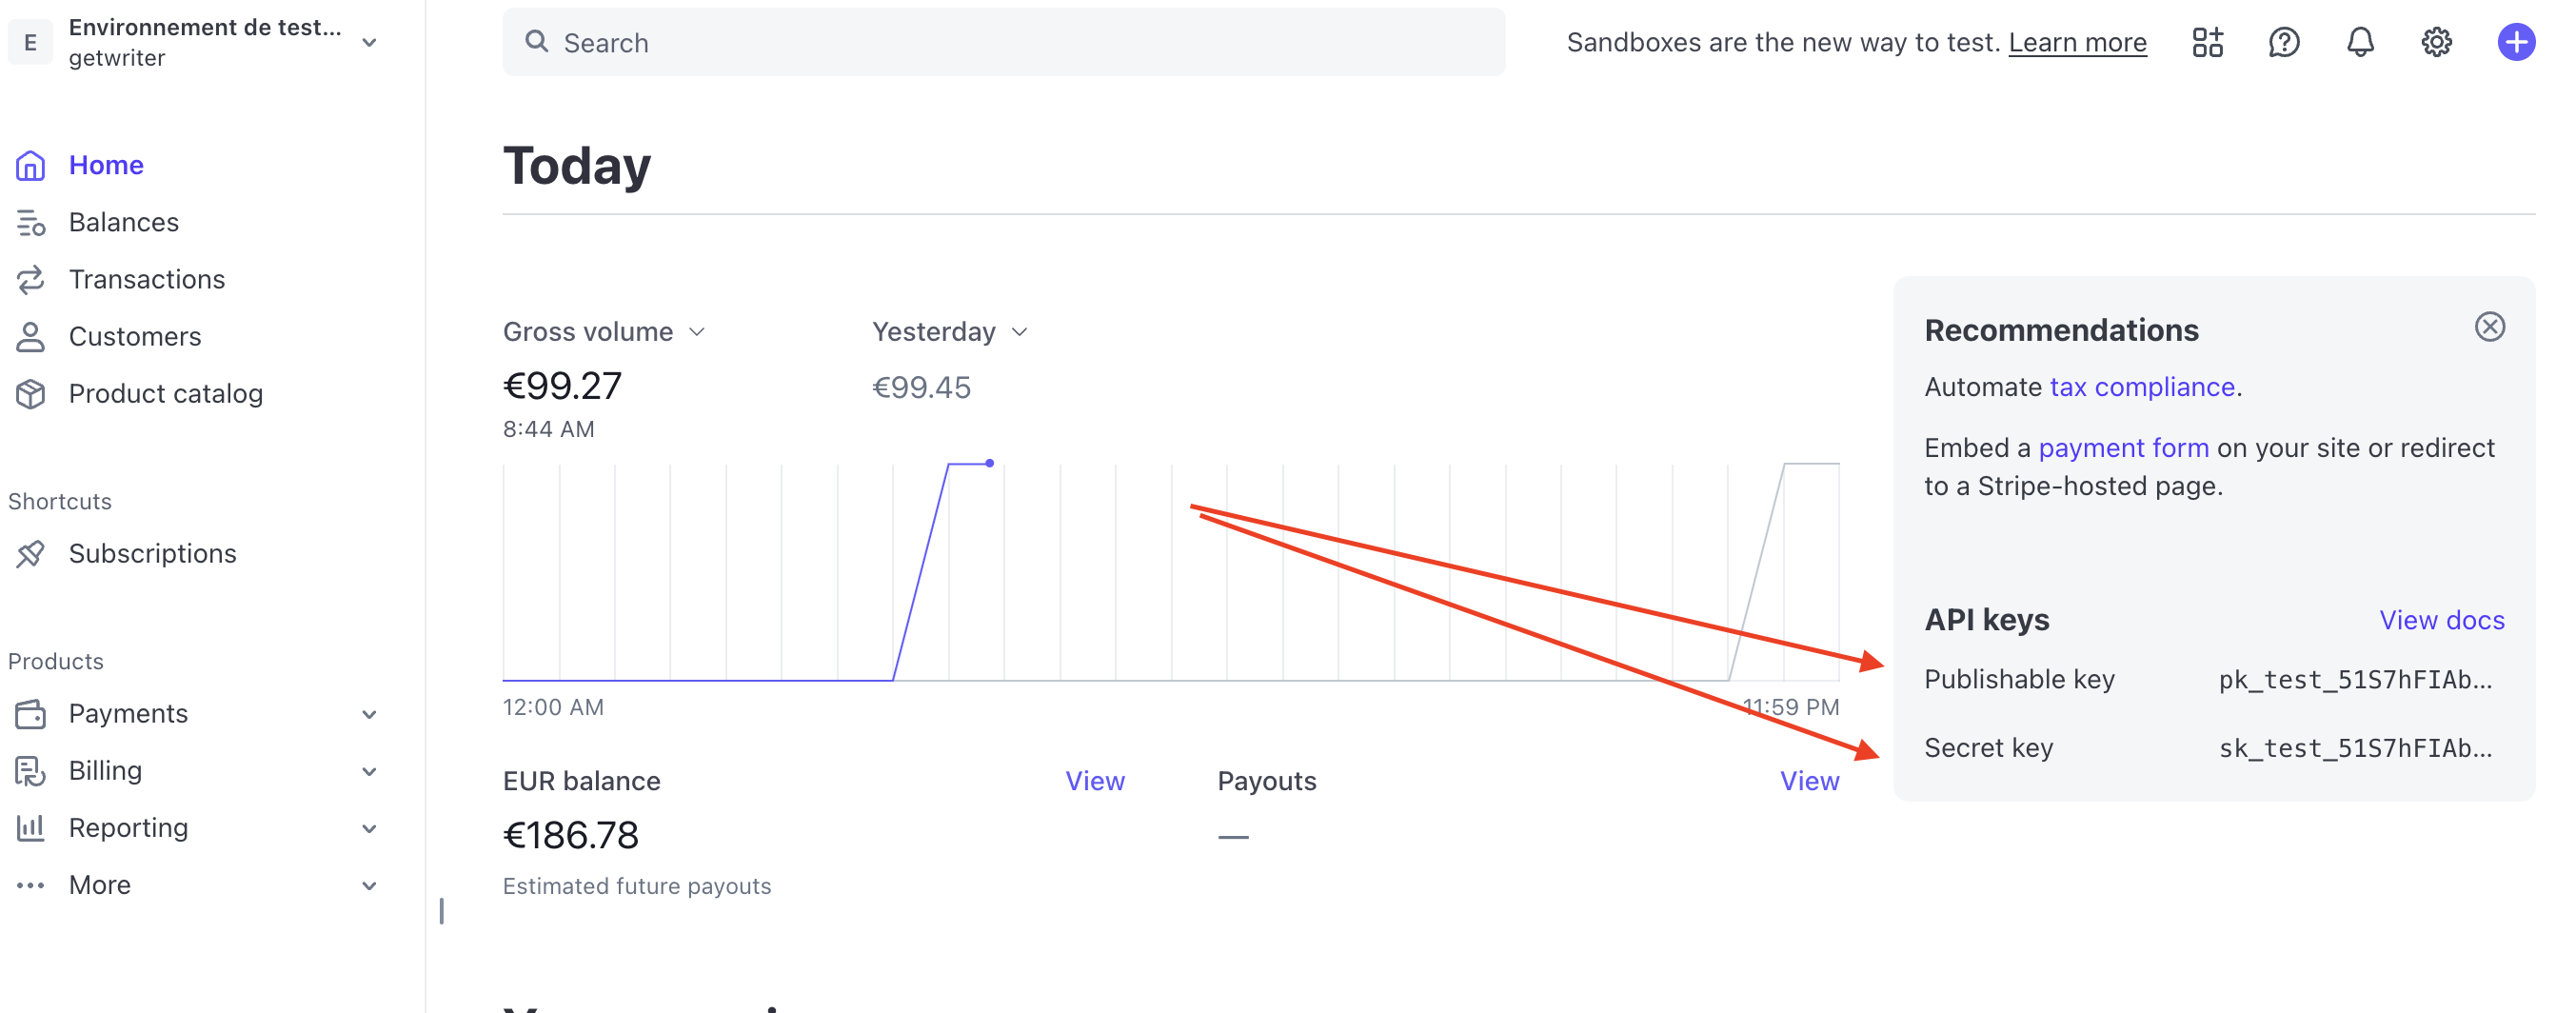
Capacity will automatically ask you to securly add your Stripe API Keys. They can be found in your Stripe dashboard.
-
Enter your Stripe Secret Key (starts with
sk_) -
Click Save to securely store your key
Your API key is encrypted and never visible in your code or logs.
Step 2: Describe Your Payment Flow
Tell Capacity what kind of payments you need. Be specific about your requirements:
Simple Examples:
- "Create a one-time checkout for my SaaS starter plan at $29/month"
- "Set up three subscription tiers: Basic at $9, Pro at $29, Enterprise at $99"
- "Add a payment form for my digital course at $149"
Advanced Examples:
- "Create a freemium model with 100 free credits, then paid tiers with more credits"
- "Set up usage-based billing that charges $0.10 per API call after 1000 free calls"
- "Add team subscriptions where each seat costs $15/month"
Step 3: Configure Products in Stripe
Note:
The easiest to make it works is simply to ask Capacity "How do I create products on Stripe ? Tell me exactly how to fill the required fields."
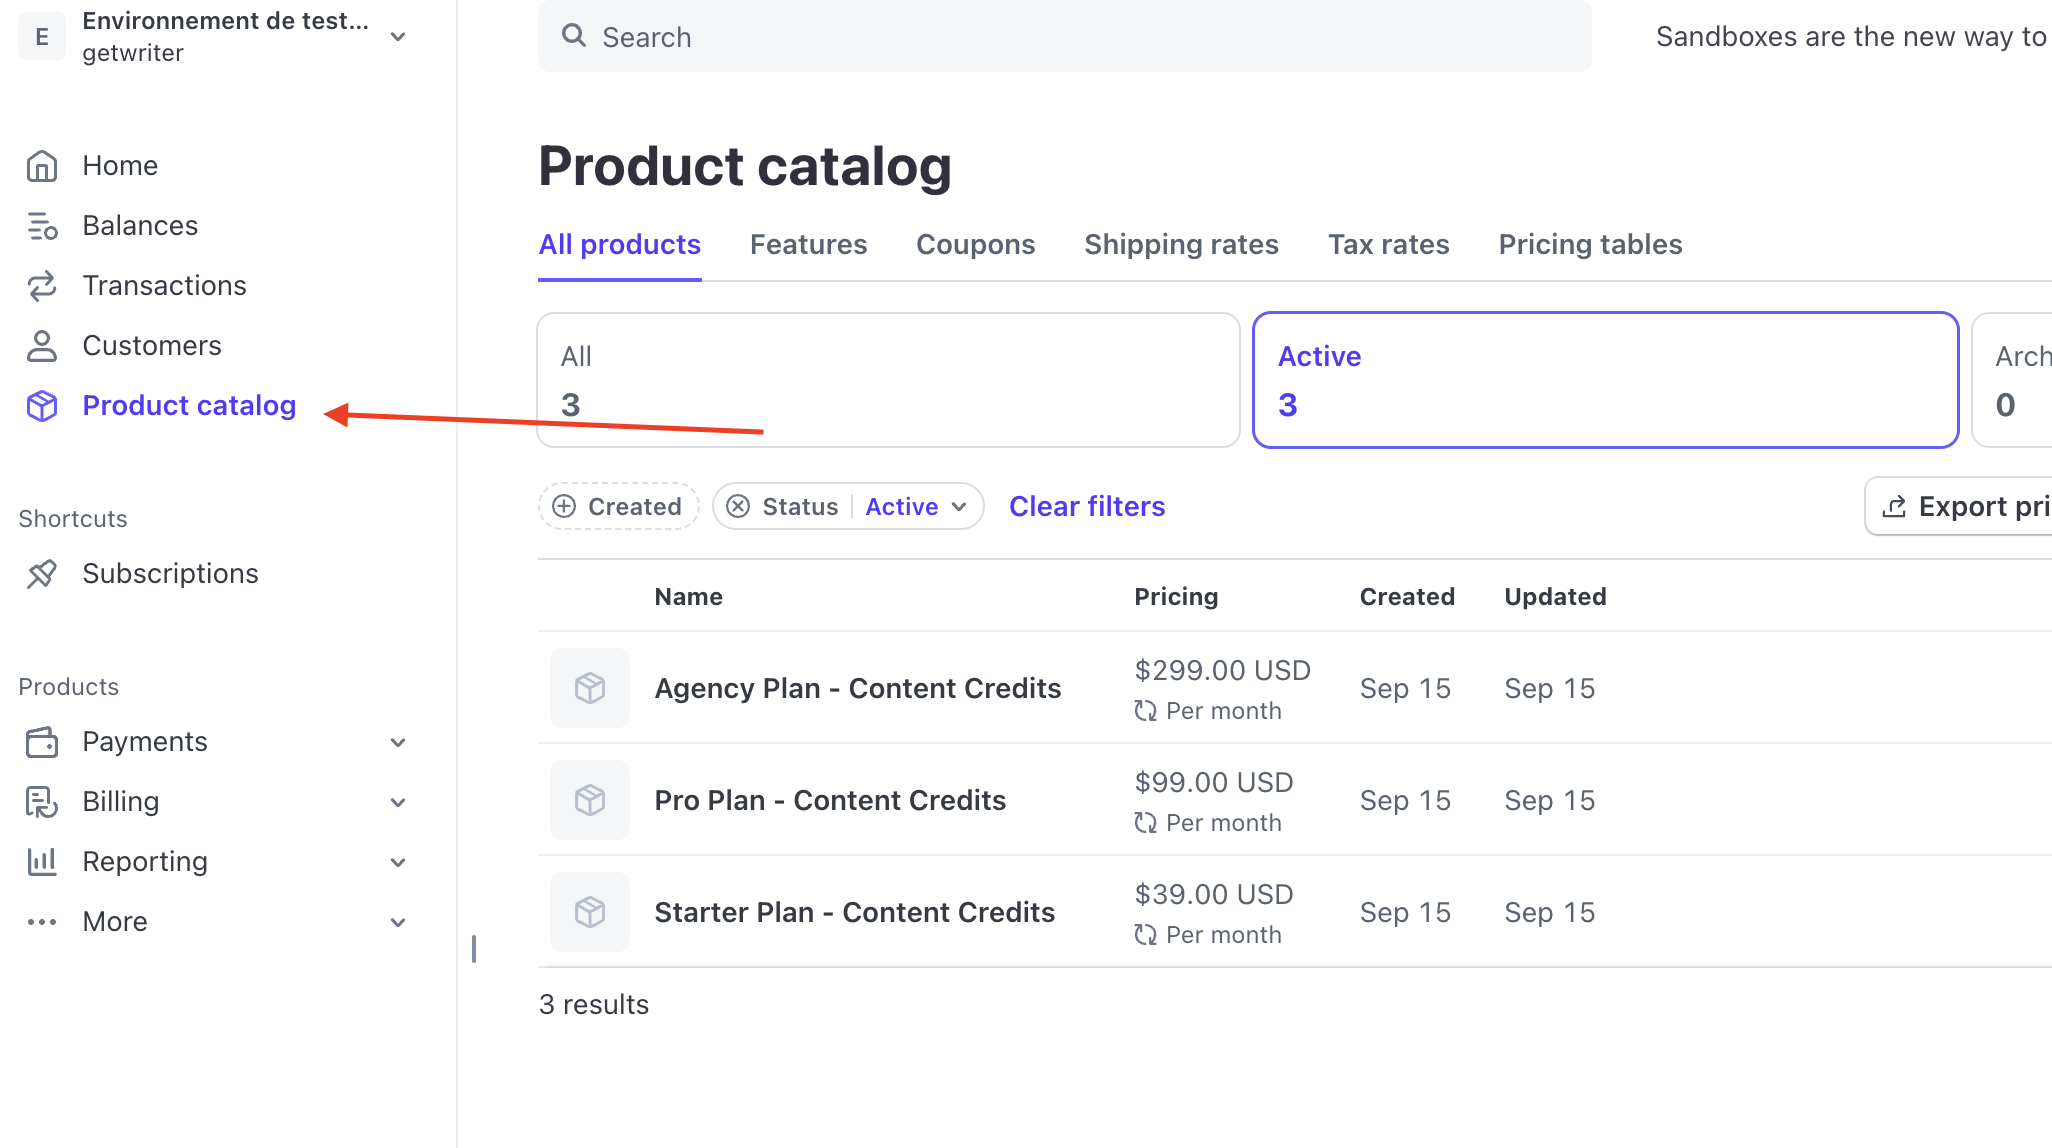
- Go to your Stripe Dashboard
- Navigate to Products
- Create products matching your requirements

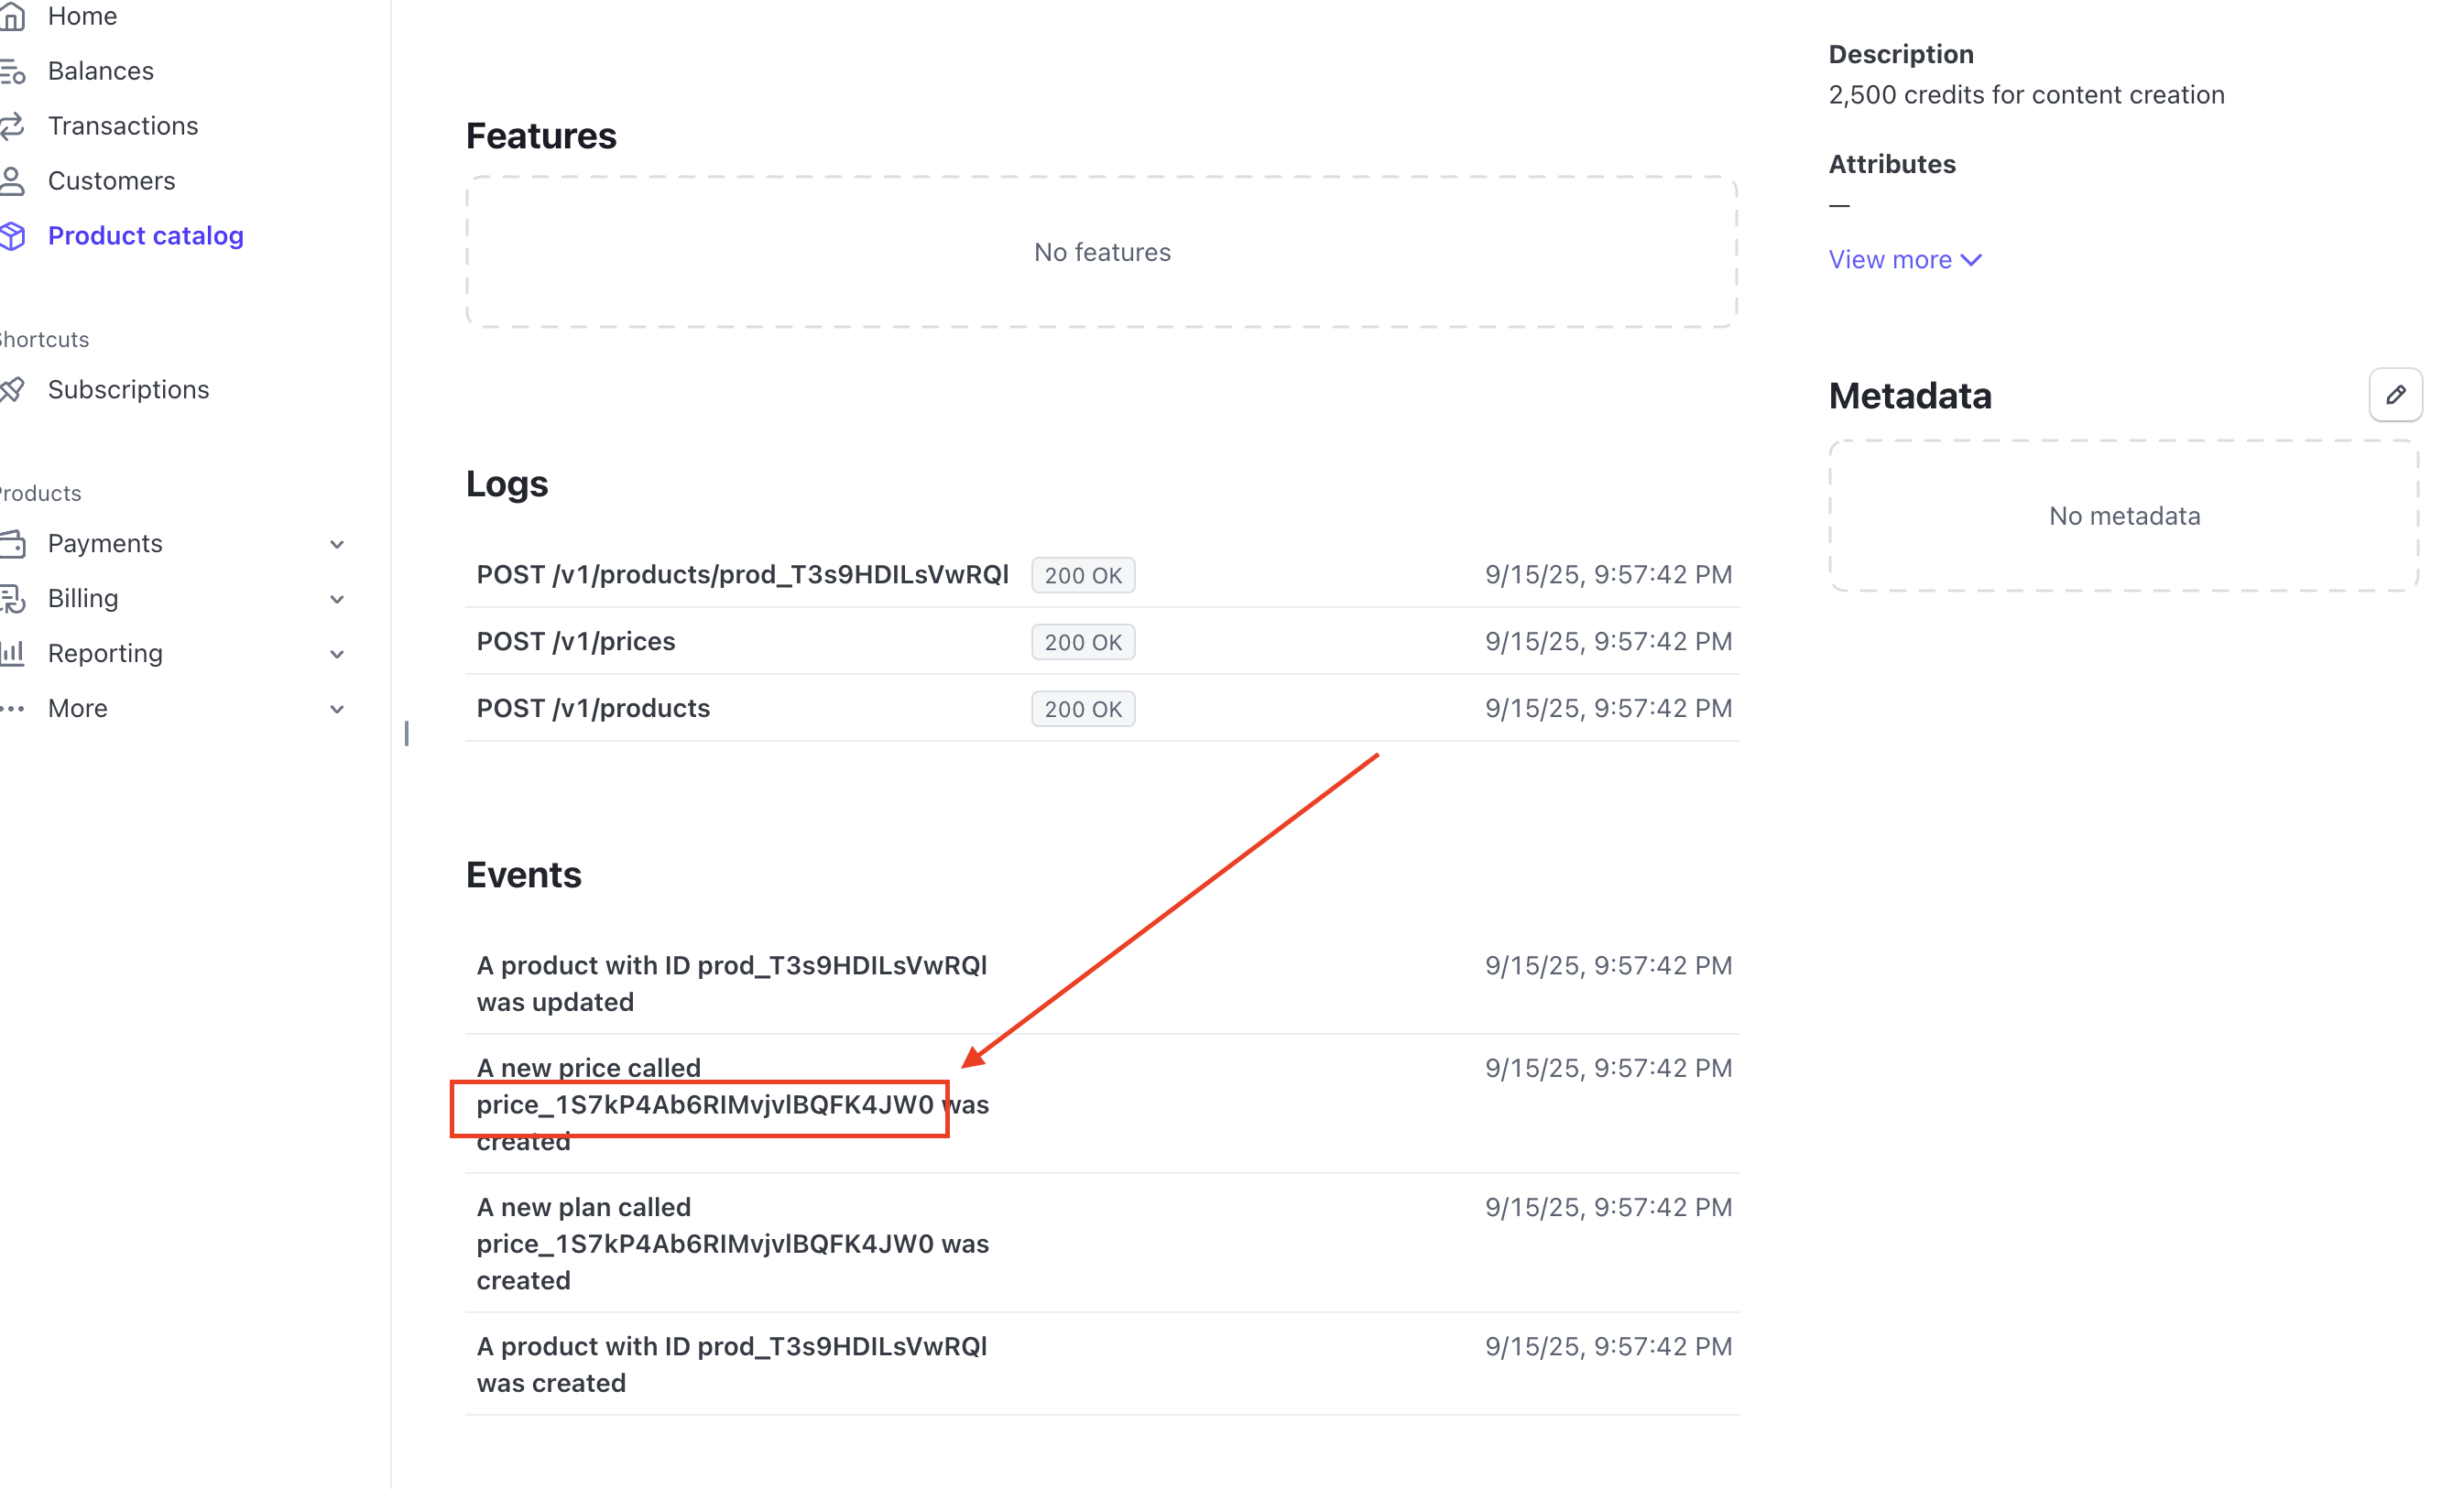
- Usually Capacity will need the Stripe PriceId of your products, they can be found on the product page.
Step 4: Setup Webhooks
If you setup recurring subscription, your project will need webhooks.
Note:
Webhooks are listening 24/7 for new events from Stripe ( ex : a subscription cancelled, renewed etc...)
If you asked Capacity to setup subscription it will probably automatically deploy a Supabase Edge function that will handle those webhooks, but you will have set it up on your Stripe account manually.
-
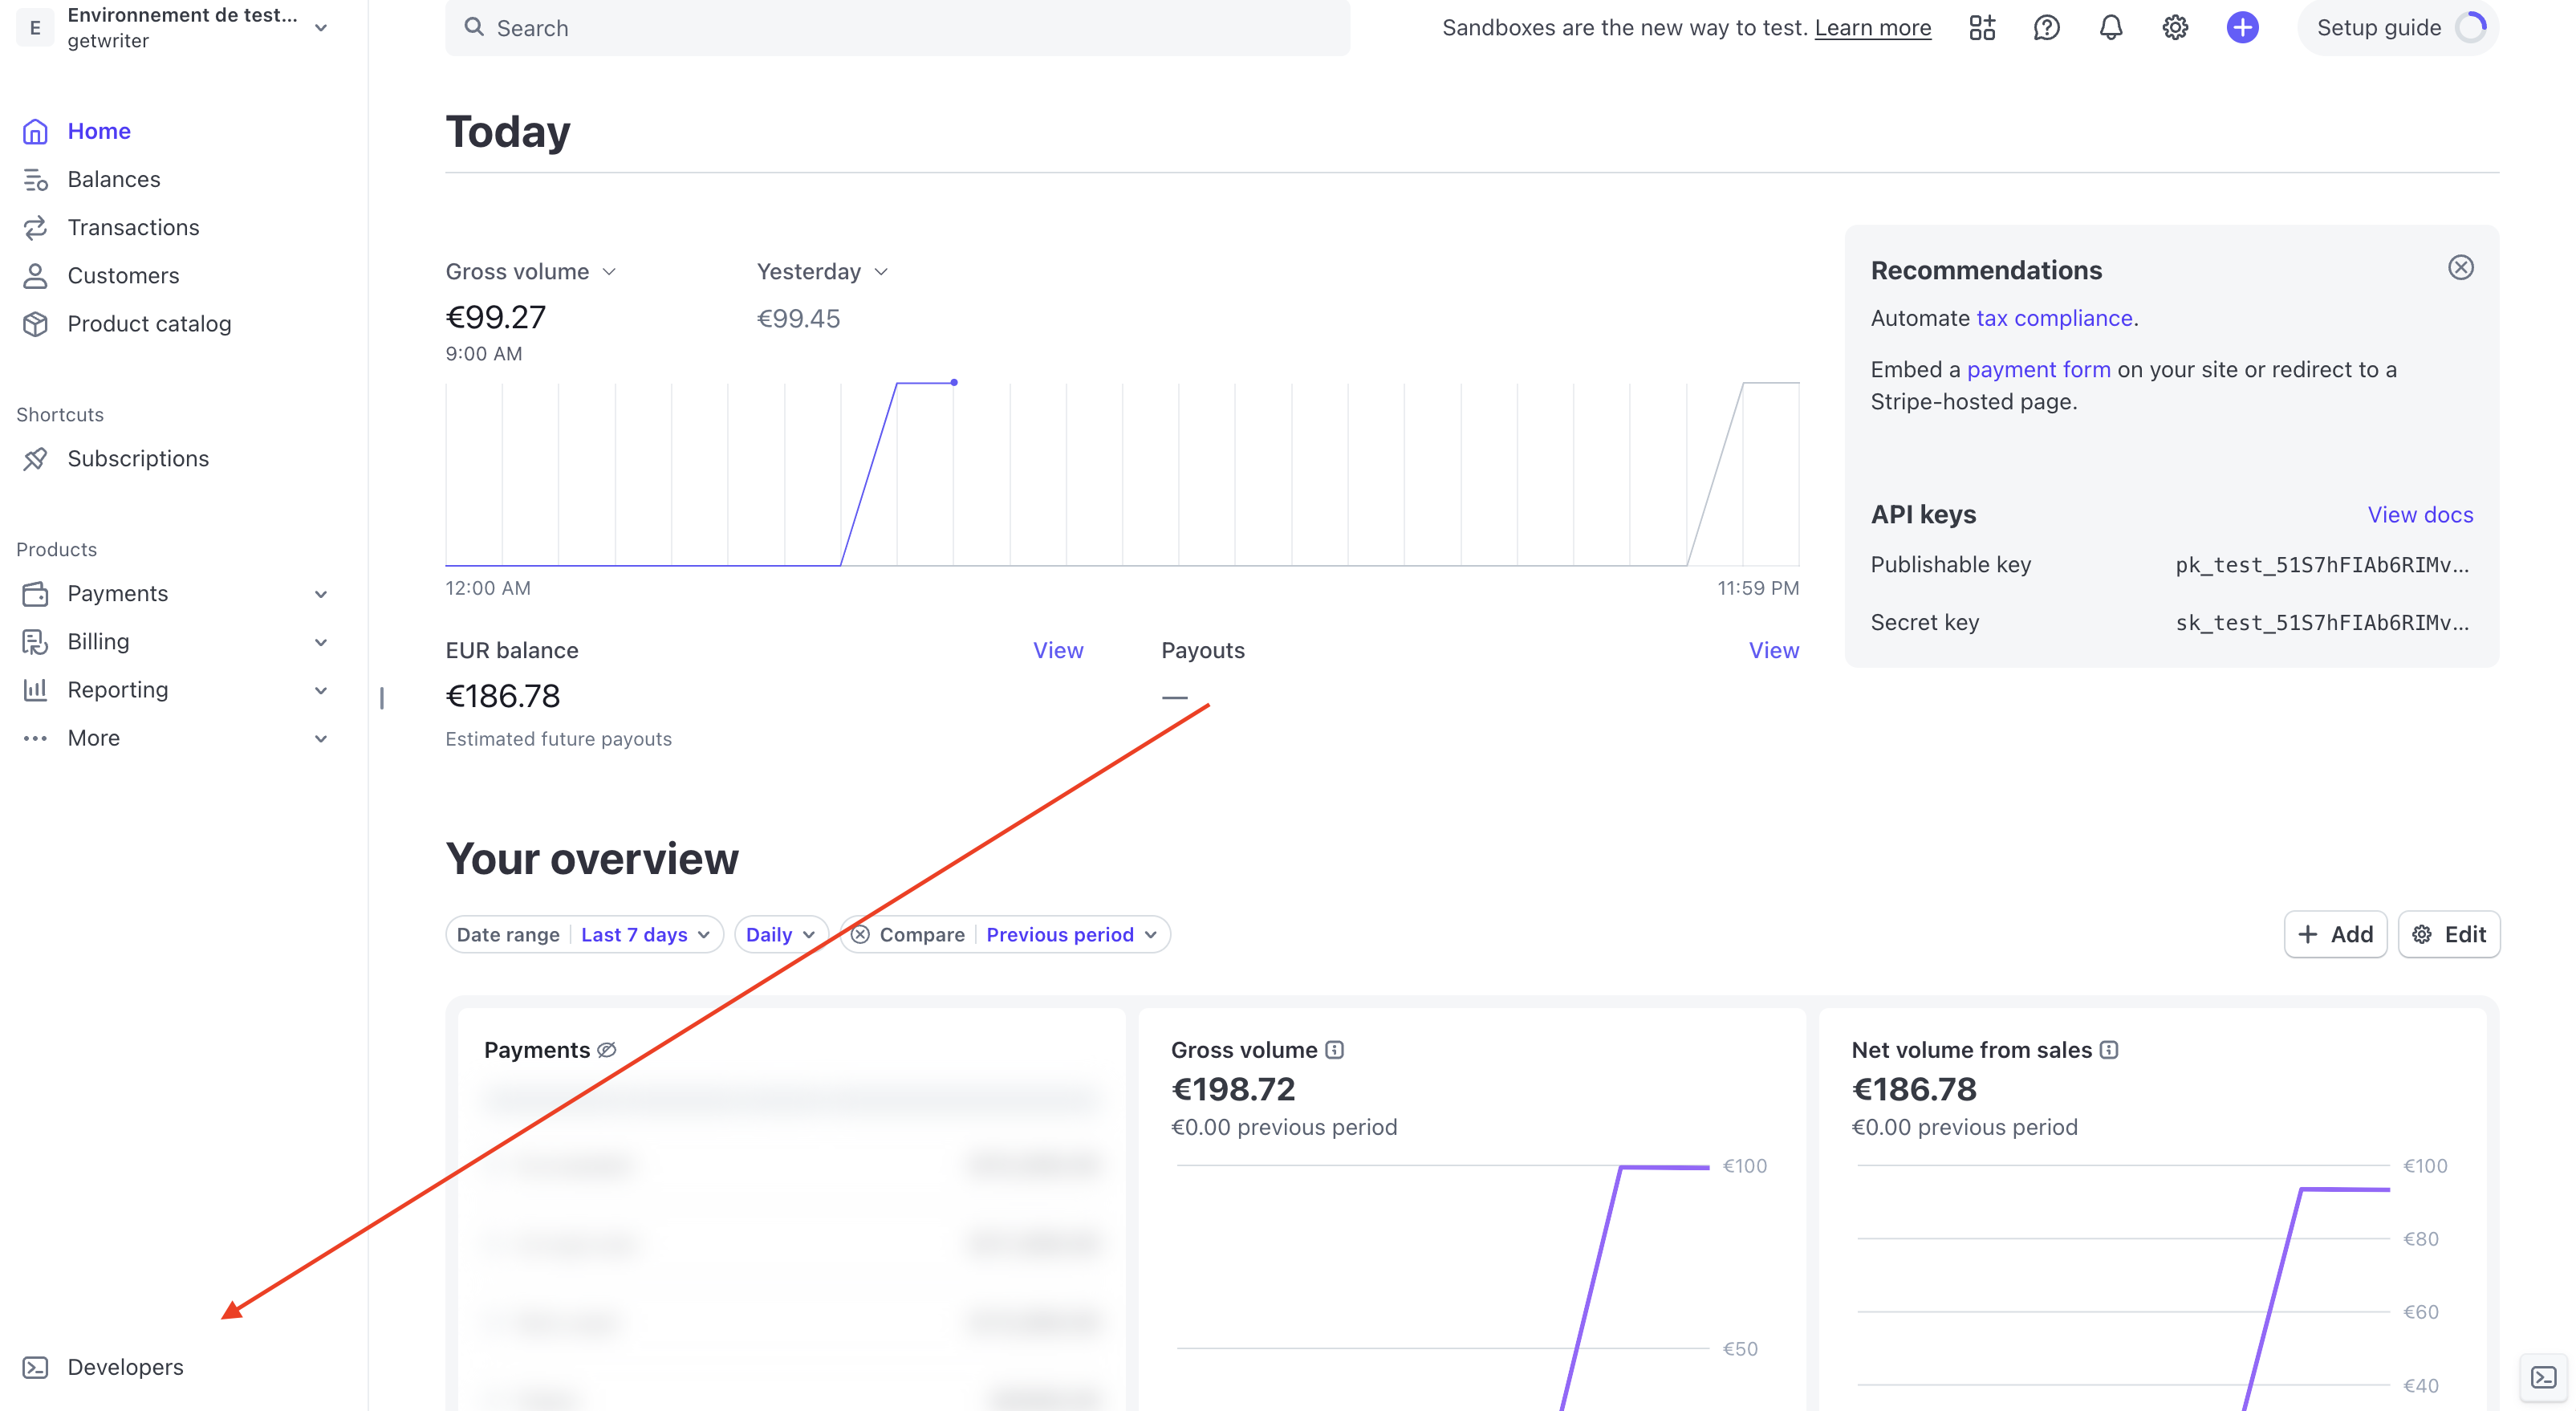
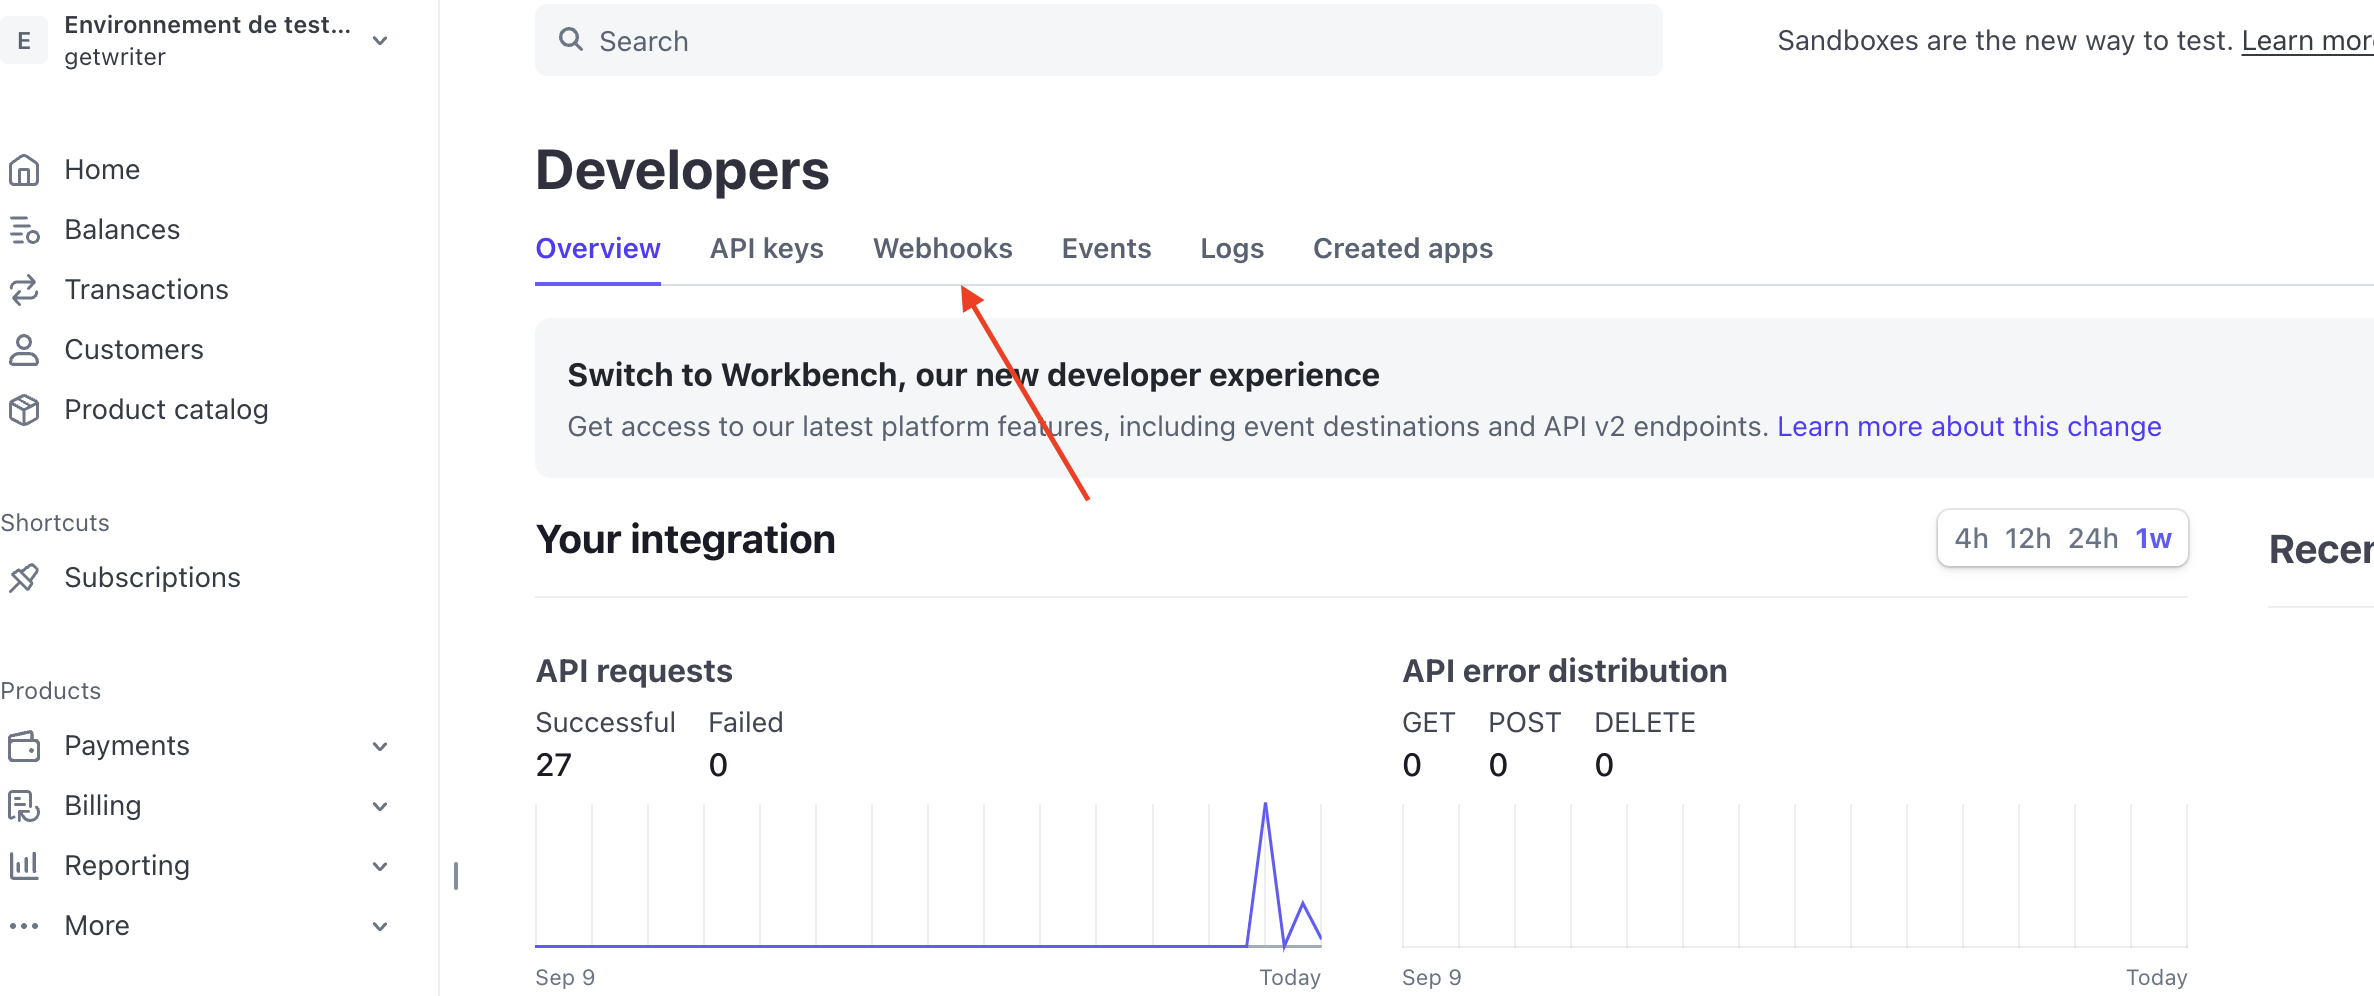
On your Stripe dashboard click on "Developper" at the bottom left corner.
-
Click on "Webhooks".
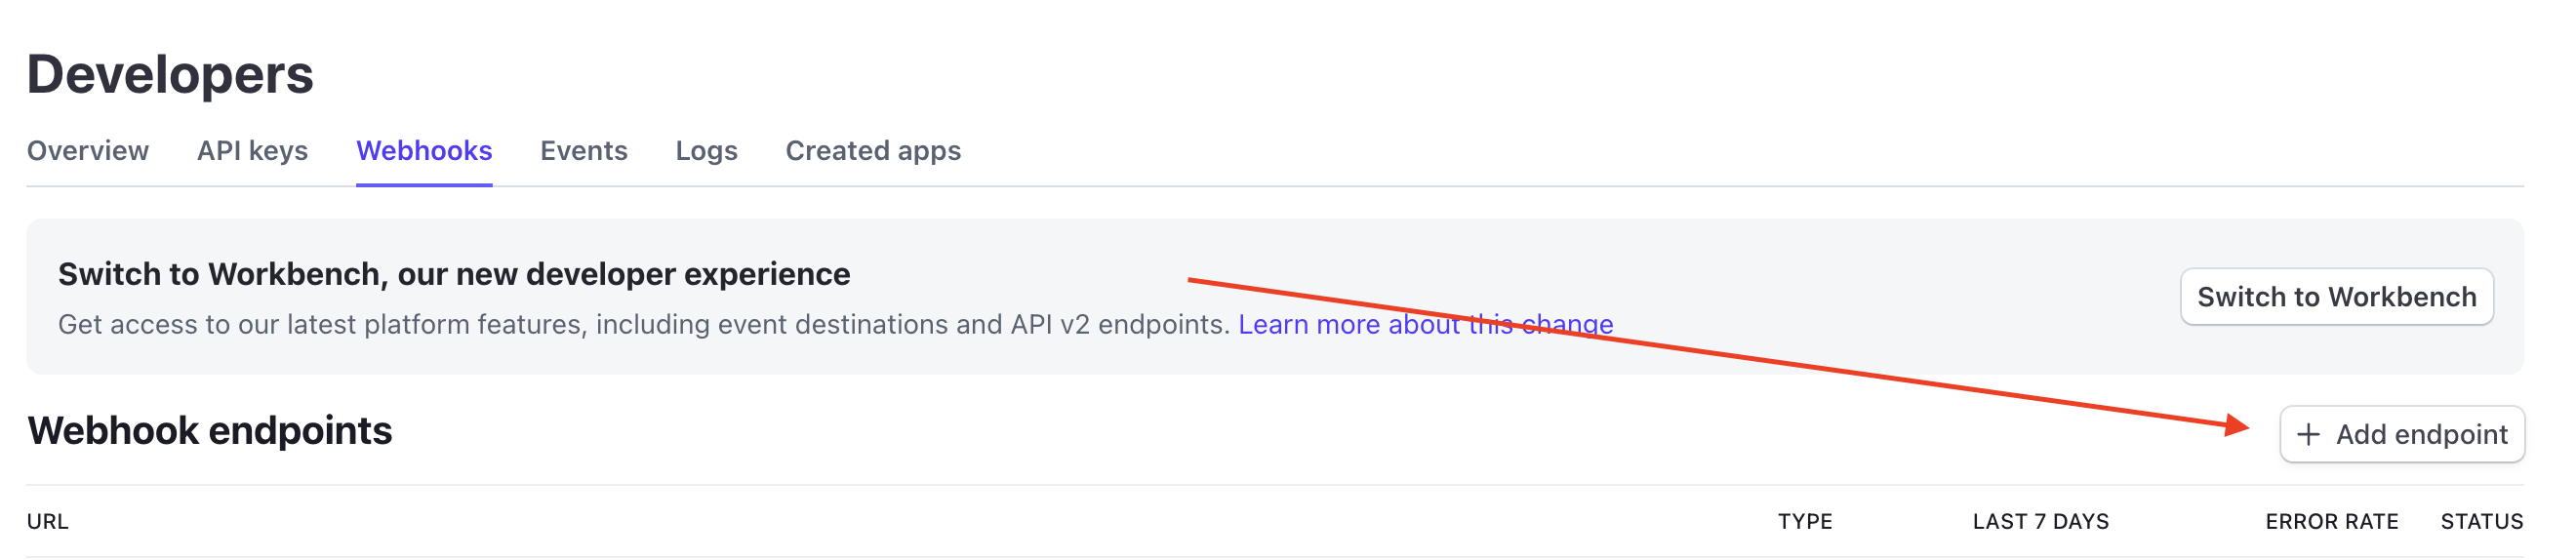
-
Then "Add Endpoint".
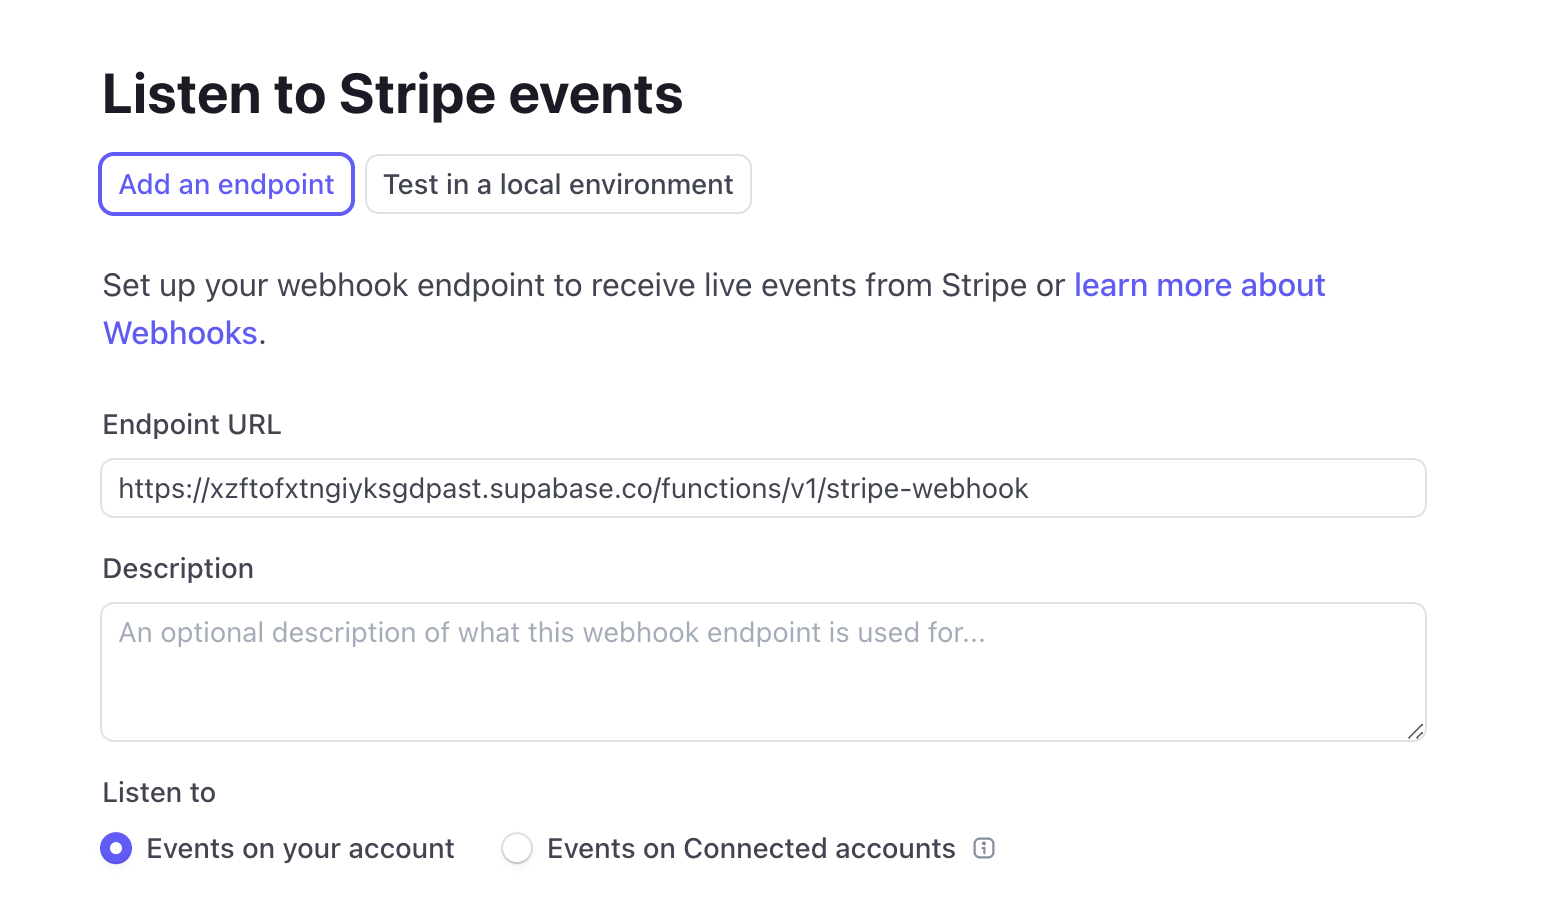
Note:
Stripe is now asking us for en Endpoint URL. It's actually the URL of our Supabase Edge function.
-
Go to your Supabase dashboard, select your Project, then on the left menu click on "Edge functions".
-
Find the Edge function created by Capacity to handle webhooks.

Note:
If you can't find it, you can just ask Capacity the name of the function or tell it to create the edge function to handle webhooks.
-
Copy the URL of the edge function on Stripe in the "Endpoint URL" field.
-
Select events:
- checkout.session.completed
- customer.subscription.created
- customer.subscription.updated
- customer.subscription.deleted
- invoice.payment_succeeded
-
Click on "Add Endpoint".
-
Disable Verify JWT with legacy secret on Supabase Edge function.
On your Supabase dashboard, go back to the Edge function menu, then click on your stripe webhook edge function.
Then navigate to "Details" and make sure the "Verify JWT with legacy secret" is disabled.
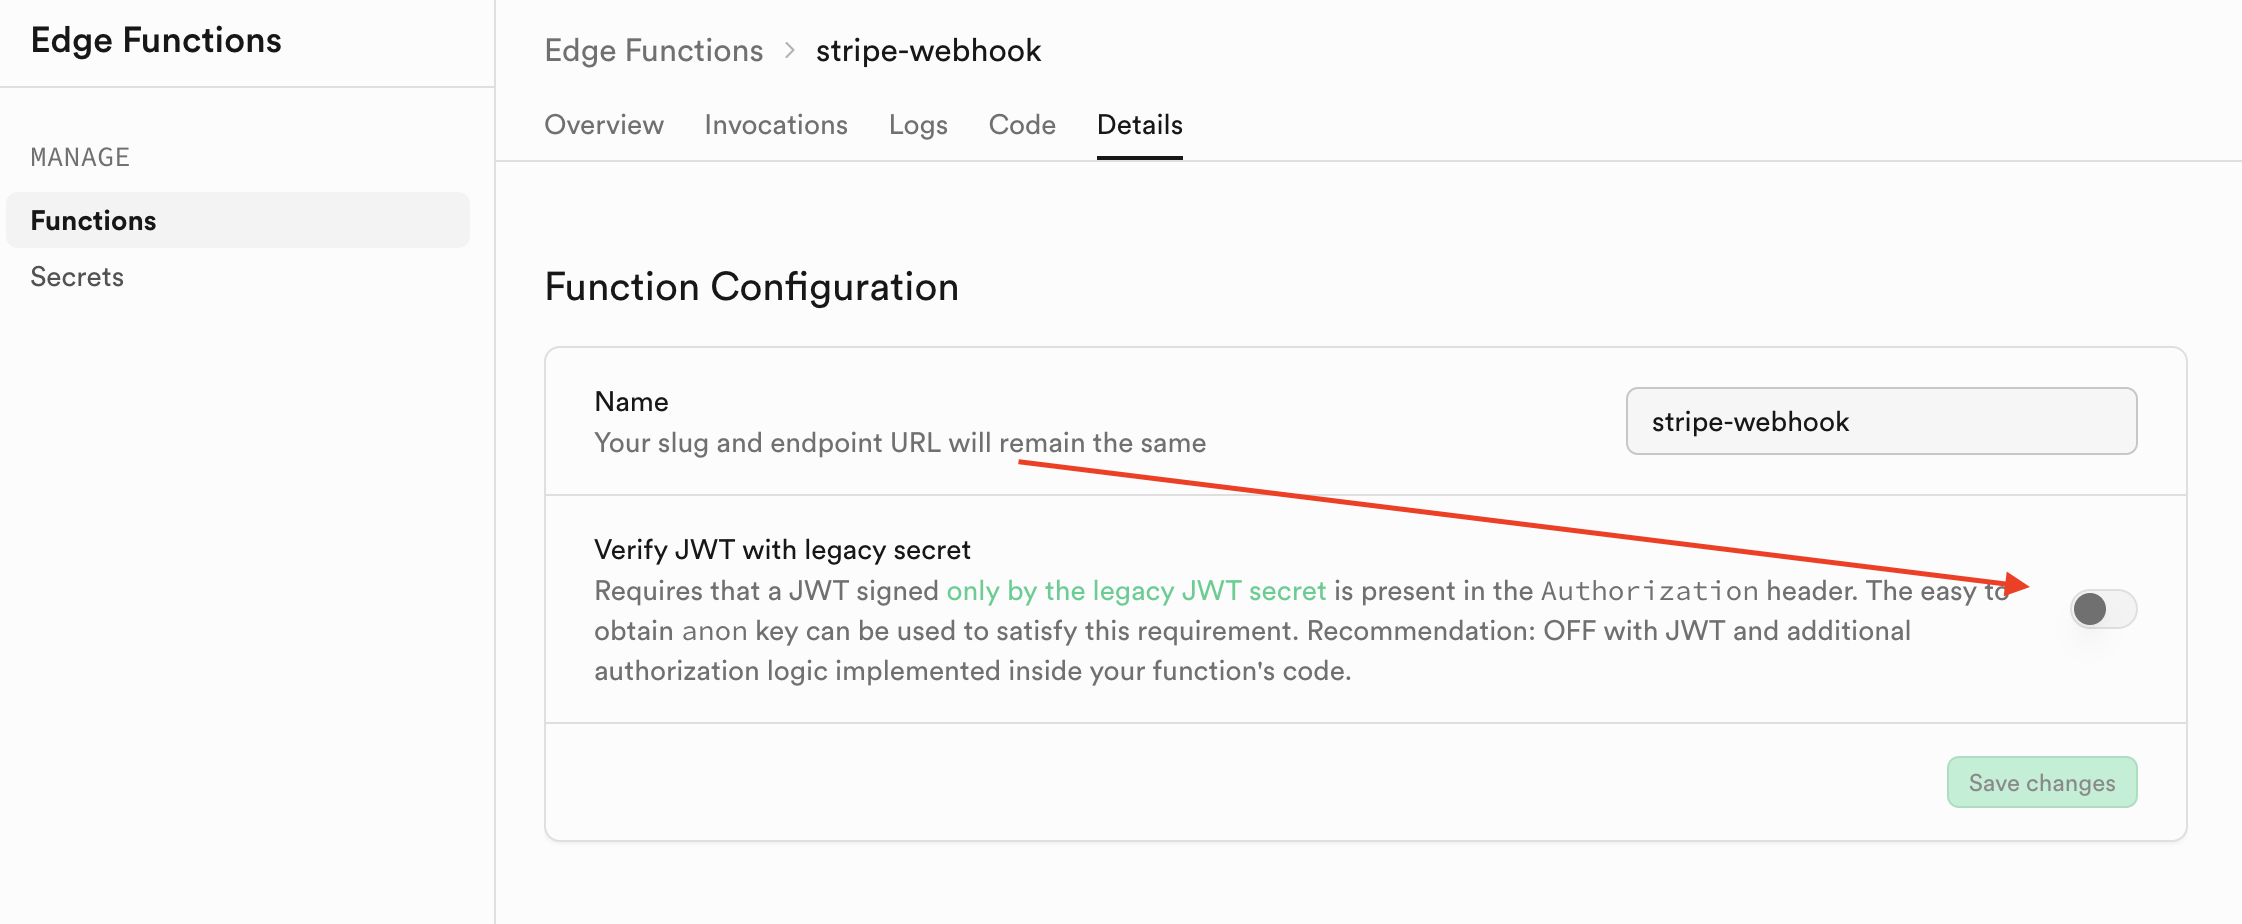
Note:
If Verify JWT with legacy secret is enabled you will end up with an error 401 : "Missing authorization header"
Step 5: Test Your Integration
Note:
Make sure your Stripe API keys are in TEST MODE. Testing a payment in Live mode might result in your Stripe account being banned.
-
Use test cards for payment testing:
- Card number:
4242 4242 4242 4242 - Any future expiration date
- Any 3-digit CVC
- Any billing ZIP code
- Card number:
-
Monitor the integration:
- Check browser console for client-side logs
- View Stripe Dashboard for payment events
- Monitor webhook events in Stripe's webhook logs
Step 6: Switch to Live Mode
Switch your Stripe account to Live mode to accept real payments.
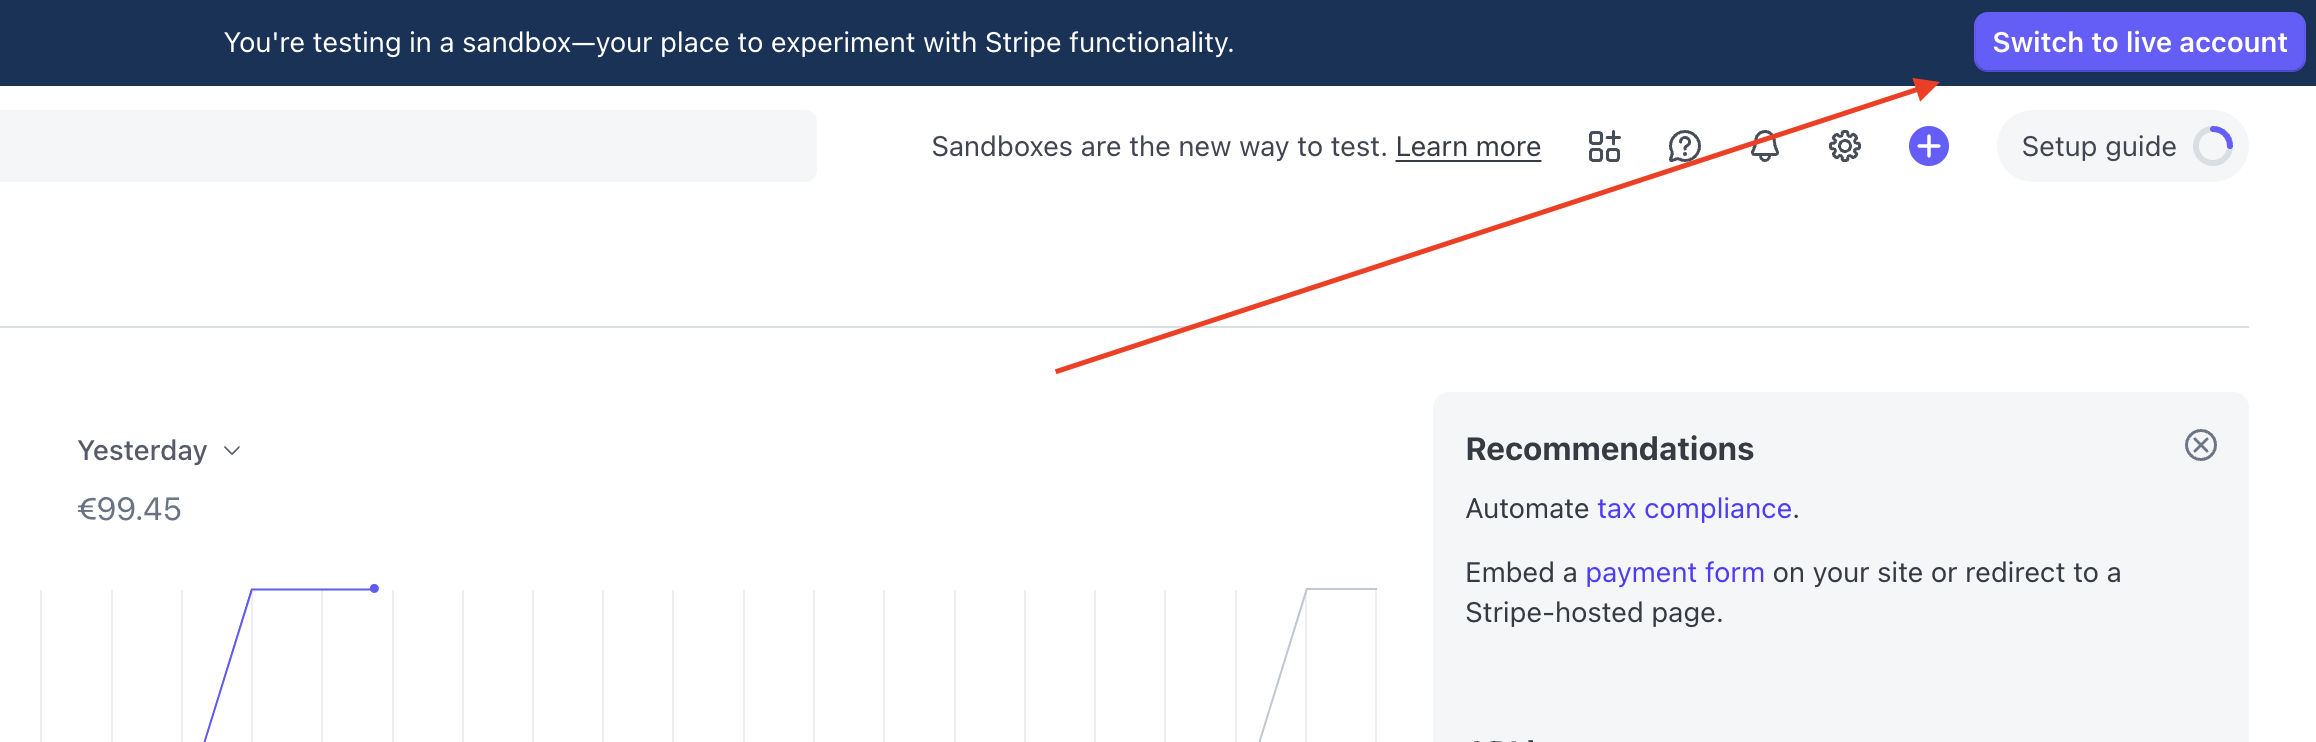
When switching to Live mode make sure that your app is finished, otherwise Stripe might decline your website.
After switching to Live mode you will need to update in both Capacity environement variables your:
- Stripe API Key
- Stripe API Secret
- Stripe webhook secret
Common Payment Flows
One-Time Payments
"Add a checkout page for my product at $49 with a success page that shows a download link"
Capacity will create:
- Checkout session creation endpoint
- Payment form or checkout redirect
- Success/cancel pages
- Order confirmation logic
Subscription Management
"Create a subscription system with monthly and annual billing options, including a customer portal"
Capacity will implement:
- Subscription creation flow
- Customer portal integration
- Plan switching logic
- Cancellation handling
Credit-Based System
"Set up a credit system where users purchase credit packs: 100 credits for $10, 500 for $40, 1000 for $70"
Capacity will build:
- Credit purchase flow
- Credit balance tracking
- Usage deduction logic
- Balance display components
Testing Checklist
When testing your Stripe integration:
- Test successful payment flow
- Test failed payment scenarios
- Verify credit allocation after payment
- Check subscription status updates
- Test customer portal access
- Verify webhook processing
- Test different card types and currencies
- Check email receipts
Debugging
Check Console Logs
Open your browser's developer console to see:
- Stripe.js initialization
- Checkout session creation
- Payment method attachments
- Error messages
Monitor Stripe Dashboard
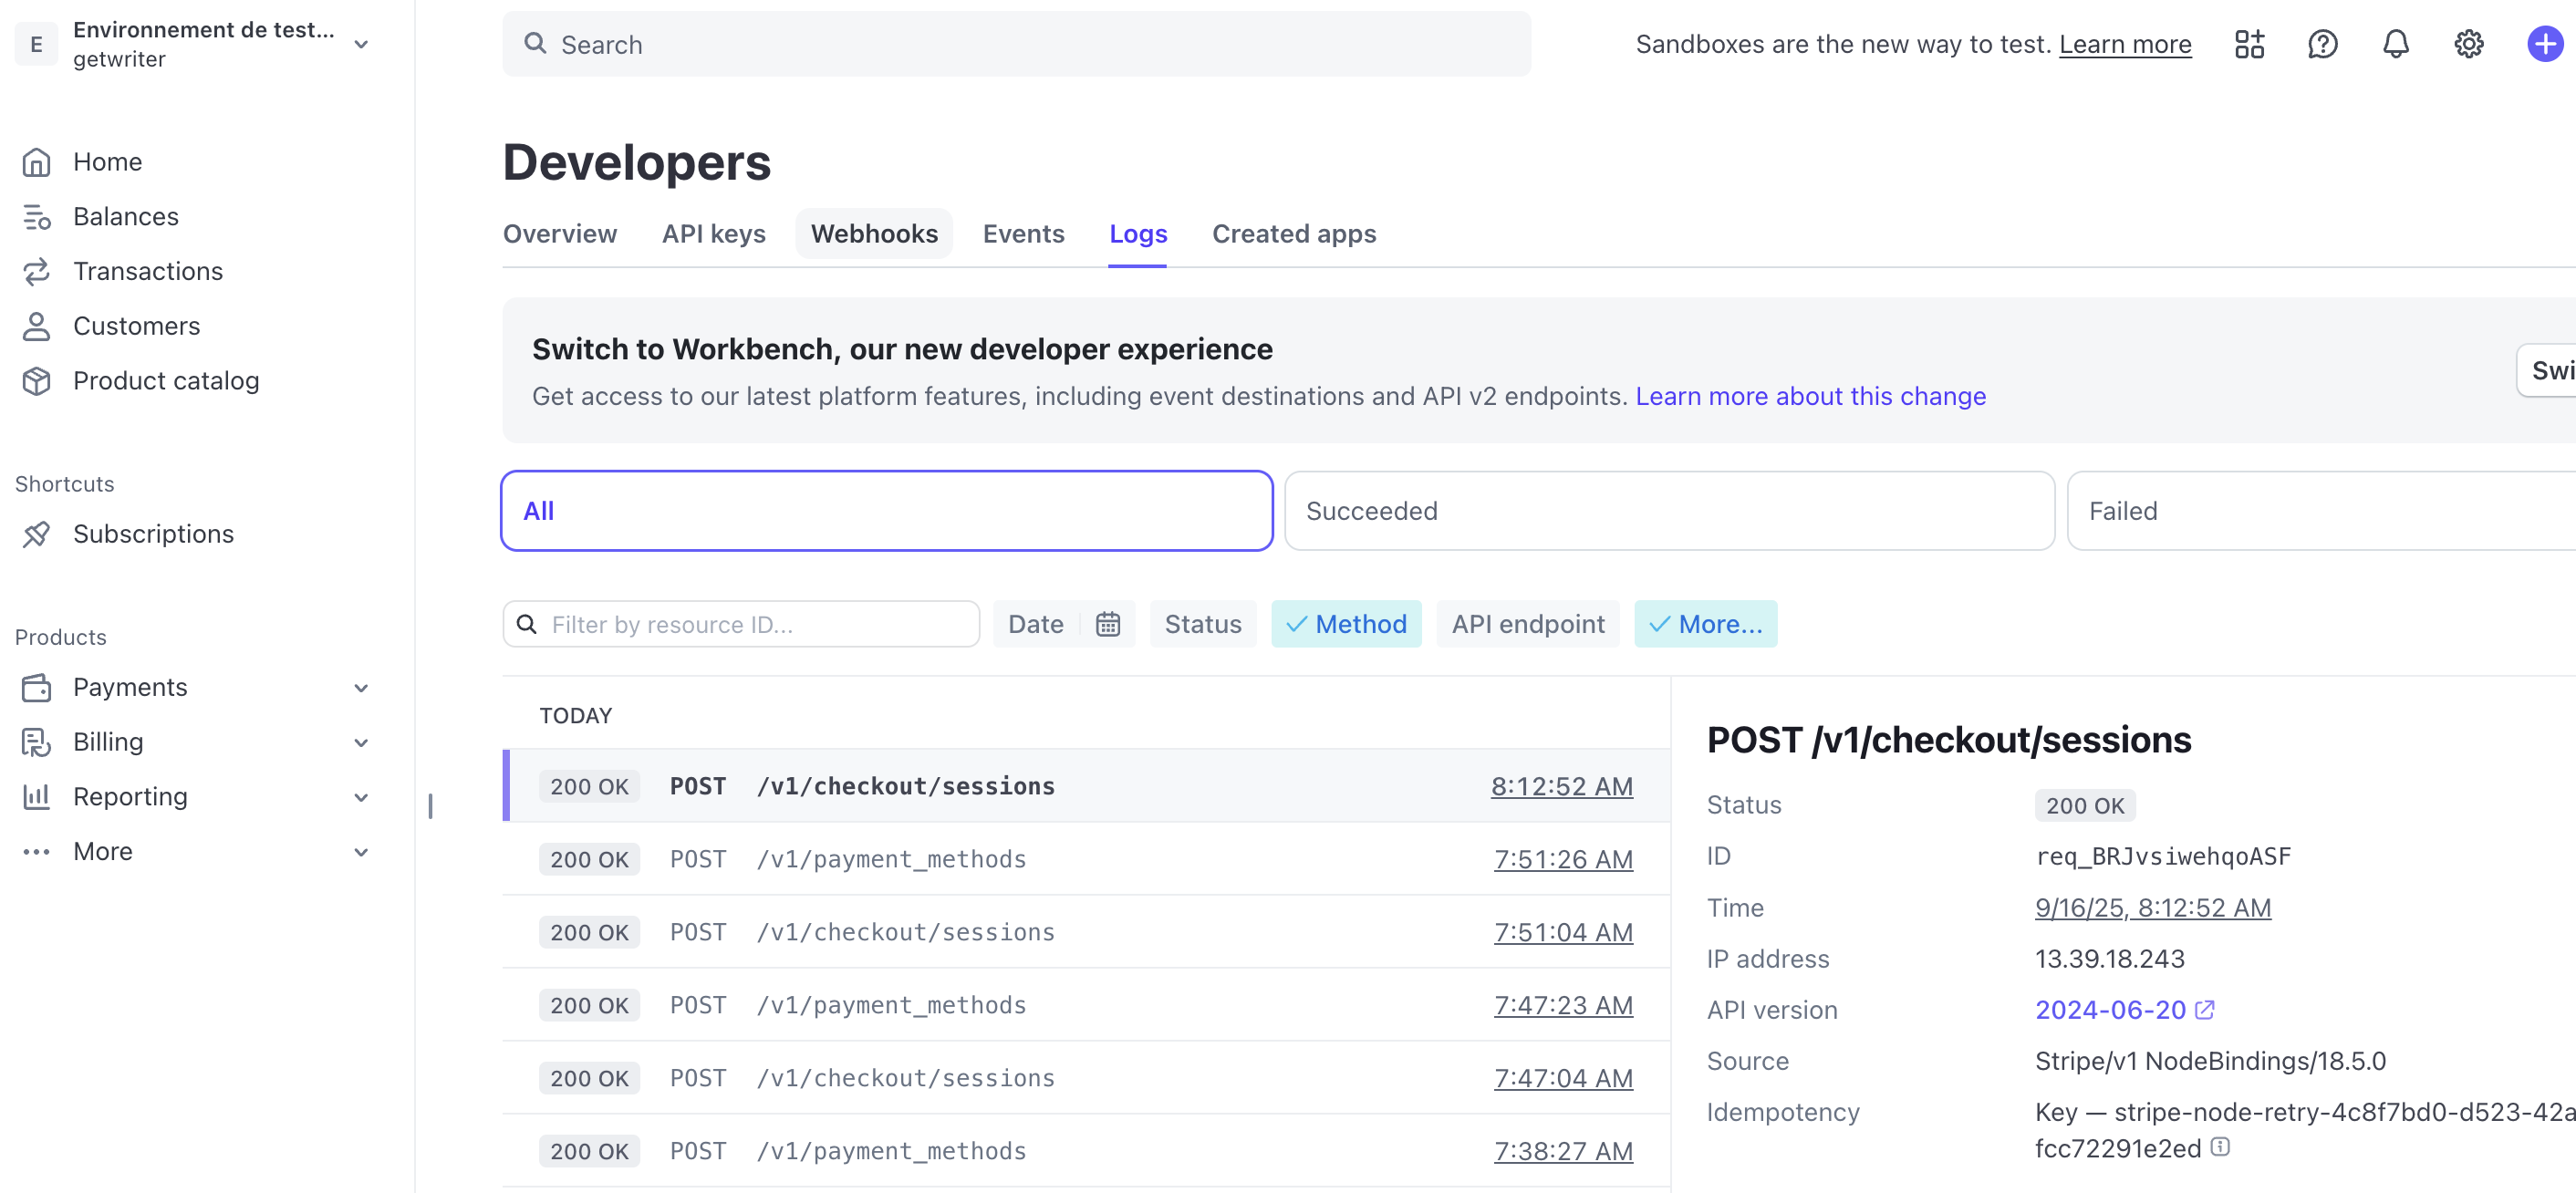
- Go to Stripe Dashboard > Developers > Logs
- View real-time API requests
- Check webhook delivery status
- Review payment events
Monitor Supabase logs
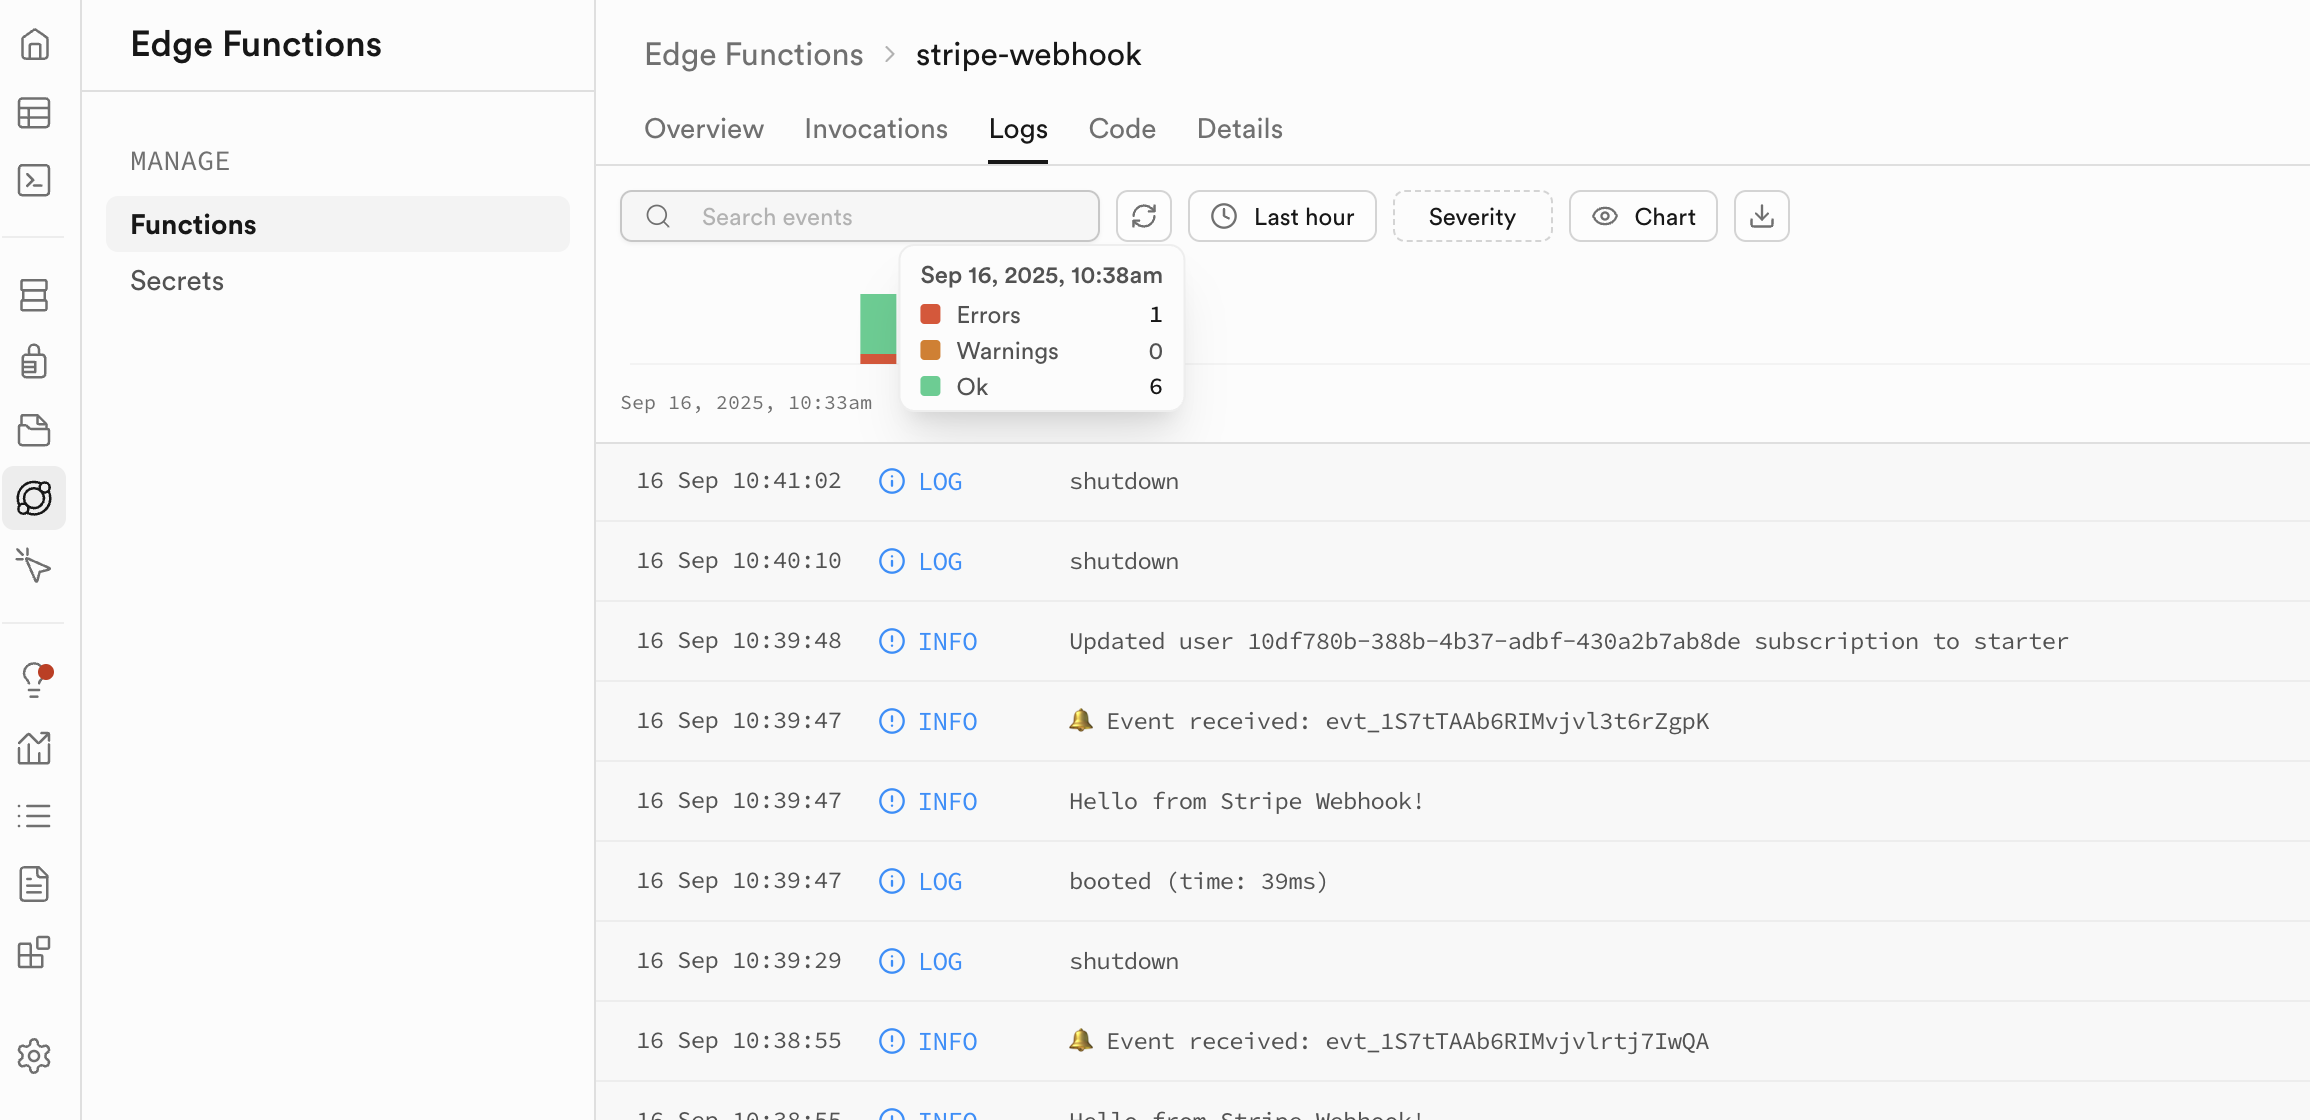
- Go to Supabase Dashboard > Edge functions > your stripe webhook edge function
- Click on logs
- Check webhook delivery status
- Review payment events
Make sure Stripe API keys and Webhook secrets are synced with Supabase
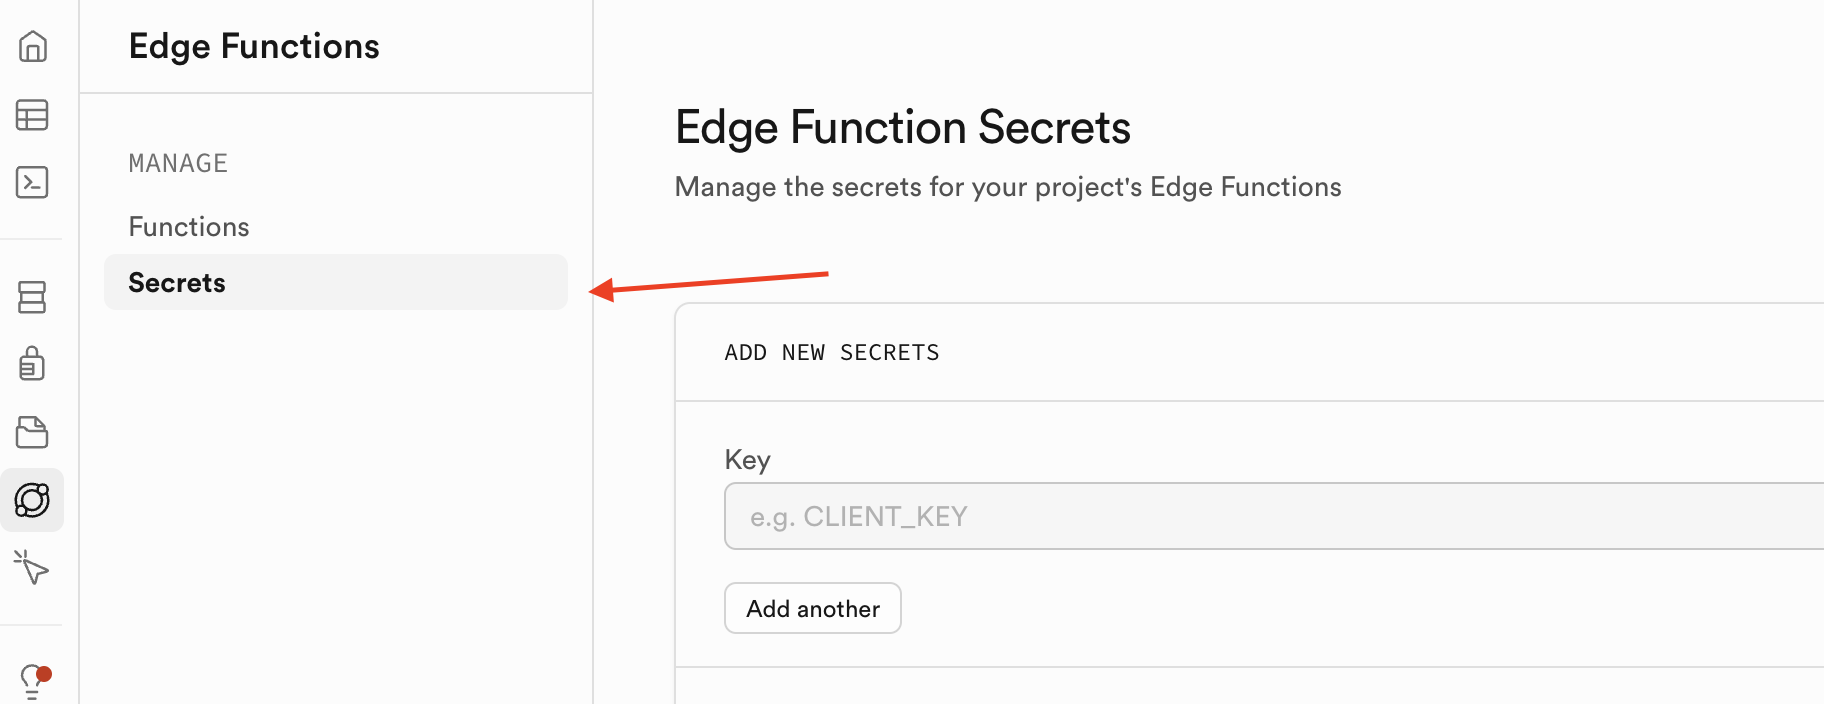
- Go to Supabase Dashboard > Edge functions
- Click on Secrets
- Make sure your keys and secrets are properly syncronized
Common Issues
"Payment form not loading"
- Ensure you're testing on a deployed app, not in preview
- Check that Stripe.js is loading correctly
- Verify API key is configured
"Webhook not processing"
- Check webhook endpoint URL in Stripe Dashboard
- Verify webhook secret is configured
- Look for signature verification errors
- Open the logs of your Supabase Edge function for stripe webhooks, and copy paste the content to Capacity.
Security Best Practices
- Never expose your Secret Key - only use Publishable Keys on the frontend
- Always verify webhooks - Capacity handles this automatically
- Use HTTPS in production - required for PCI compliance
- Link payments to authenticated users - prevent unauthorized access
- Test thoroughly - use Stripe Test Mode before going live
Advanced Features
Custom Checkout Fields
"Add a checkout form that collects the customer's company name and VAT number"
Promo Codes and Discounts
"Enable promo codes for 20% off the first 3 months of any subscription"
Tiered Pricing
"Create volume-based pricing: $10/user for 1-10 users, $8/user for 11-50, $6/user for 50+"
Metered Billing
"Set up usage-based billing that tracks API calls and bills monthly based on usage"
Next Steps
- Customize your checkout: Add your branding and custom fields
- Set up email notifications: Configure receipt and invoice emails
- Enable additional payment methods: Apple Pay, Google Pay, SEPA, etc.
- Configure tax settings: Automatic tax calculation with Stripe Tax
- Monitor analytics: Track conversion rates and revenue in Stripe Dashboard
Support
For Stripe-specific questions:
For Capacity integration help:
- Ask in your project chat: "Help me debug my Stripe integration"
- Check the browser console and Stripe logs
- Review webhook delivery in Stripe Dashboard