Supabase Integration
Capacity's Supabase integration allows you to seamlessly connect your applications to Supabase databases, enabling you to build powerful, data-driven applications with minimal setup.

What is Supabase?
Supabase is an open-source Firebase alternative that provides:
- Database: A fully managed, scalable PostgreSQL database
- Real-time subscriptions: Live updates to your data
- Authentication: Built-in user authentication and authorization
- Edge Functions: Backend functions for custom logic
- Storage: File and media storage
- Auto-generated APIs: Instant REST and GraphQL APIs
Why Connect Supabase to Capacity?
When you connect your Supabase project to Capacity, you unlock powerful capabilities:
Complete Backend Infrastructure
- Unlock a real backend for your AI-generated applications with Edge functions
- Instant APIs - REST and GraphQL endpoints automatically generated from your database
- Server-side functions with Supabase Edge Functions for custom backend logic
- Built-in authentication system with multiple providers (Google, GitHub, email, etc.)
- File storage and CDN for handling media uploads and assets
- Database management with PostgreSQL's full power and SQL capabilities
Getting Started
Prerequisites
Before connecting Supabase to Capacity, ensure you have:
- A Supabase account
- At least one Supabase project created
Step 1: Generate a Personal Access Token
- Go to your Supabase Dashboard
- Navigate to Account Settings > Access Tokens or click here
- Click Generate new token
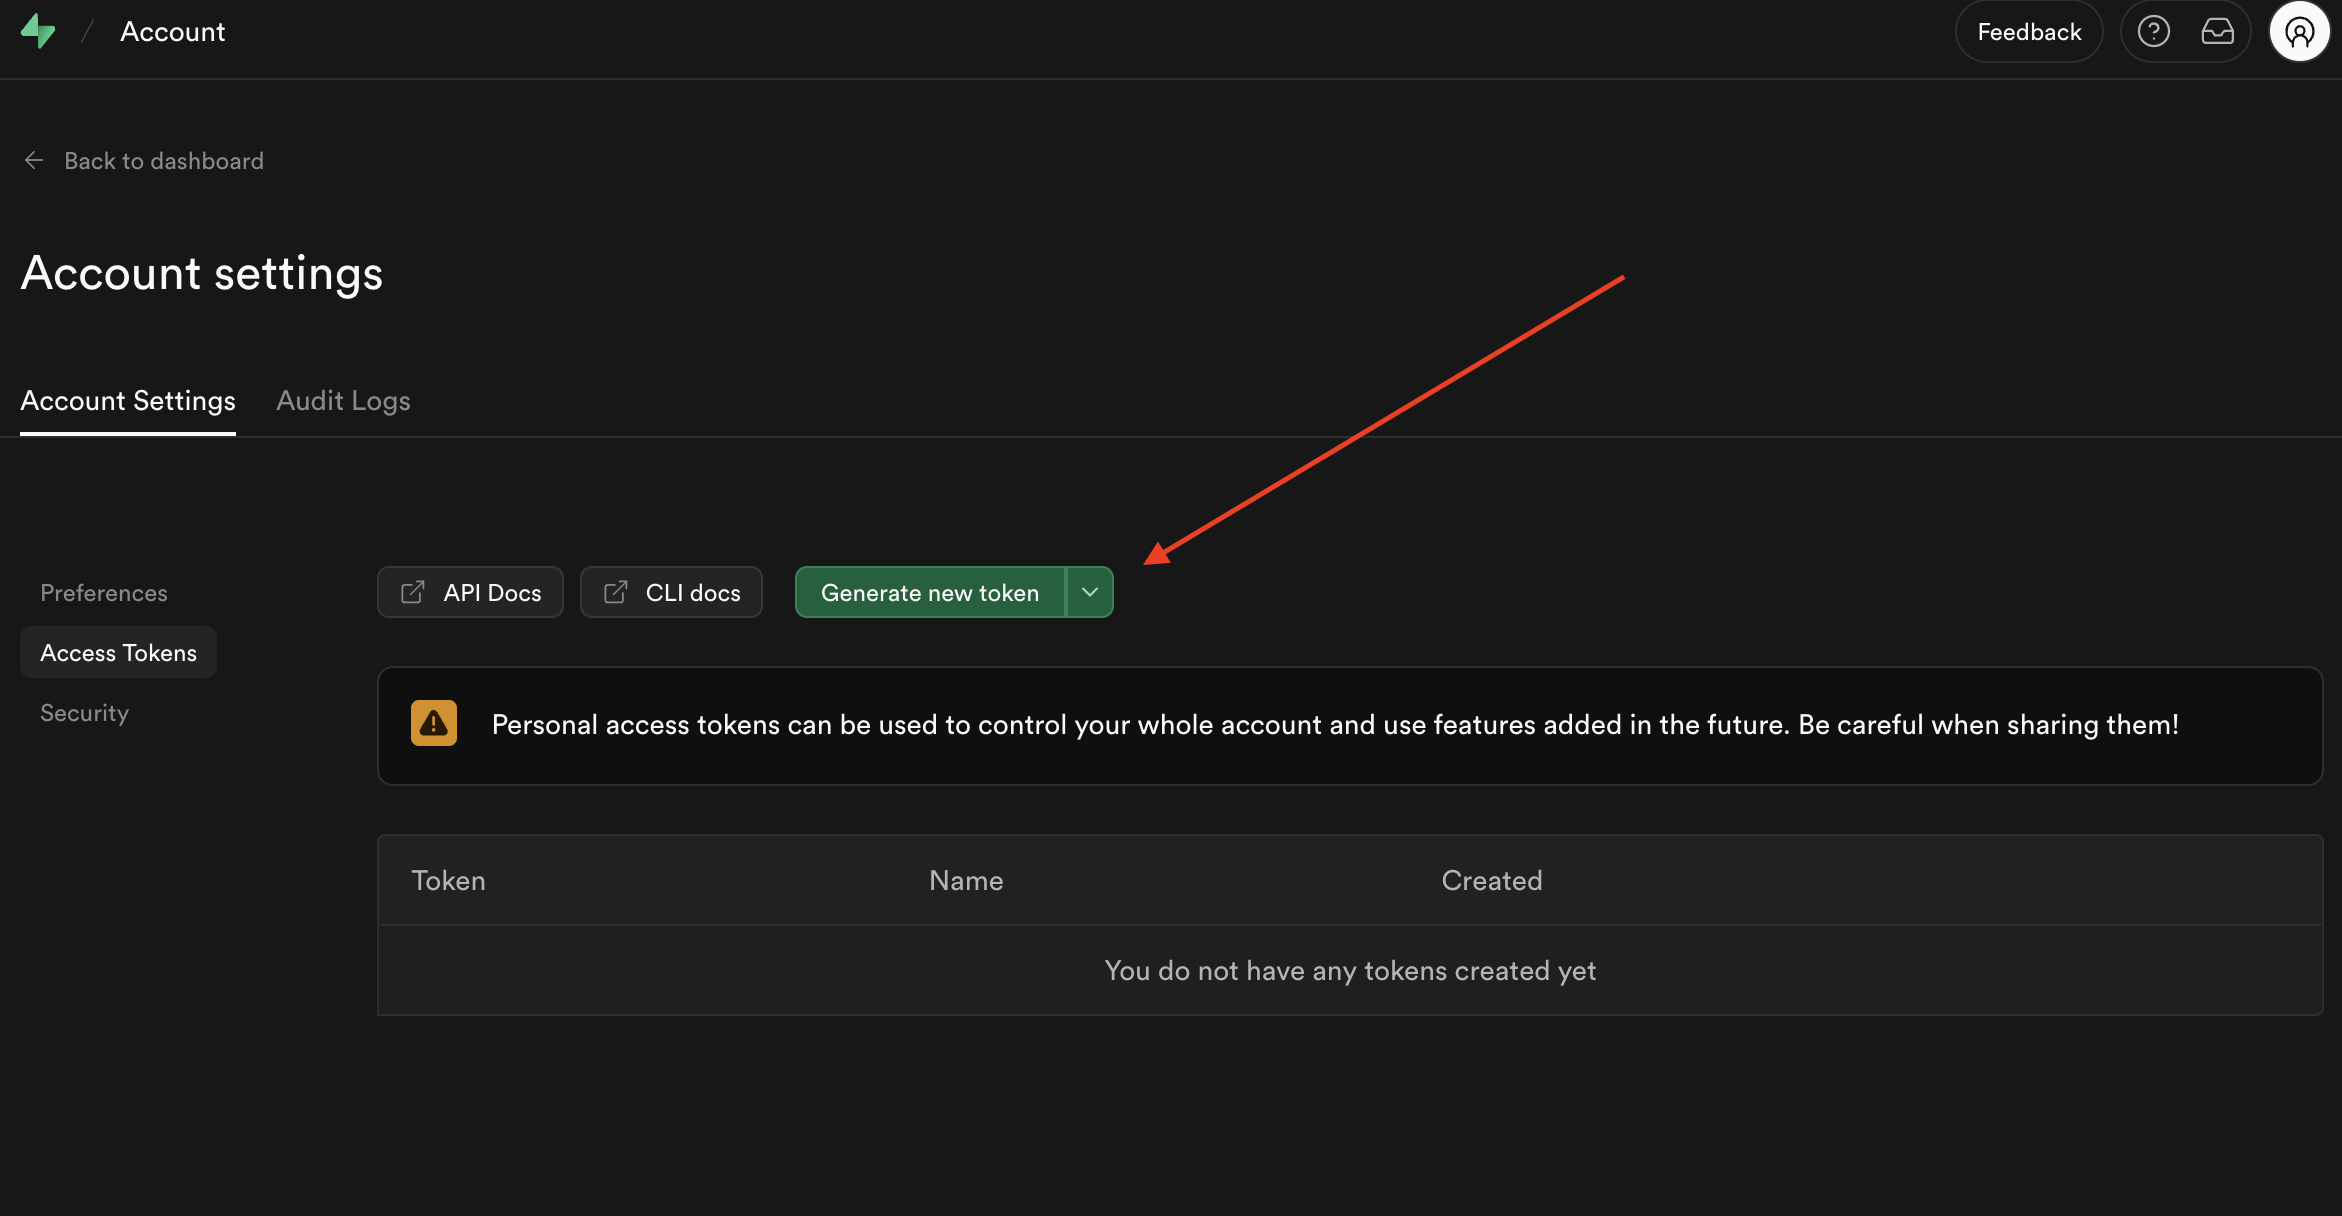
- Give your token a descriptive name (e.g., "Capacity Integration")
- Copy the generated token (it starts with
sbp_)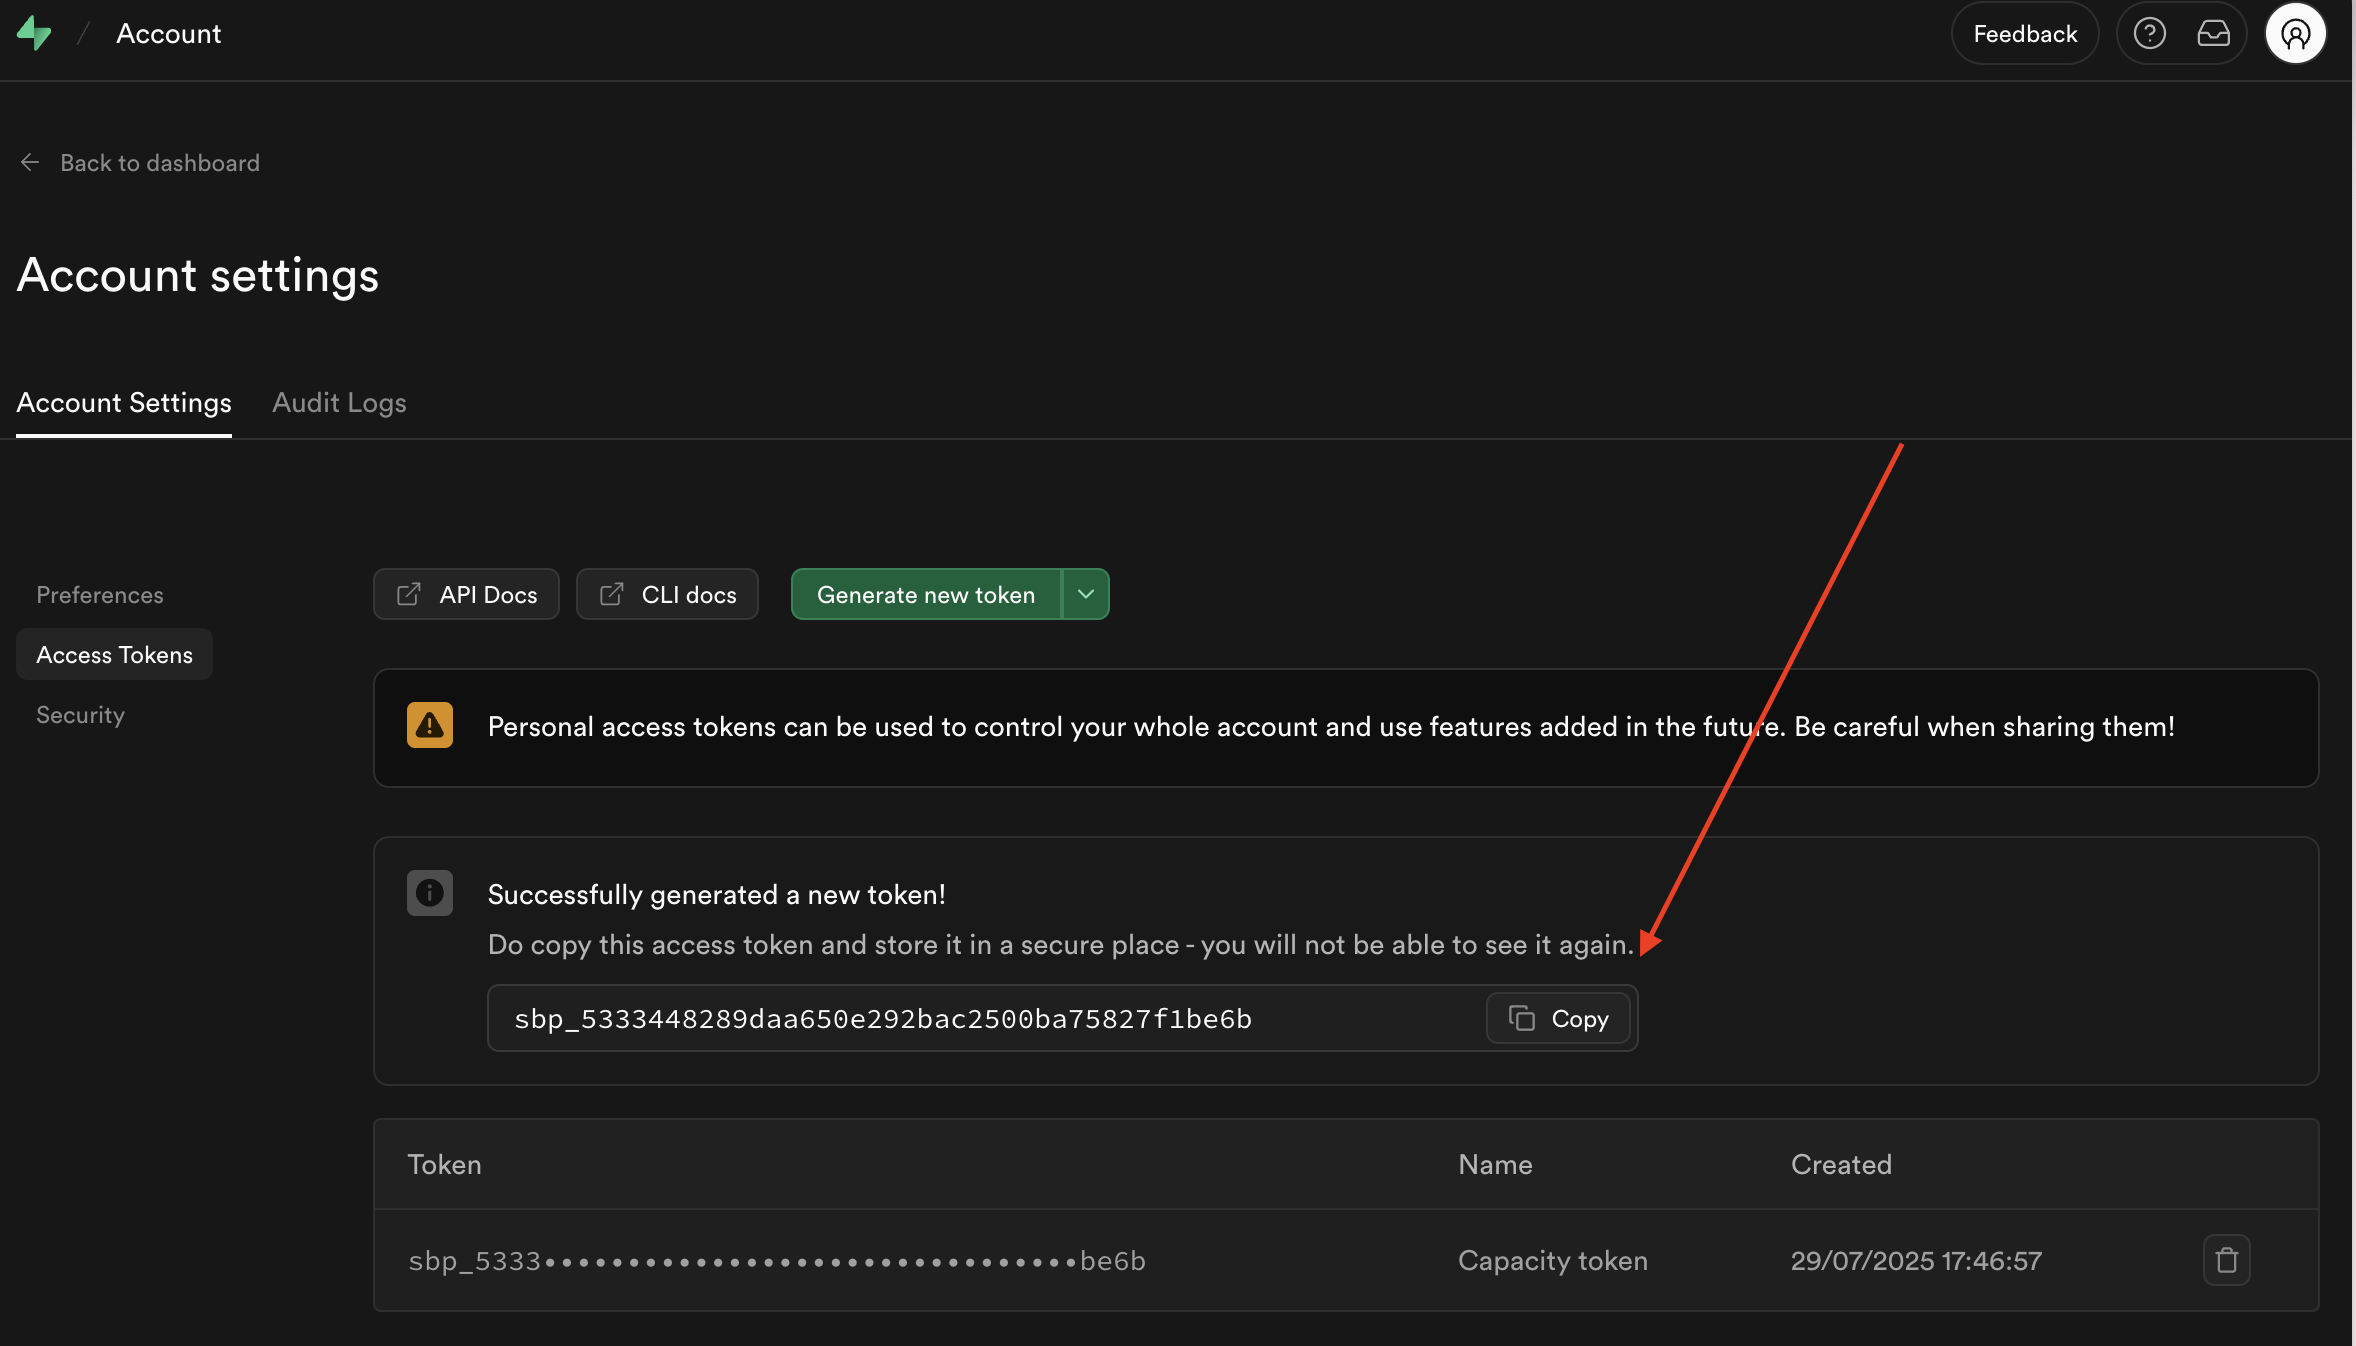
Note:
Keep your Personal Access Token secure. Don't share it or commit it to version control.
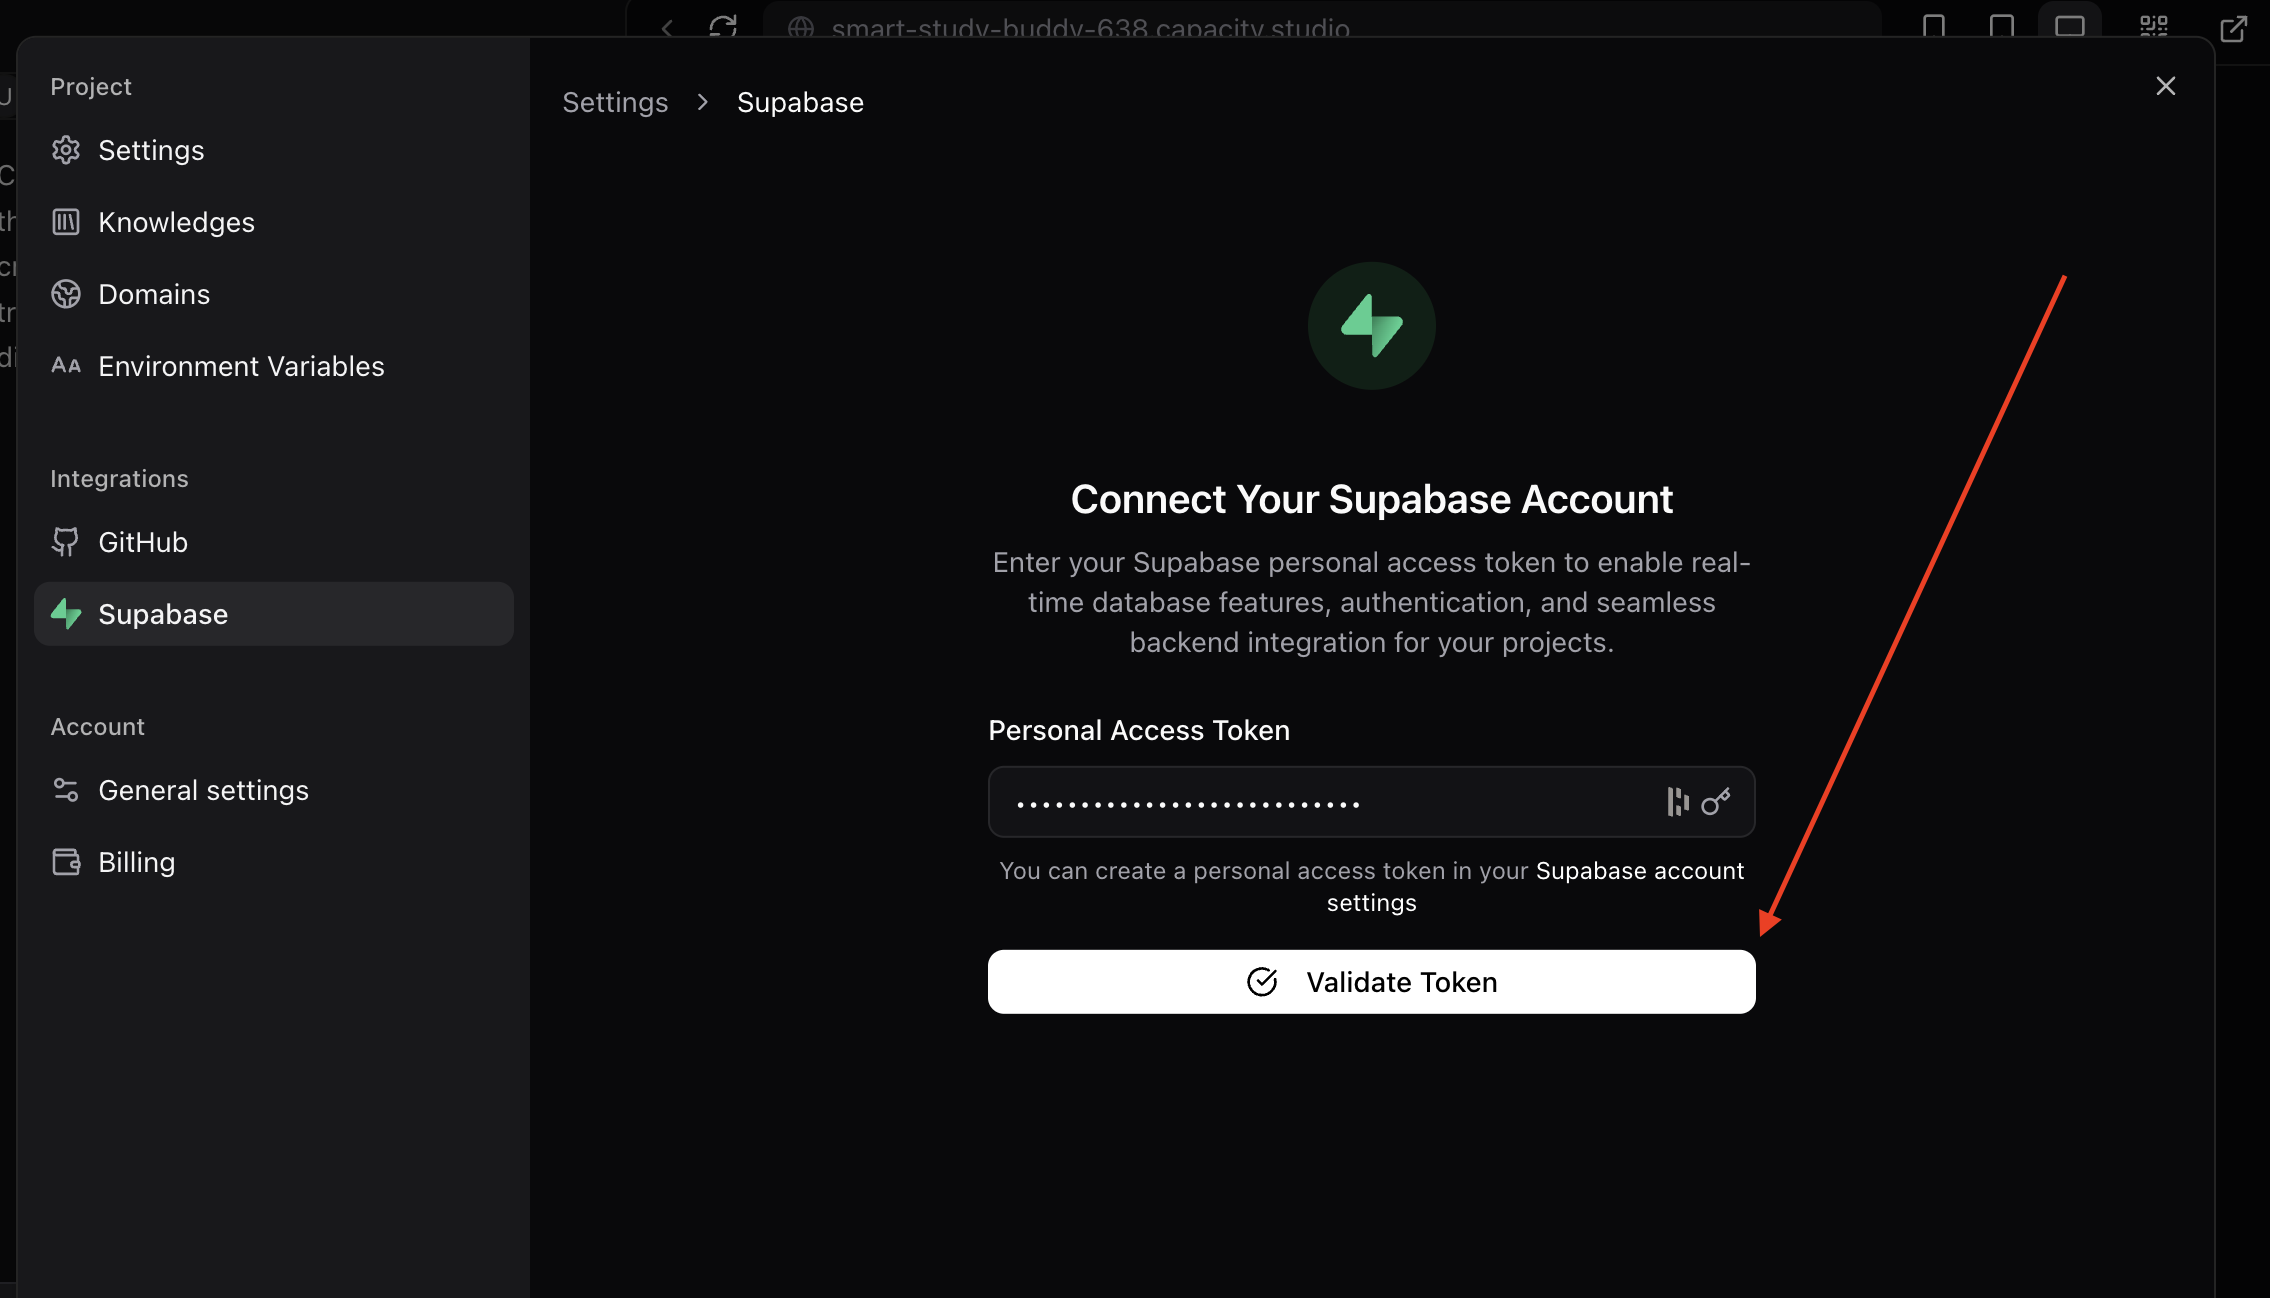
Step 2: Connect Your Supabase Account
When Creating a New Project
- Start creating a new project on Capacity
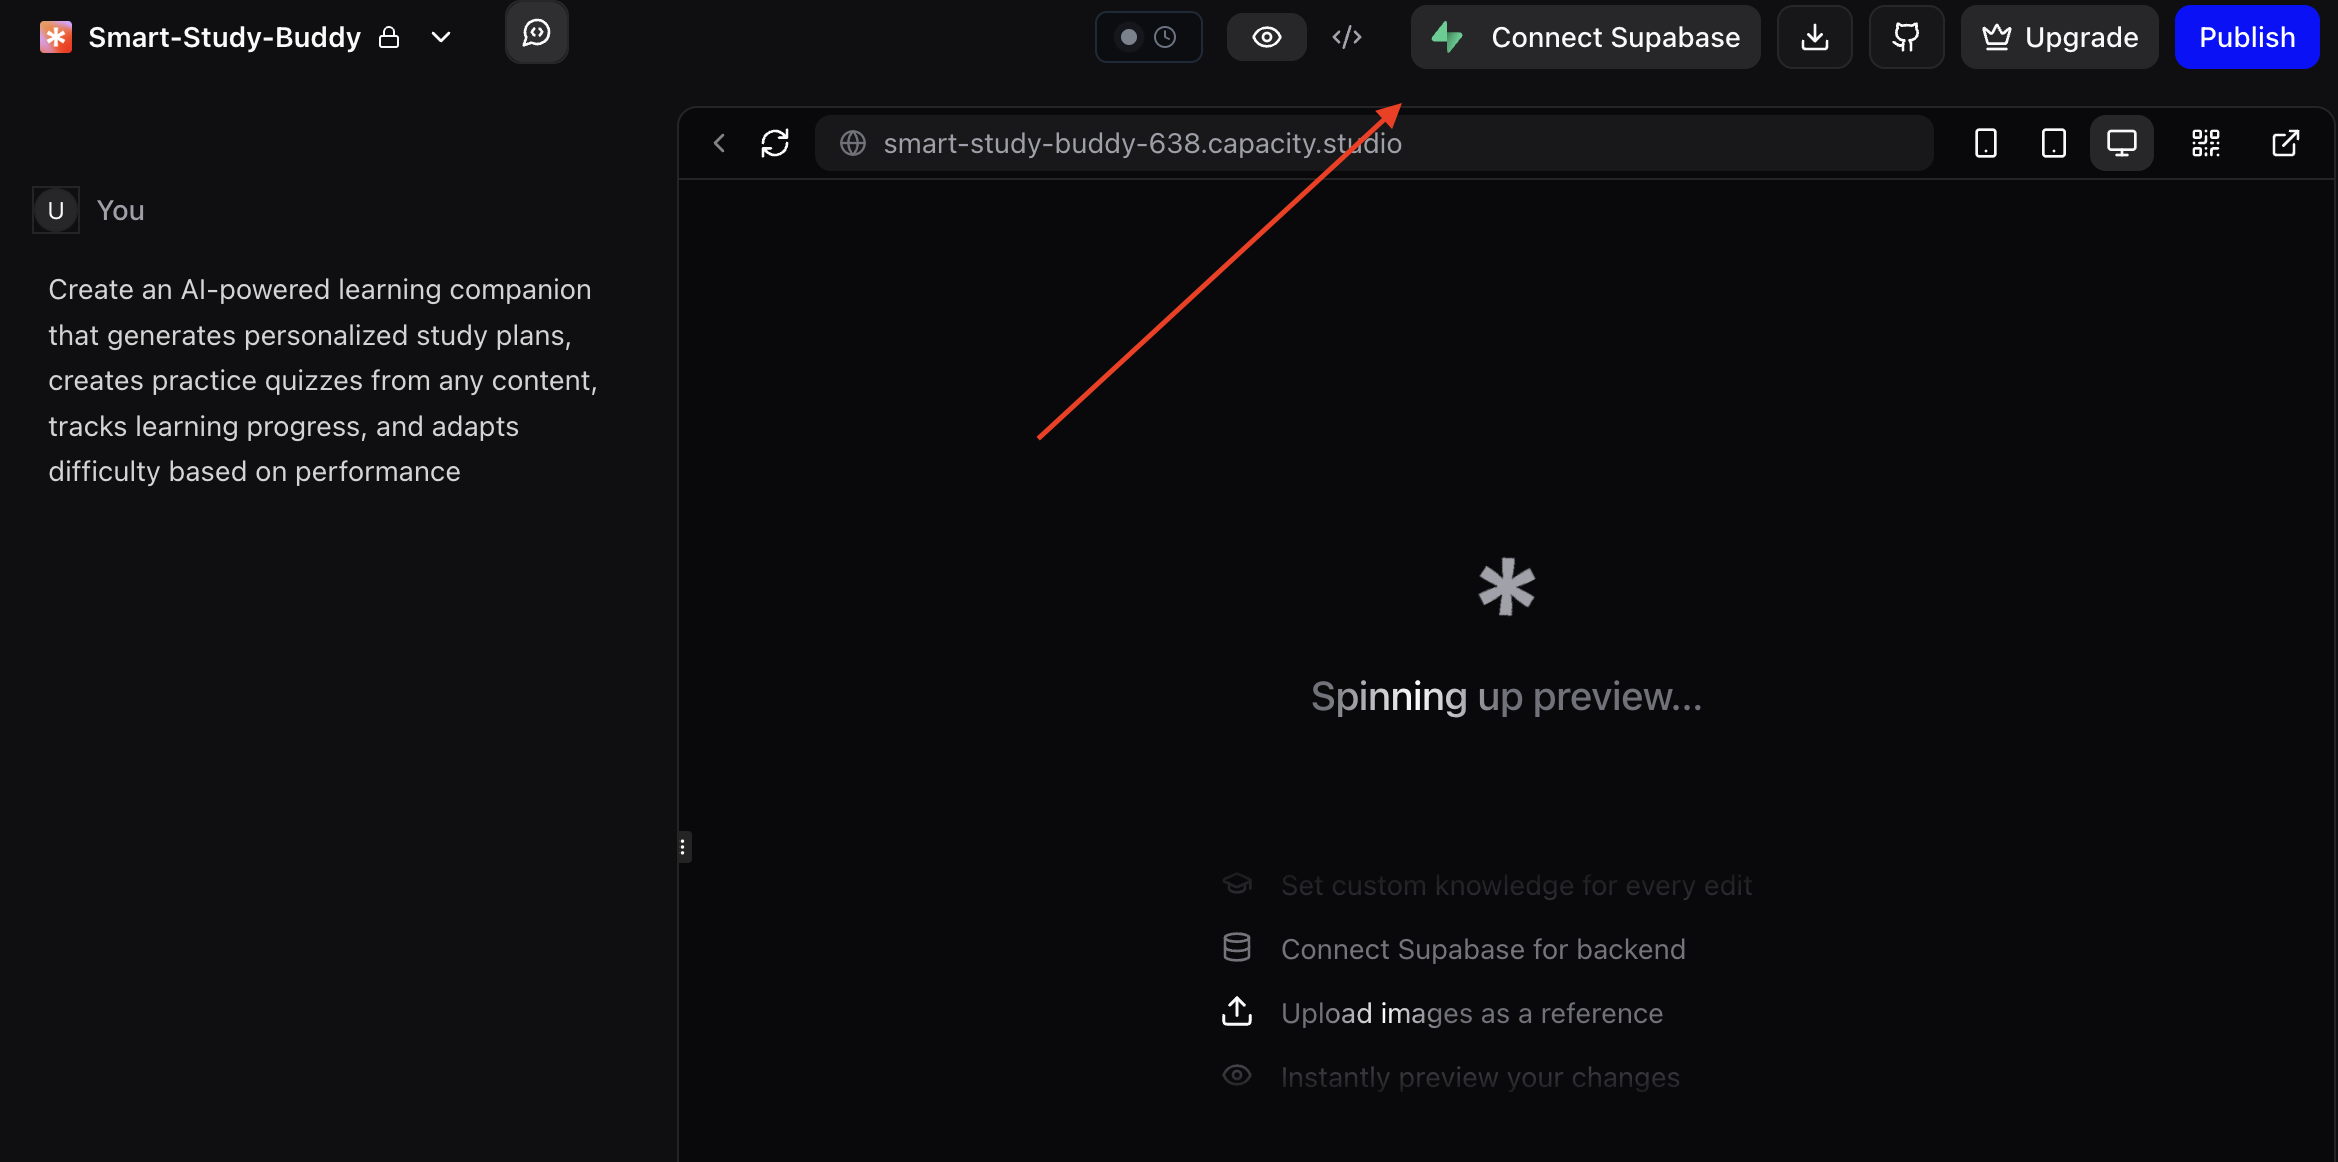
- Look for the Supabase connection button in the project creation interface
- Click "Connect Supabase" or "Select Project" if you haven't connected any accounts yet
- Enter your Personal Access Token in the dialog that appears
- Click "Connect" to authenticate
- Select the Supabase project you want to use for this Capacity project
- Proceed with your project creation - your app will now have database capabilities!
Step 3: Verify the Connection
Once connected, you should see:
- Green indicator showing your connected Supabase project name
- Project name displayed in the Supabase connection button
- Database capabilities available in your AI prompts
Using Supabase in Your Projects
Database Operations
When your project is connected to Supabase, you can ask the AI to:
Use the connected Supabase account you have access to setup authentication system
Use the connected Supabase account you have access to deploy an edge function that call openai for ...
Available Features
Your connected Supabase project provides access to:
- All your database tables and views
- Edge functions
- Row Level Security policies
- Real-time subscriptions
- File storage buckets
- Authentication providers
Managing Connections
Multiple Supabase Accounts
You can connect multiple Supabase accounts to Capacity:
- Click the Supabase connection button
- Select "Connect Another Account" from the dropdown
- Enter the Personal Access Token for the new account
- Switch between accounts by selecting different projects from the dropdown
Project Selection
- Each Capacity project can be connected to one Supabase project at a time
- Switch projects anytime from the Supabase connection dropdown
- Projects from different organizations are clearly labeled
Troubleshooting
Common Issues
Connection failed
- Verify your Personal Access Token is correct and hasn't expired
- Ensure you have proper permissions in your Supabase organization
- Check that your Supabase project is active and accessible
Can't see my project
- Confirm you're using a token from the correct Supabase organization
- Verify you have access to the project in Supabase dashboard
- Try refreshing the organization data from the connection settings
Getting Help
If you're experiencing issues with the Supabase integration:
- Check the browser console for any error messages
- Verify your Supabase project status in the Supabase dashboard
- Test your connection by creating a simple database query
- Tell Capacity the error you are facing
Edge Functions

What are Edge Functions?
Edge Functions are backend functions that run on Supabase, close to your users. They enable you to execute custom business logic, integrate with third-party services, and build powerful backend features without managing servers.
Why Use Edge Functions with Capacity?
When you ask Capacity to create Edge Functions, the AI automatically:
- Writes and deploys the function code directly to your Supabase project
- Configures environment variables and secrets securely
Common Use Cases
Edge Functions are perfect for:
- Payment Processing: Handle Stripe webhooks and payment flows
- AI Integrations: Connect to OpenAI, Anthropic, or other AI services
- Email Services: Send transactional emails via SendGrid, Resend, or SMTP
- Database Triggers: React to database changes with custom logic
- Scheduled Tasks: Run cron jobs for periodic tasks
- Third-party Webhooks: Process events from external services
- Data Transformations: Process and transform data before storing
- File Processing: Handle image resizing, document parsing, or media conversion
- Authentication Flows: Implement custom auth logic or social logins
How do I create Edge functions with Capacity ?
Simply describe what you need and Capacity will handle the implementation:
Basic Examples:
Create an edge function that sends a welcome email when a new user signs up using Resend
Deploy an edge function that processes Stripe webhooks for subscription management
Build an API endpoint that fetches weather data and stores it in the database
Advanced Examples:
Create an edge function that uses OpenAI to analyze customer feedback and categorize it automatically
Set up a scheduled function that runs daily to clean up expired sessions and send summary reports
Deploy a webhook handler for GitHub that updates our project status when issues are closed
Deploy an edge function that will generate images using AI and Replicate
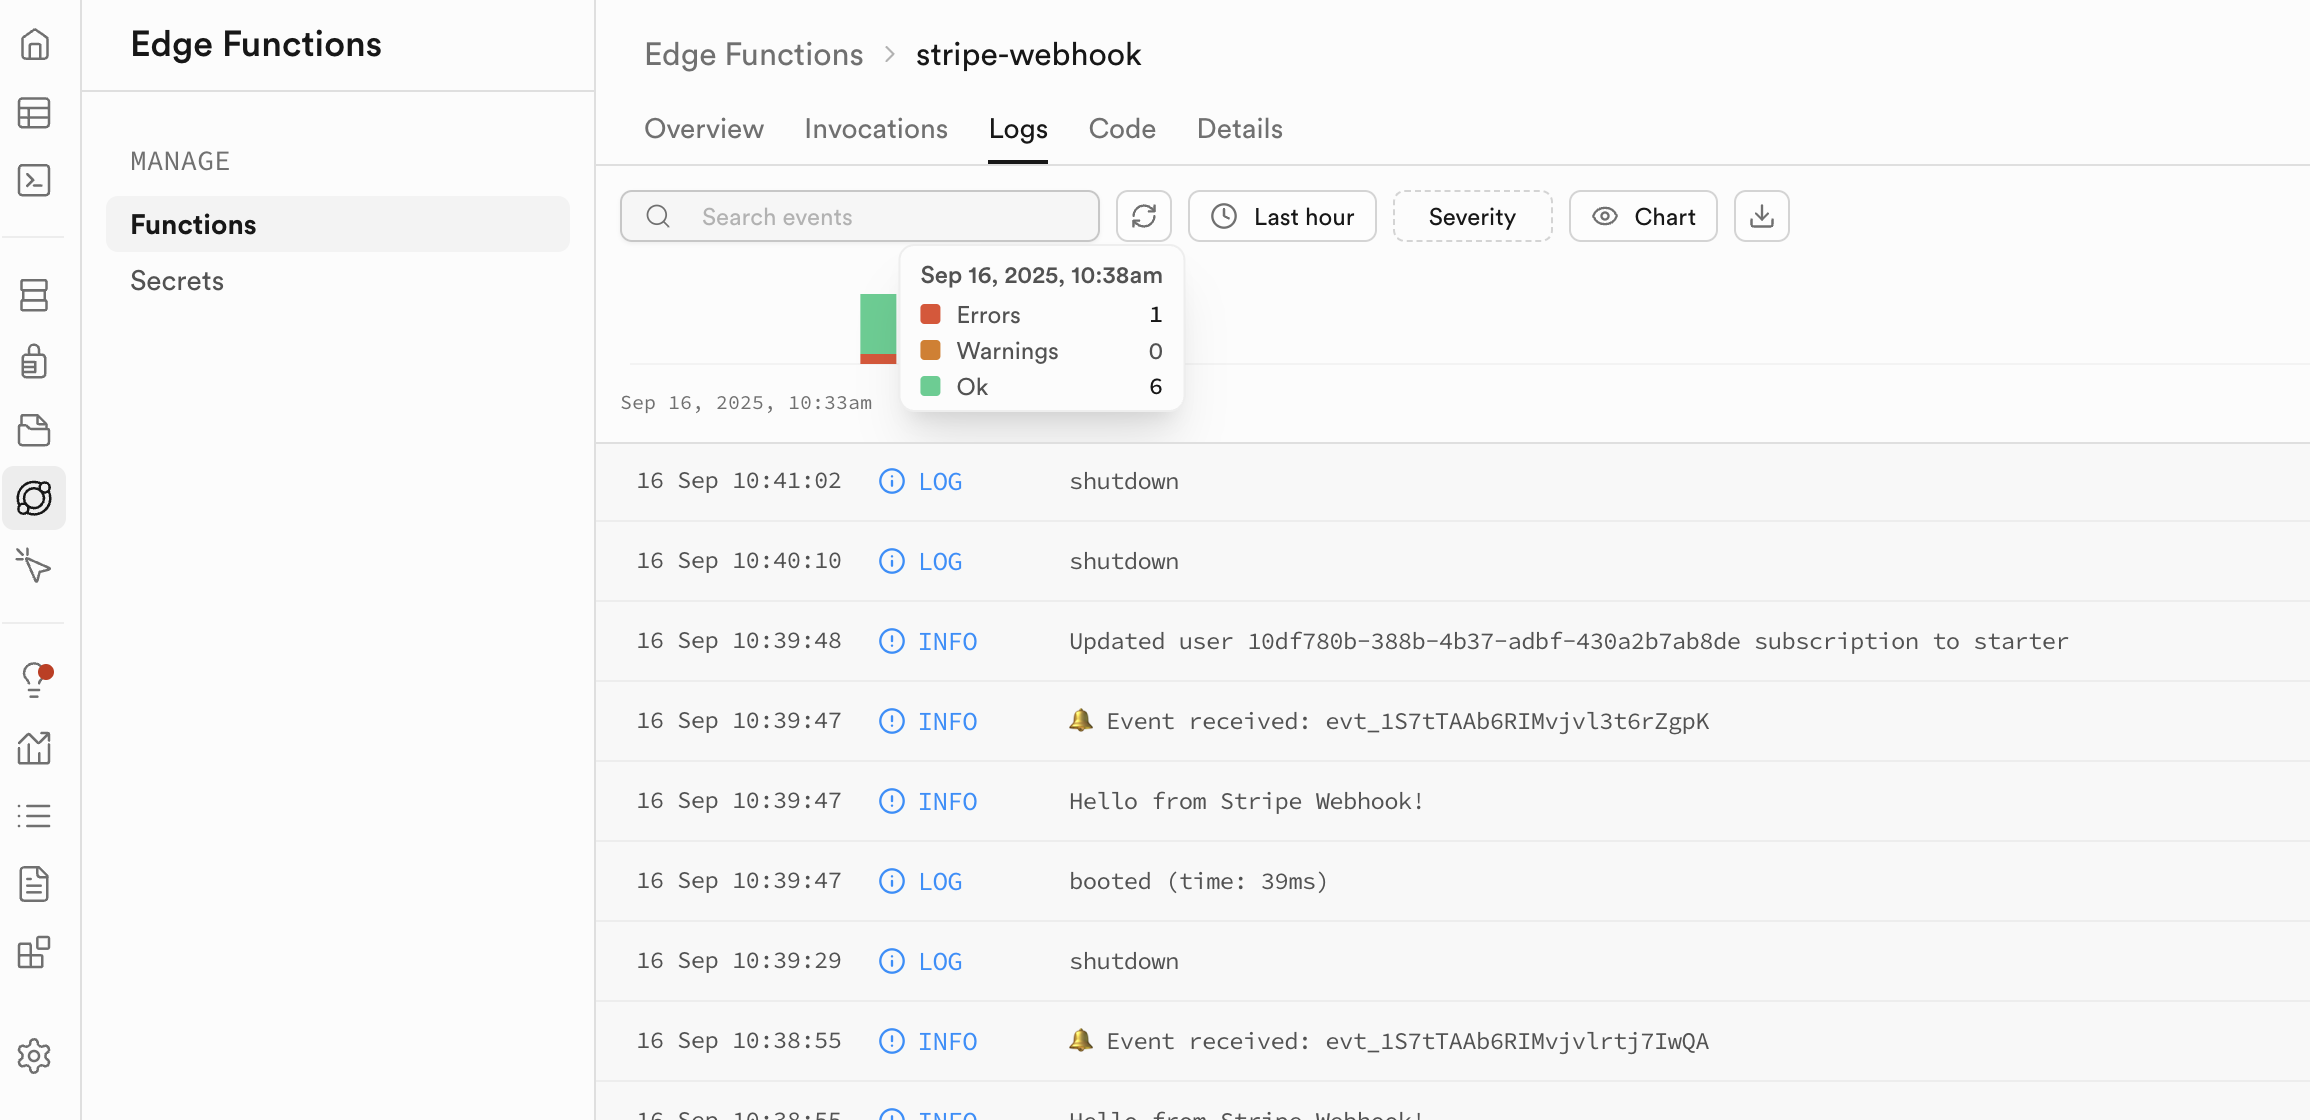
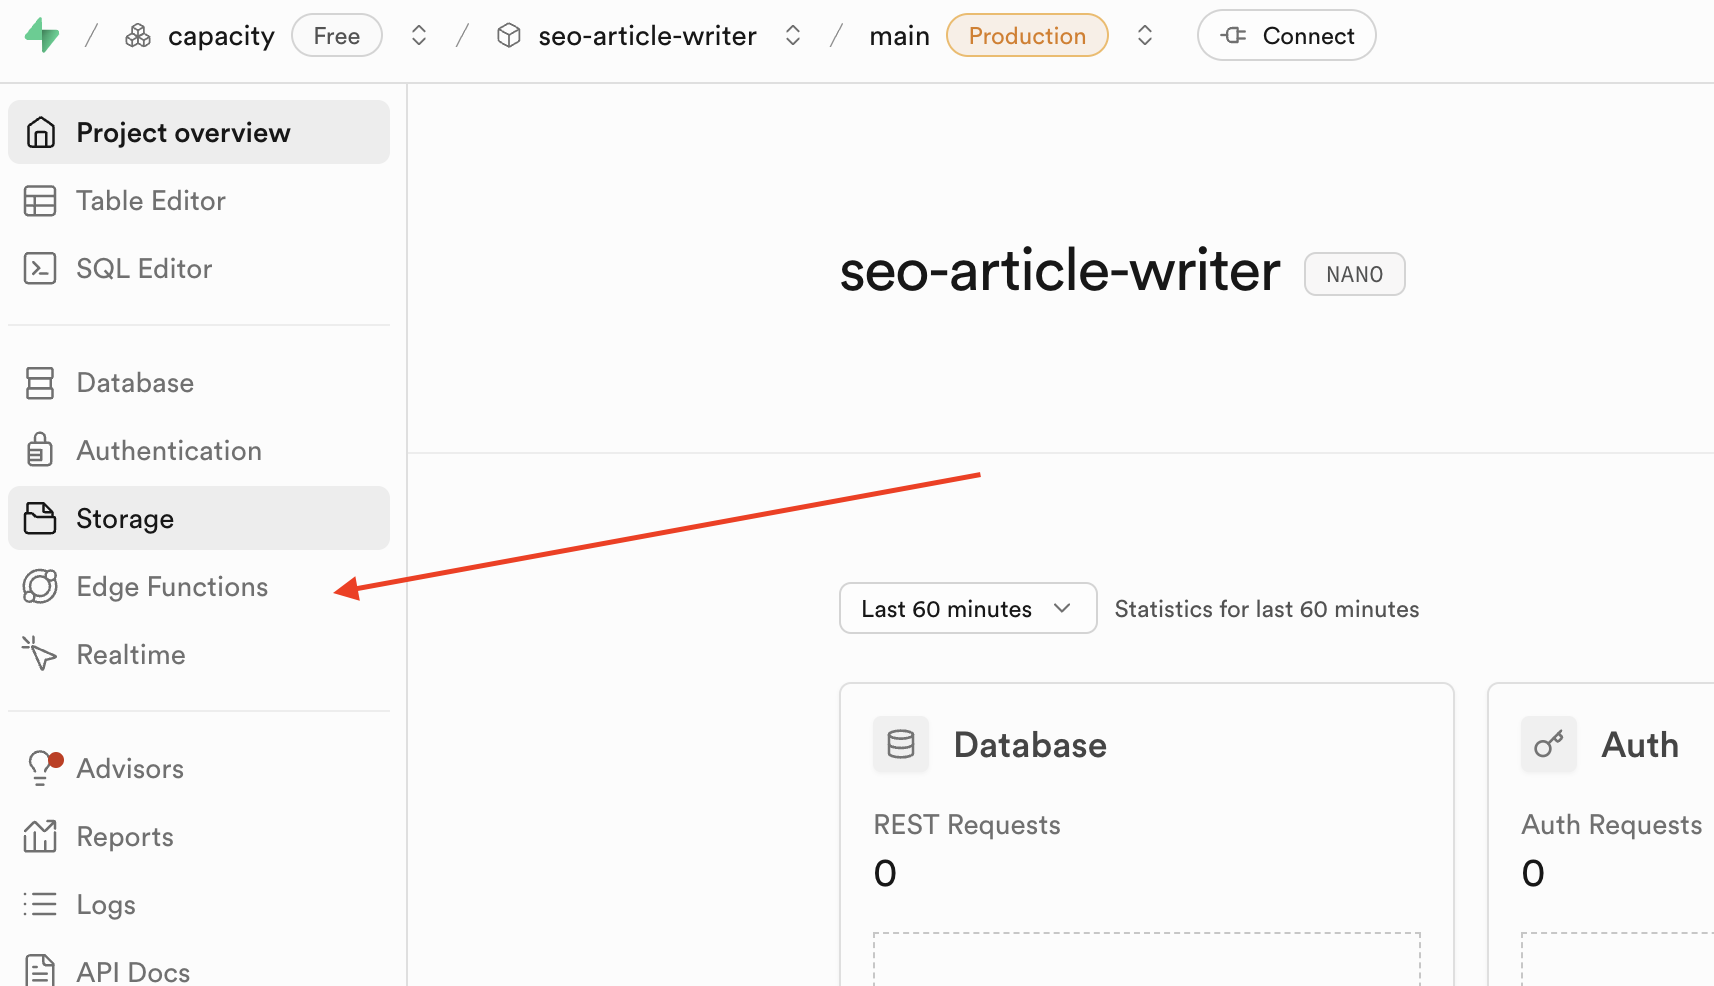
Capacity will automatically deploy Edge functions using your connected Supabase account. You can view and debug your Edge functions from your Supabase dashboard, then on the left menu click on Edge functions
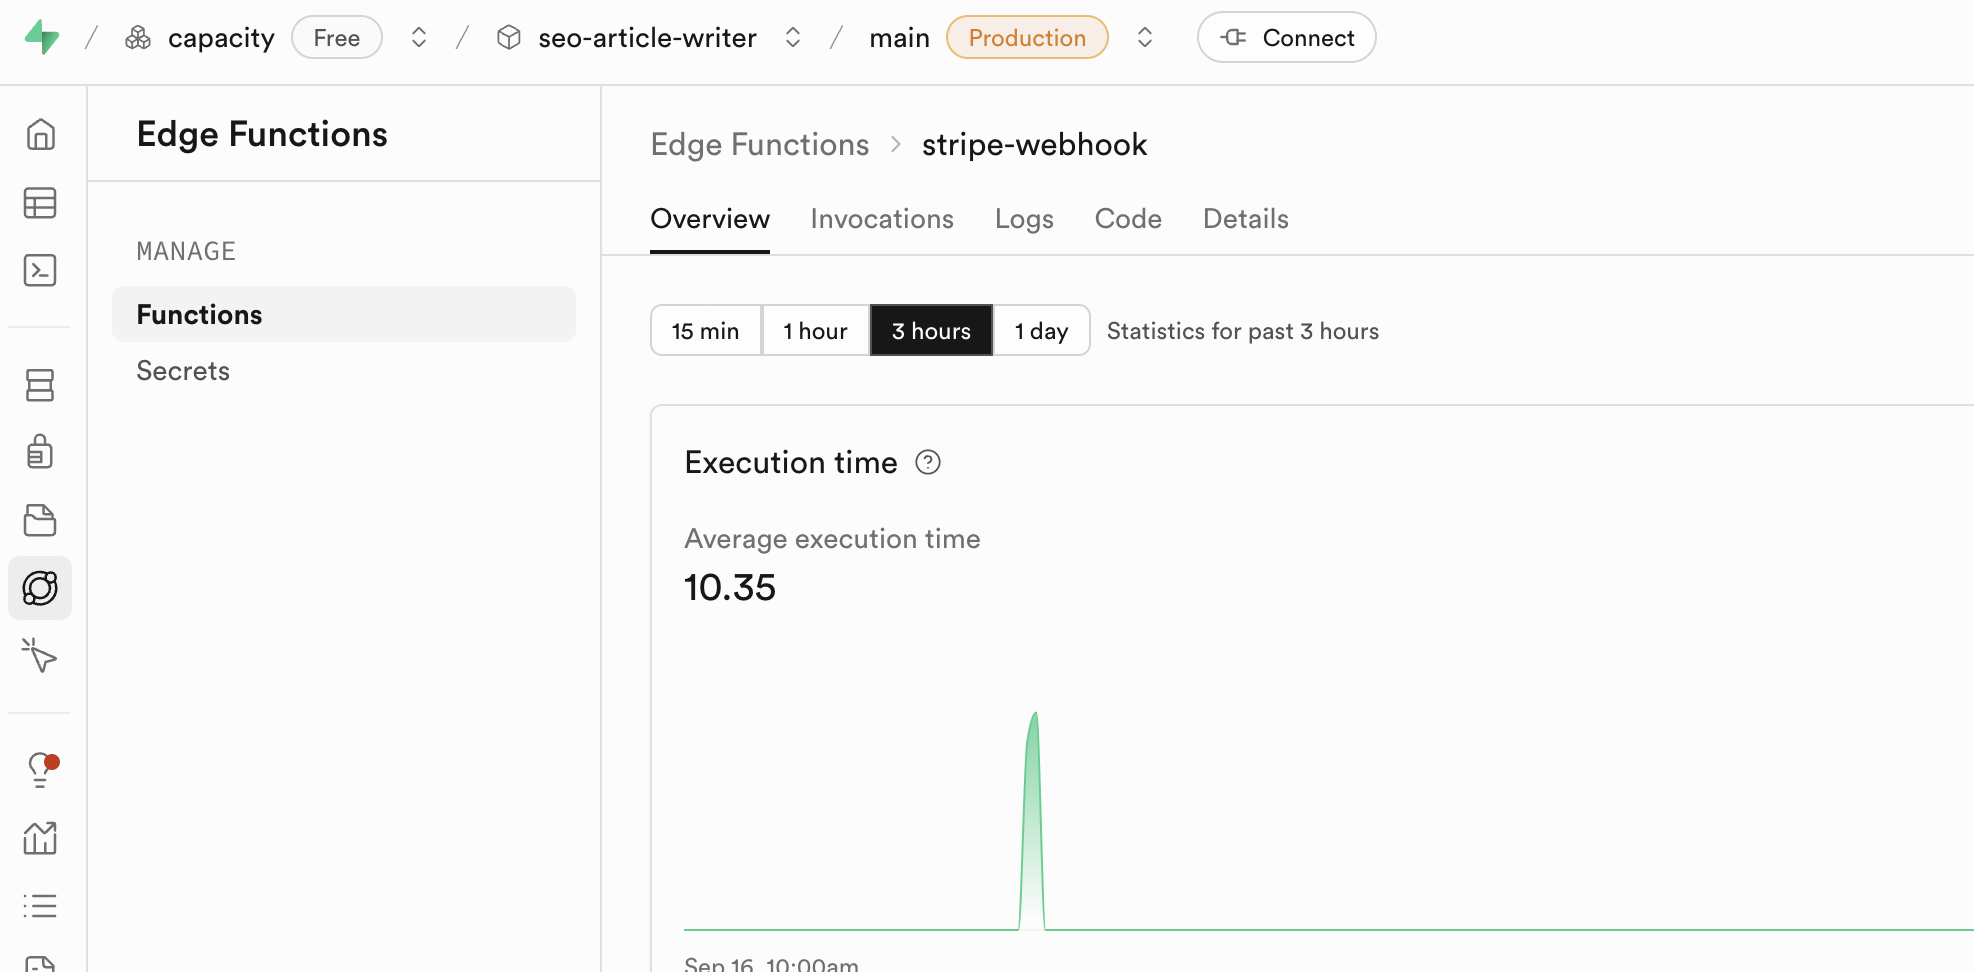
You can then view details like invocations, logs, code and more from this tab.
How Capacity Deploys Edge Functions.
- Automatic Setup: Capacity writes the complete function code including error handling
- Instant Deployment: Functions are deployed directly to your Supabase project
- Environment Configuration: API keys and secrets are automatically configured
- CORS & Security: Proper headers and authentication are set up by default
- Testing Ready: Functions are immediately accessible via HTTPS endpoints
Managing Edge Functions
Once deployed, your Edge Functions can be:
- Monitored: View logs and metrics in the Supabase dashboard
- Updated: Ask Capacity to modify existing functions
- Tested: Functions get unique URLs for immediate testing
- Debugged: Check function logs for errors and execution details