Google Authentication Integration
Add Google OAuth to your Capacity application, allowing users to sign in with their Google accounts alongside traditional email/password authentication.

What is Google Authentication?
Google Authentication (OAuth 2.0) allows users to sign into your application using their existing Google accounts. This provides:
- Seamless Sign-in: Users can authenticate without creating new passwords
- Enhanced Security: Leverages Google's robust security infrastructure
- User Trust: Users feel more secure using familiar Google login
- Reduced Friction: Faster registration and login process
Why Use Google Auth with Capacity?
When you ask Capacity to add Google authentication, the AI automatically:
- Configures Supabase OAuth: Sets up the authentication flow with your Supabase backend
- Updates Auth Pages: Adds Google sign-in buttons to login and registration forms
- Handles Authentication Flow: Implements the complete OAuth redirect cycle
- Manages User Sessions: Properly handles authenticated user states
- Error Handling: Includes comprehensive error handling and loading states
Setting Up Google Authentication
Step 1: Request Google Auth Integration
Simply ask Capacity to add Google authentication to your project:
I want to add Google auth option on auth pages in addition to email / password.
Capacity will automatically:
- Examine your current authentication setup
- Update your login and registration forms
- Add Google OAuth functionality to your auth context
- Provide you with configuration instructions
Step 2: Configure Google Cloud Console
After Capacity implements the code, you need to set up Google OAuth credentials:
Create Google Cloud Project
- Go to Google Cloud Console
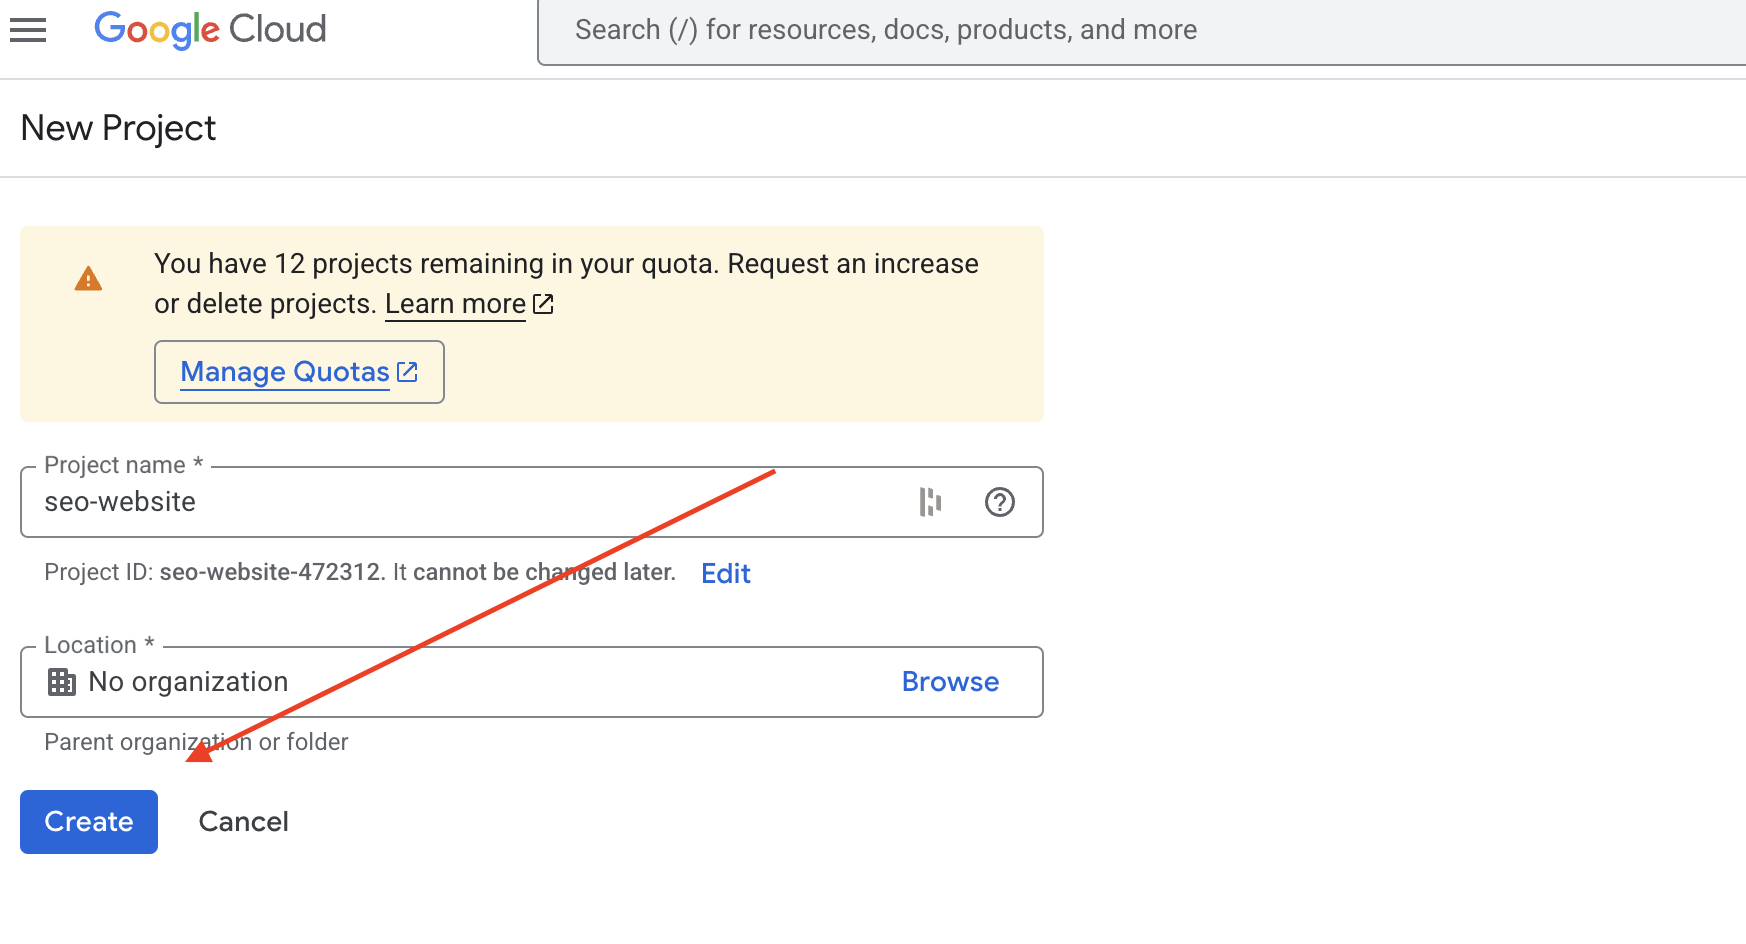
- Create a new project or select an existing one
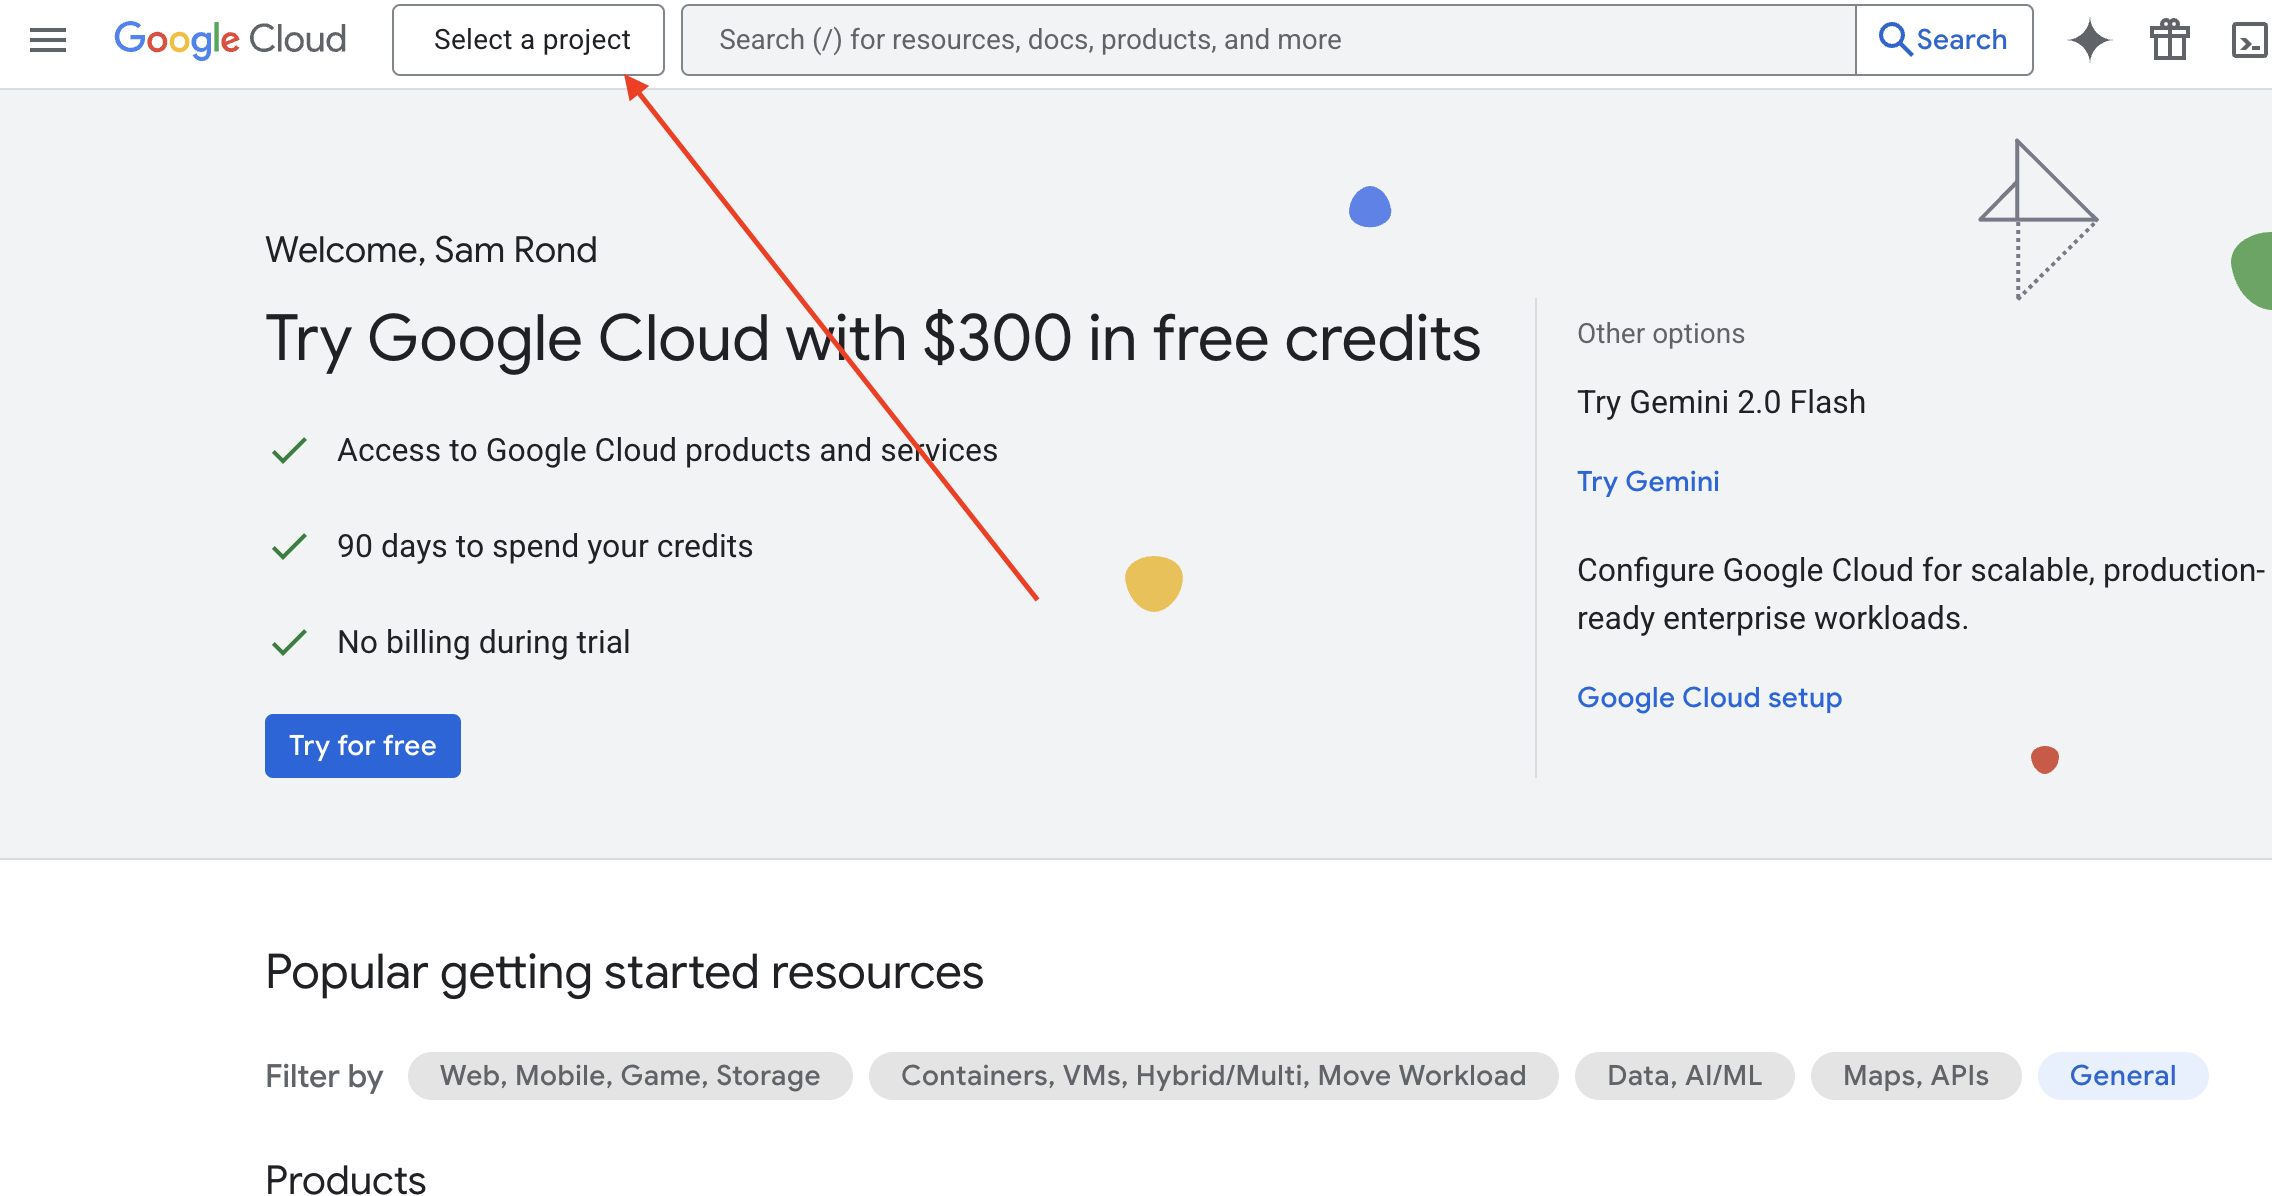

Then give a name to your project, and click on create.
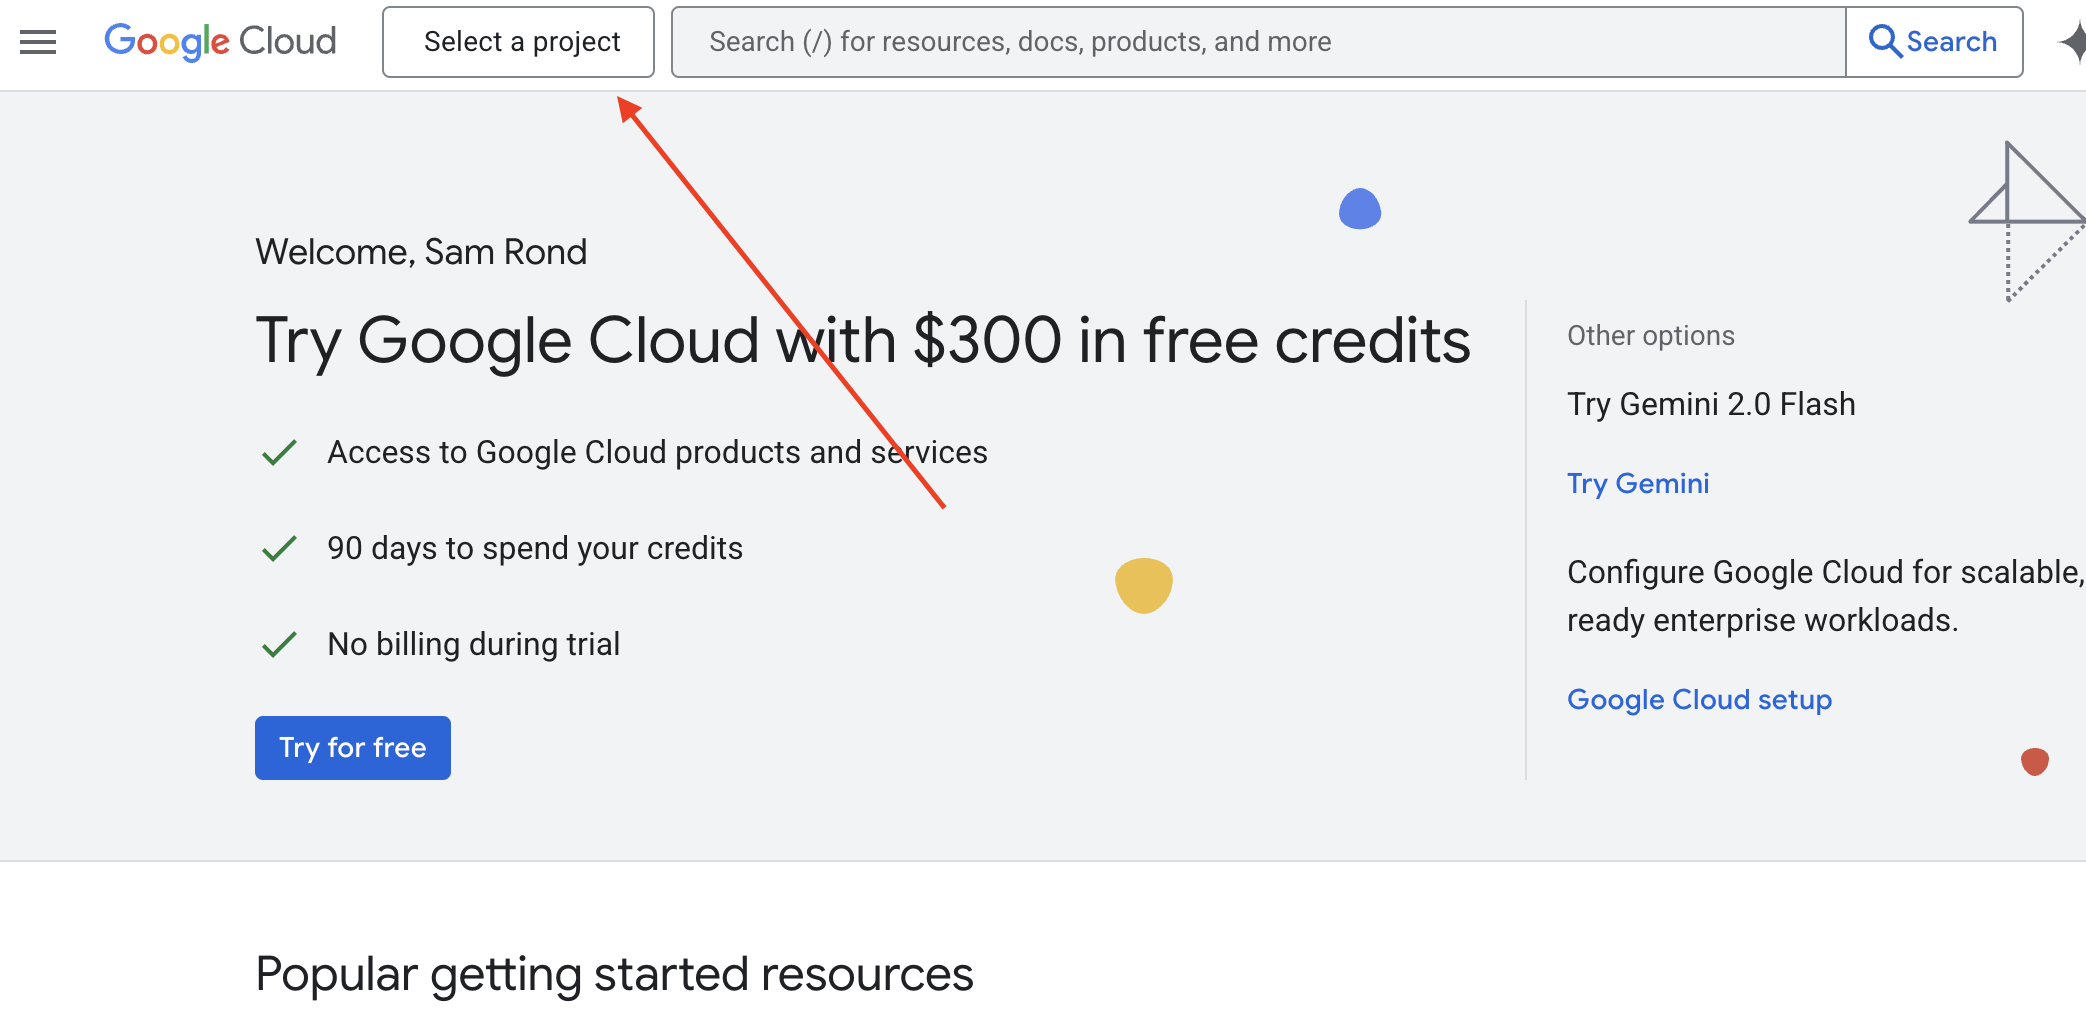
Once your project is created, select it from the top menu.
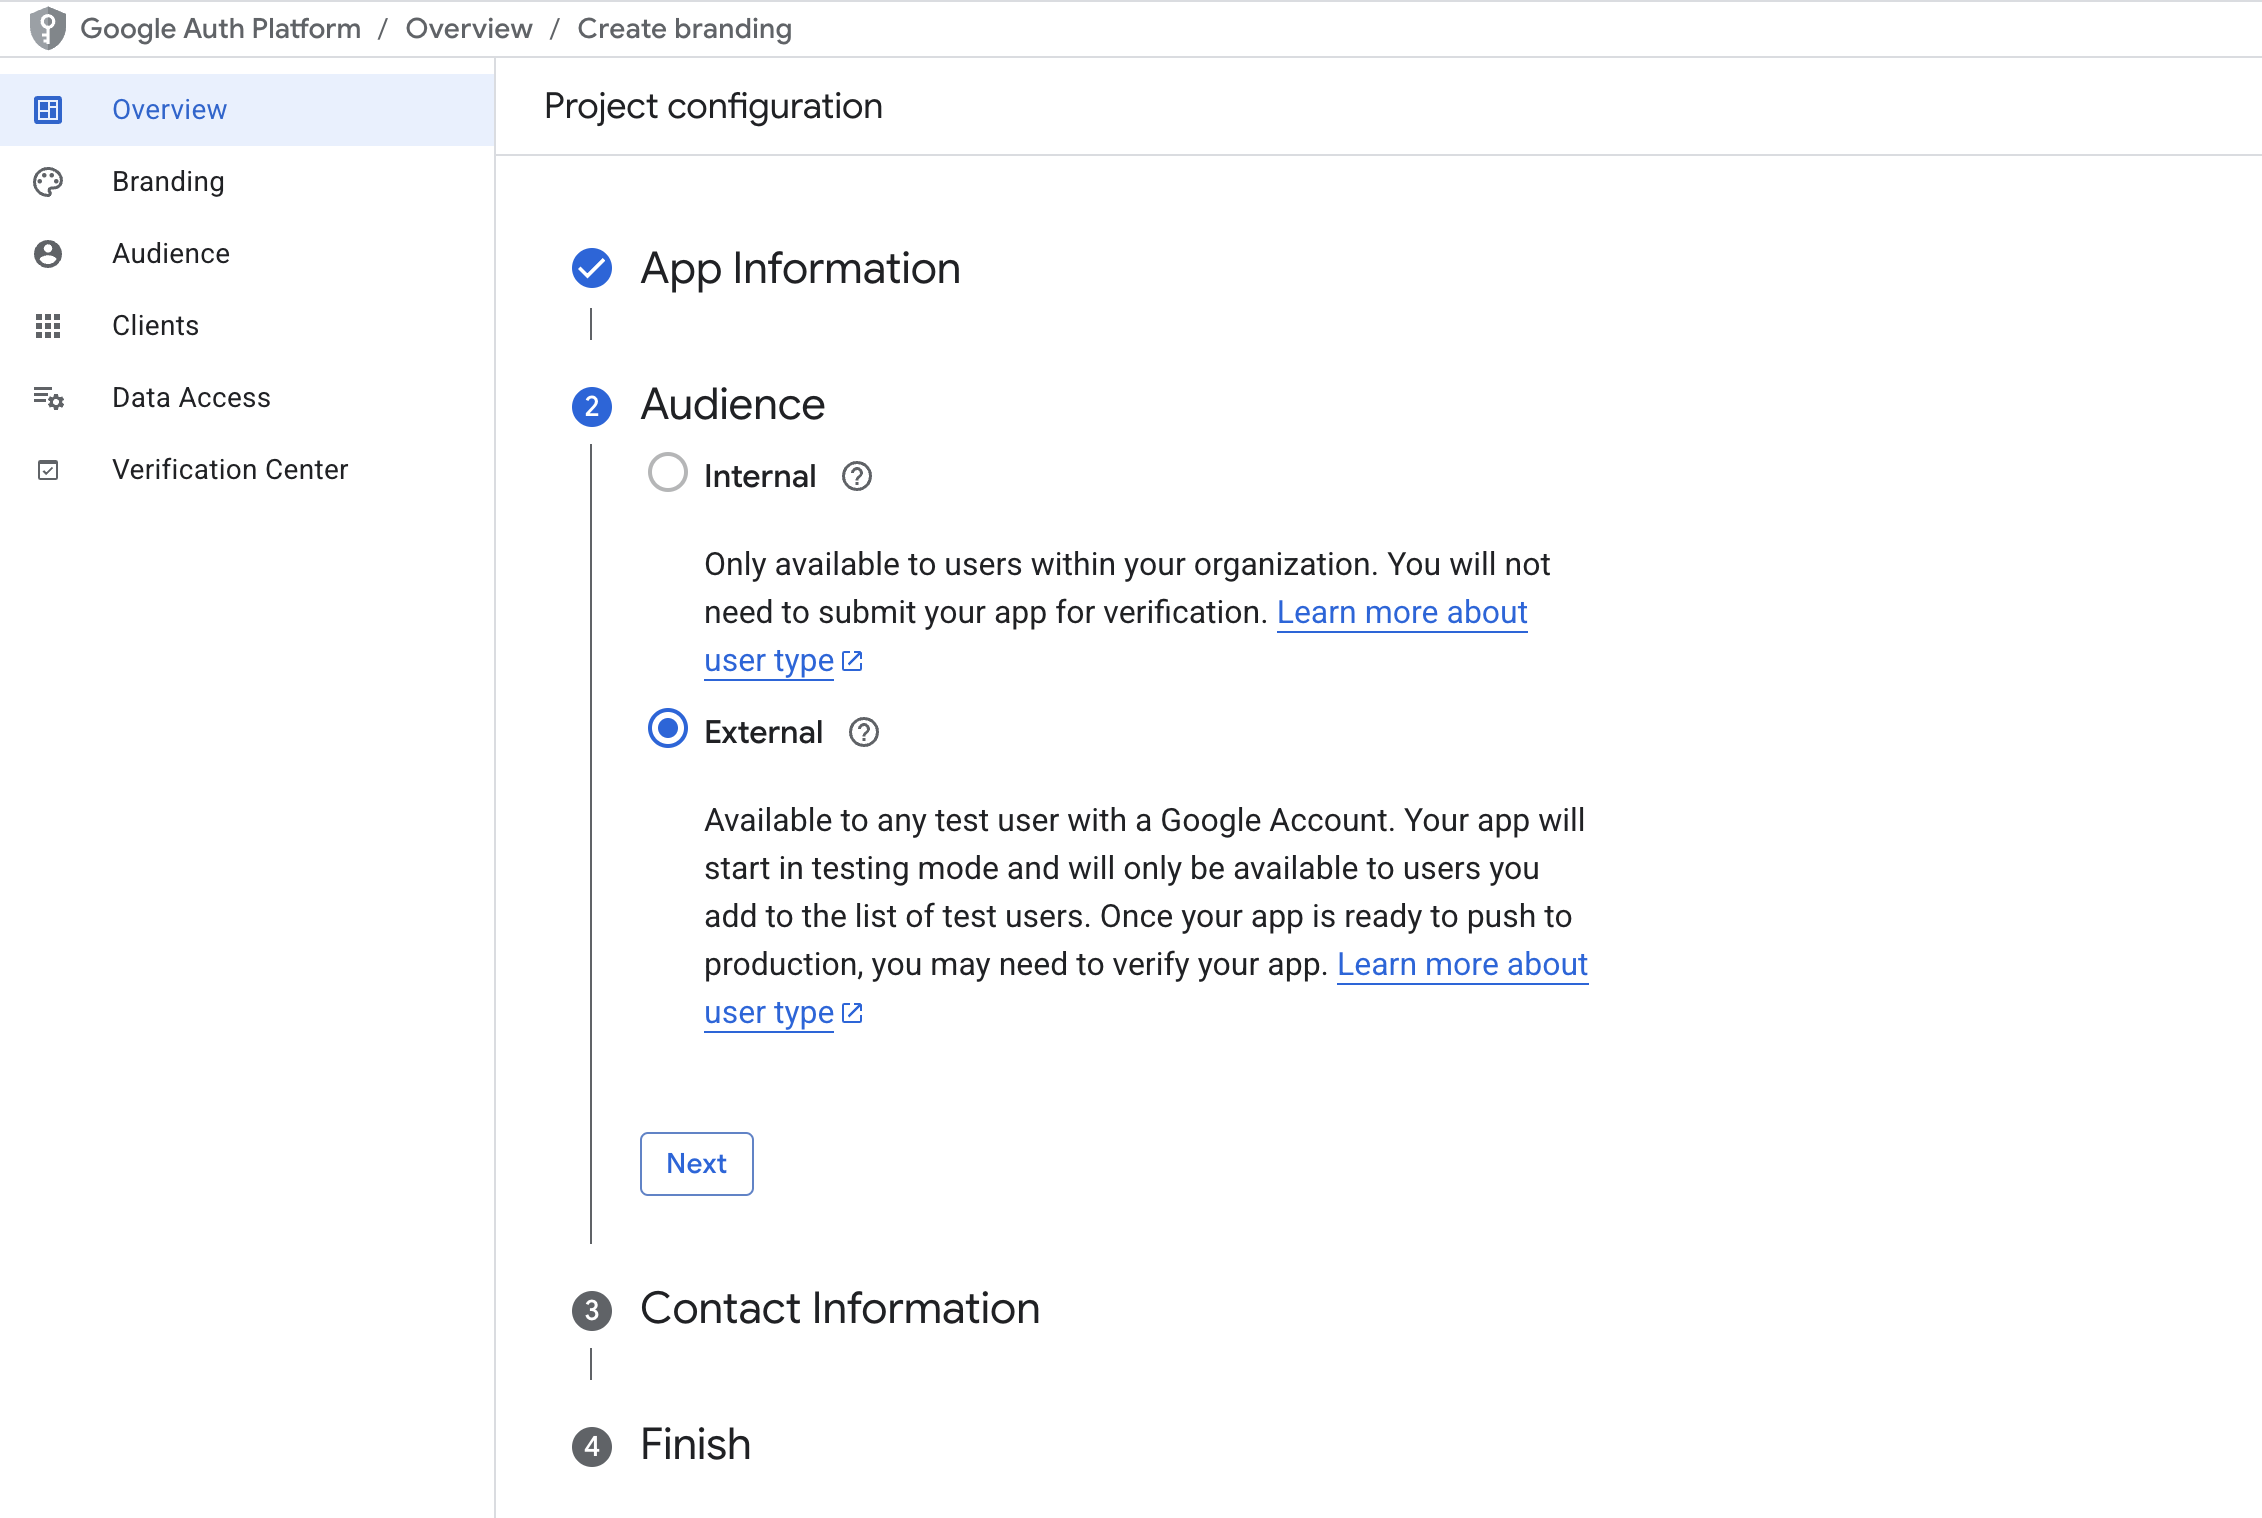
Configure OAuth Consent Screen
-
In the Google Cloud console, go to the Consent Screen configuration page. The consent screen is the view shown to your users when they consent to signing in to your app.
-
Give a name to your project and add a support email.
-
For the audience section choose External
-
Add a contact email, and accept Google conditions, then click on Create.
-
In the section Branding Under Authorized domains, add your Supabase project's domain, which has the form
<PROJECT_ID>.supabase.co.
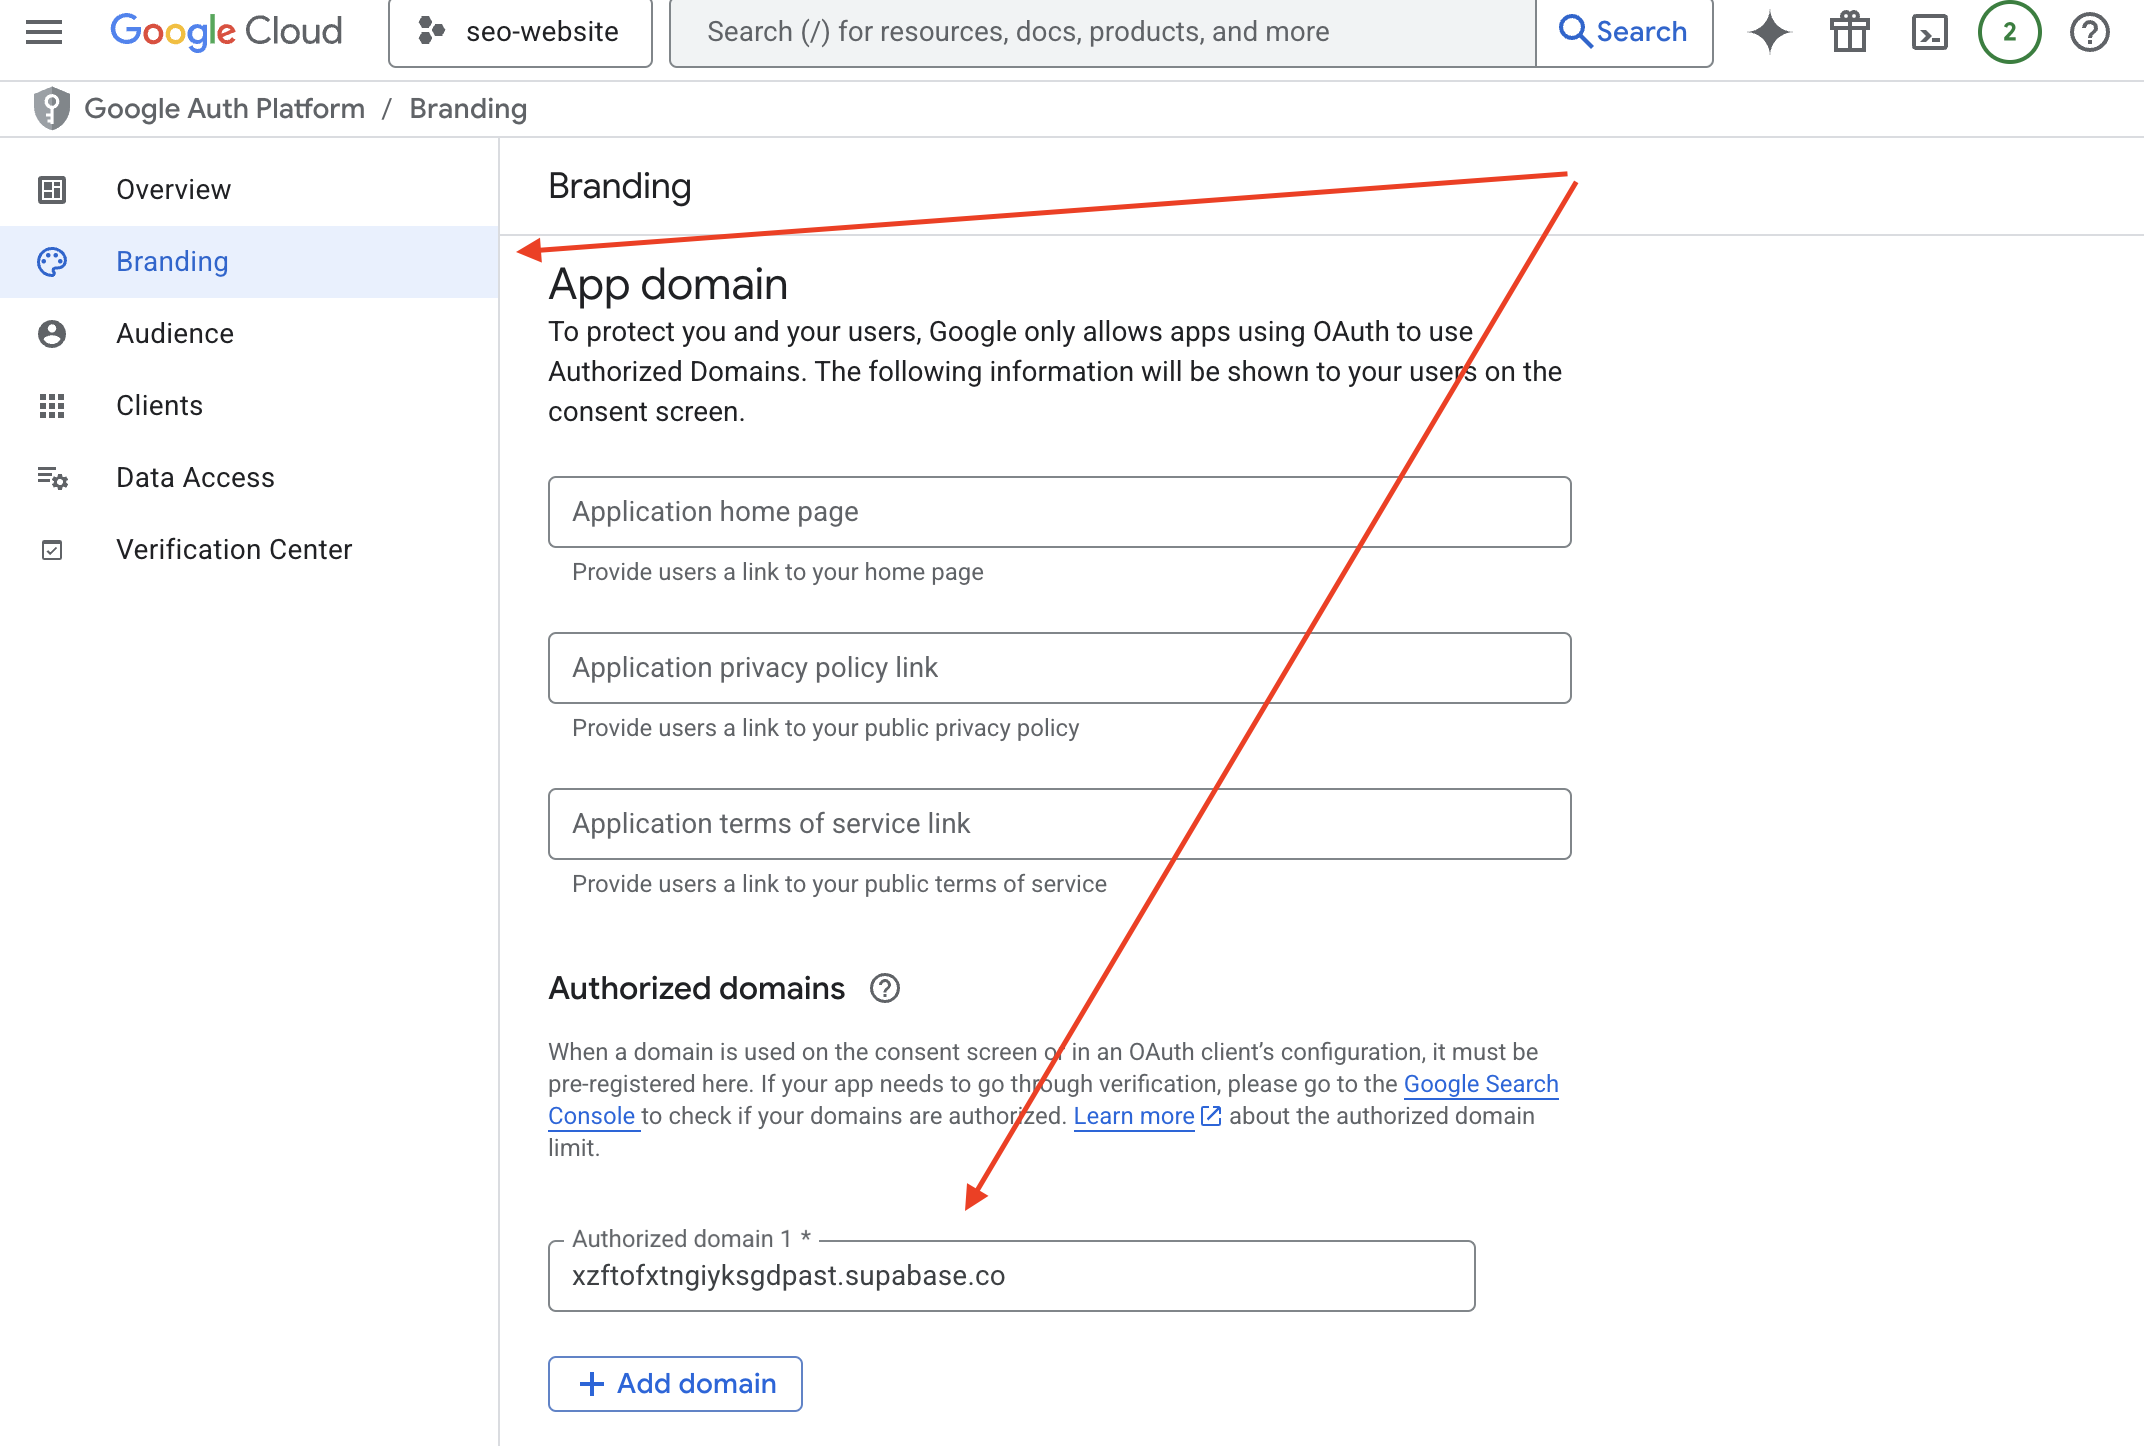
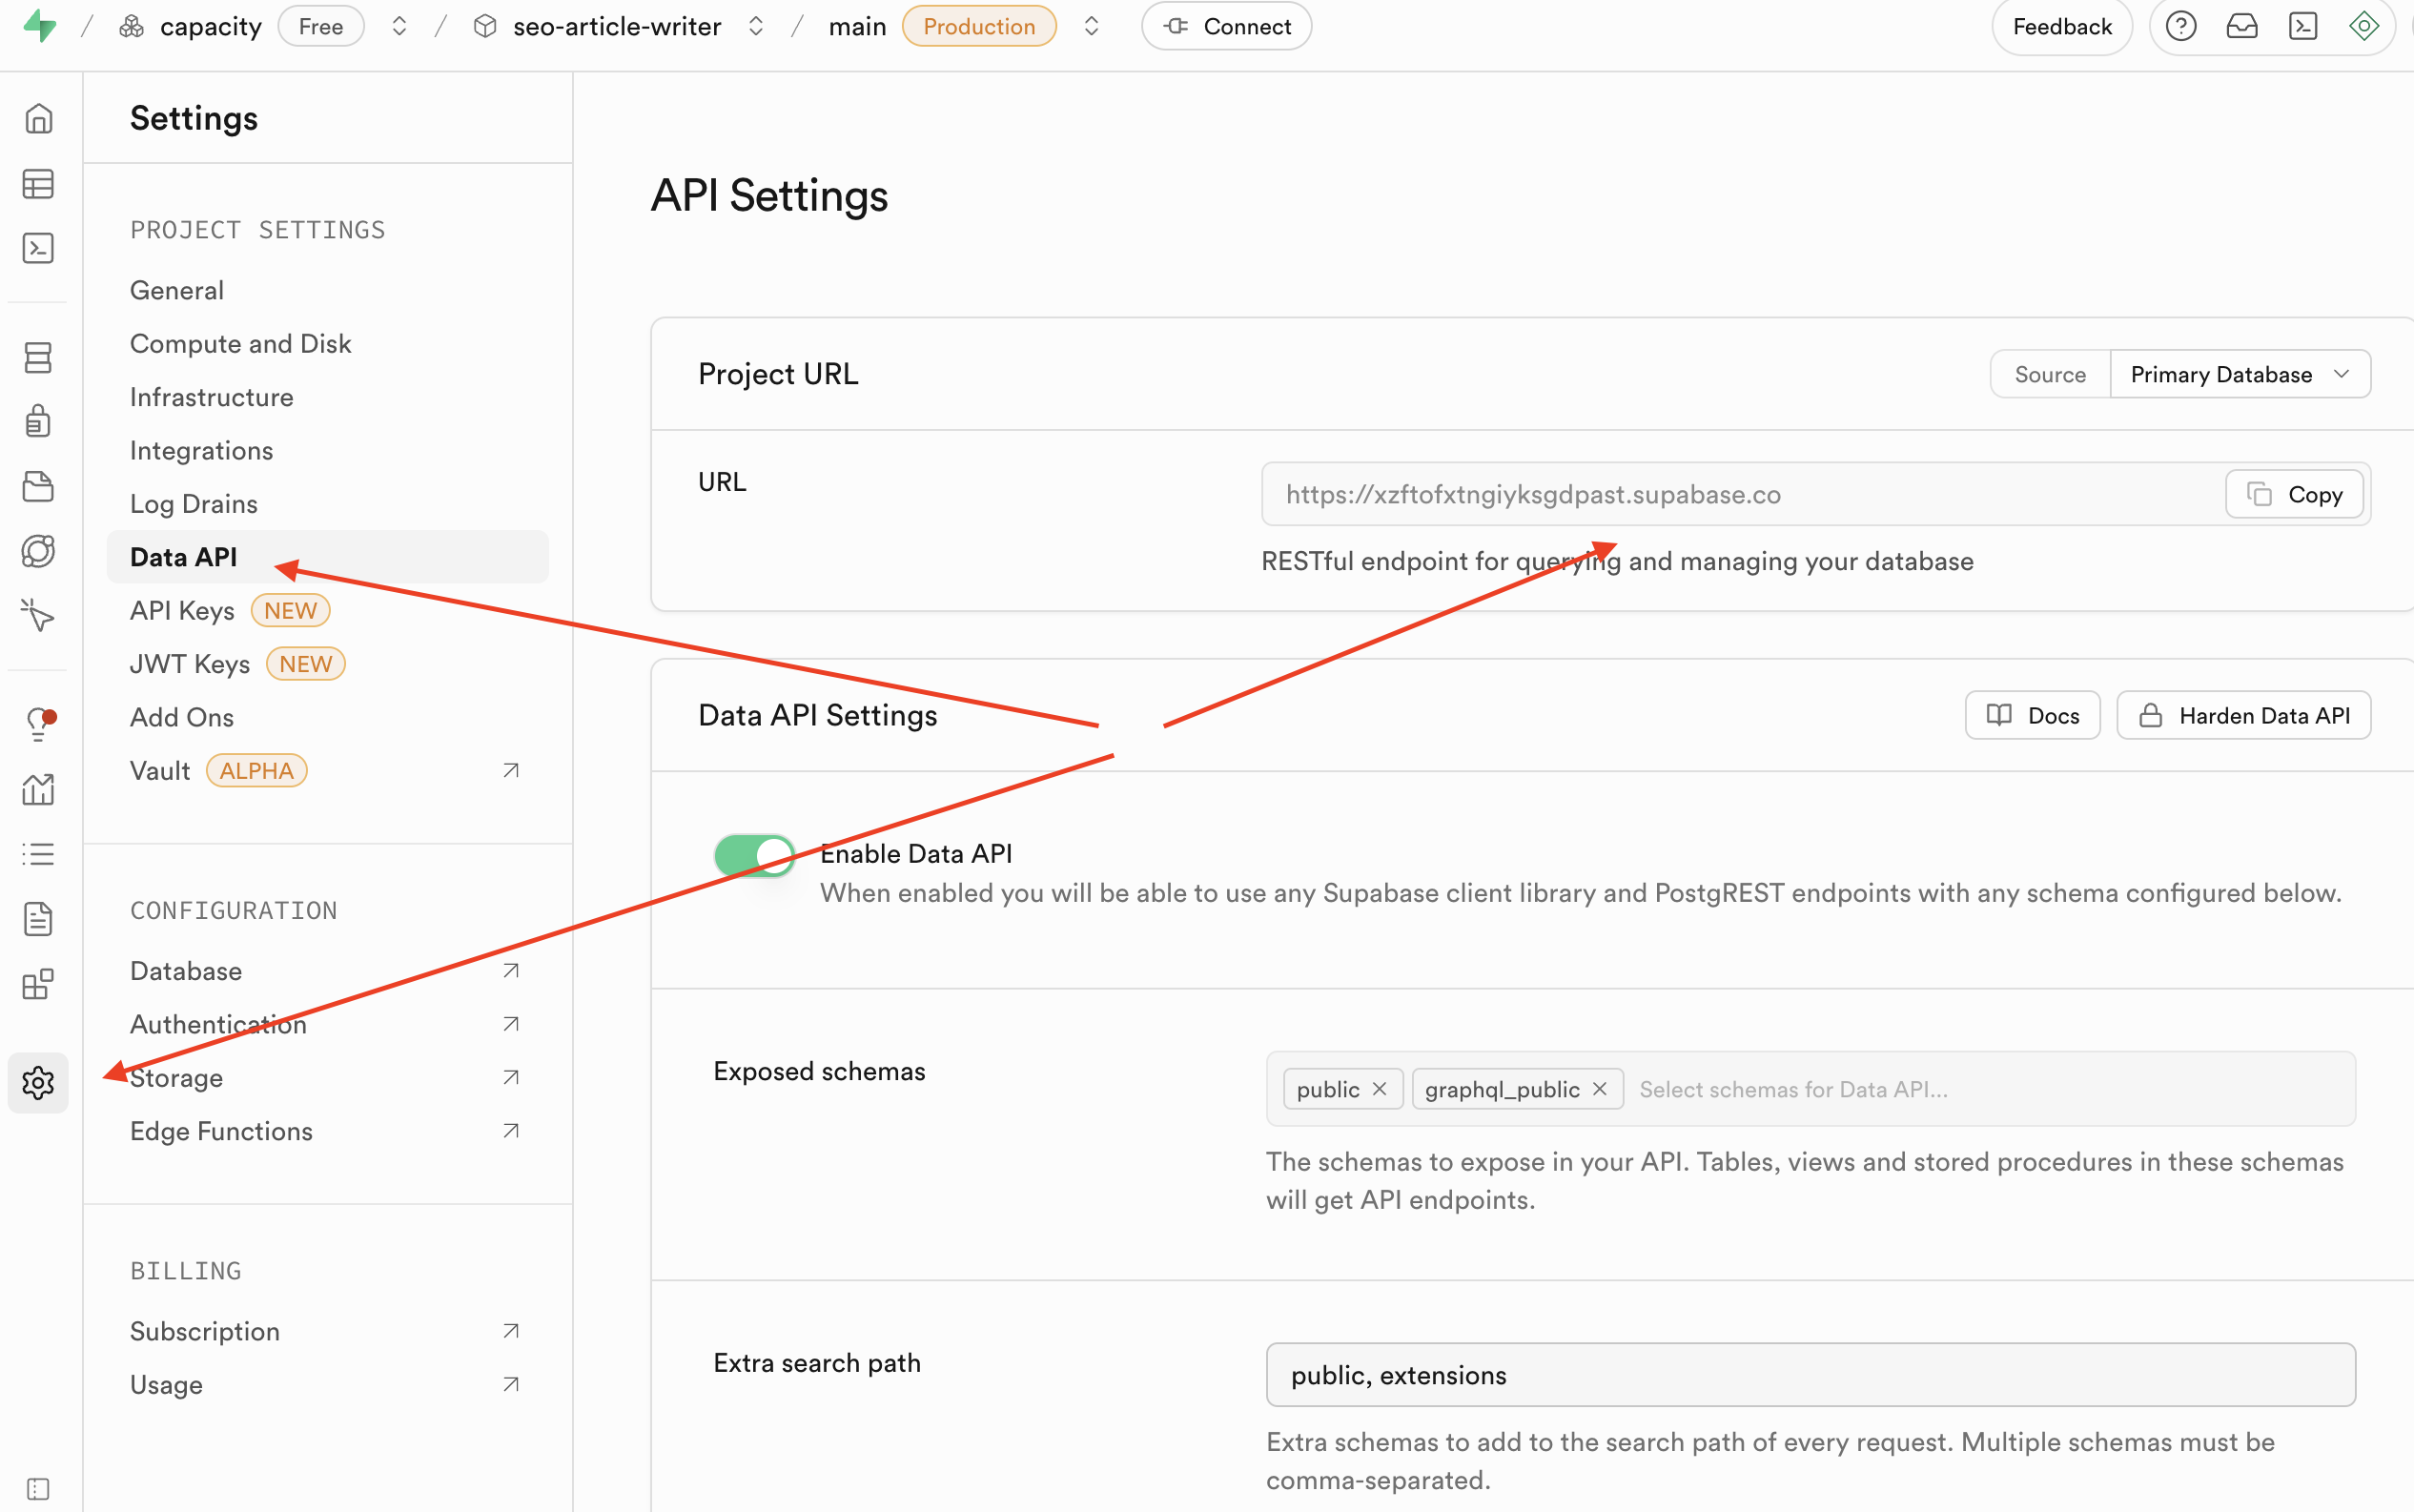
You can find your Supabase project URL from Settings > Data API
-
In the section Data Access configure the following non-sensitive scopes:
.../auth/userinfo.email...auth/userinfo.profileopenid
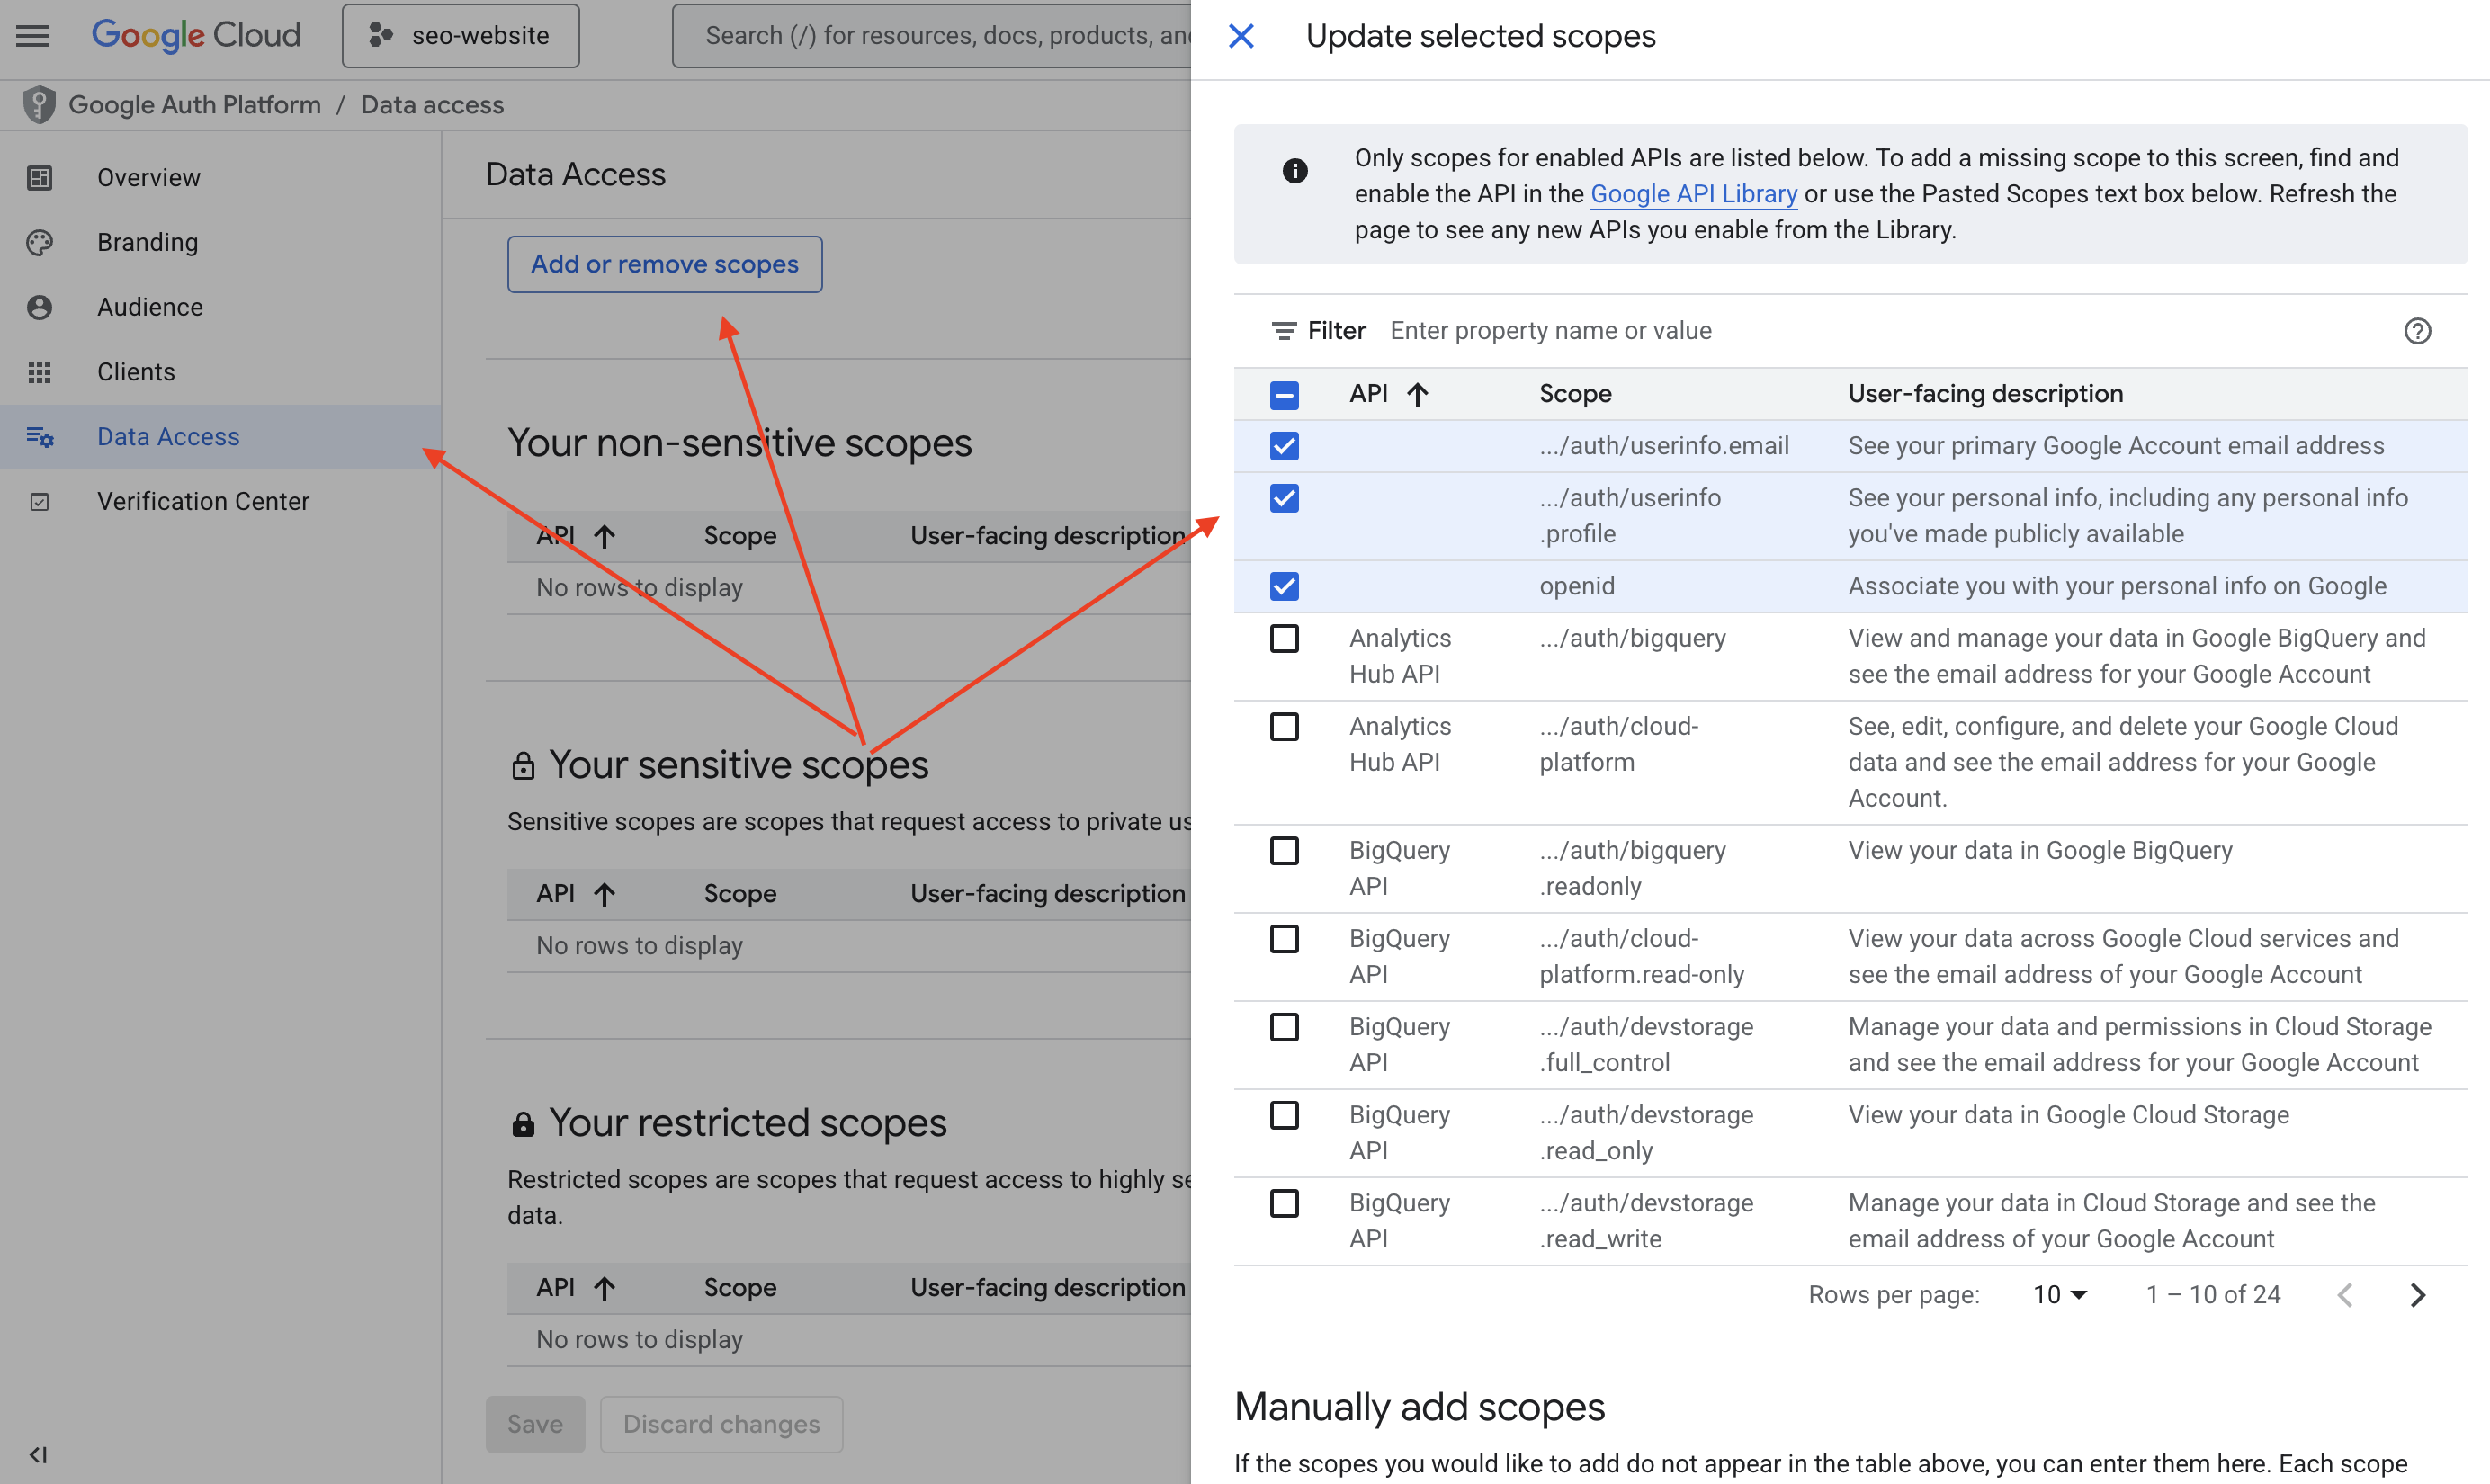
Then click Update and Save
Create OAuth 2.0 Credentials
-
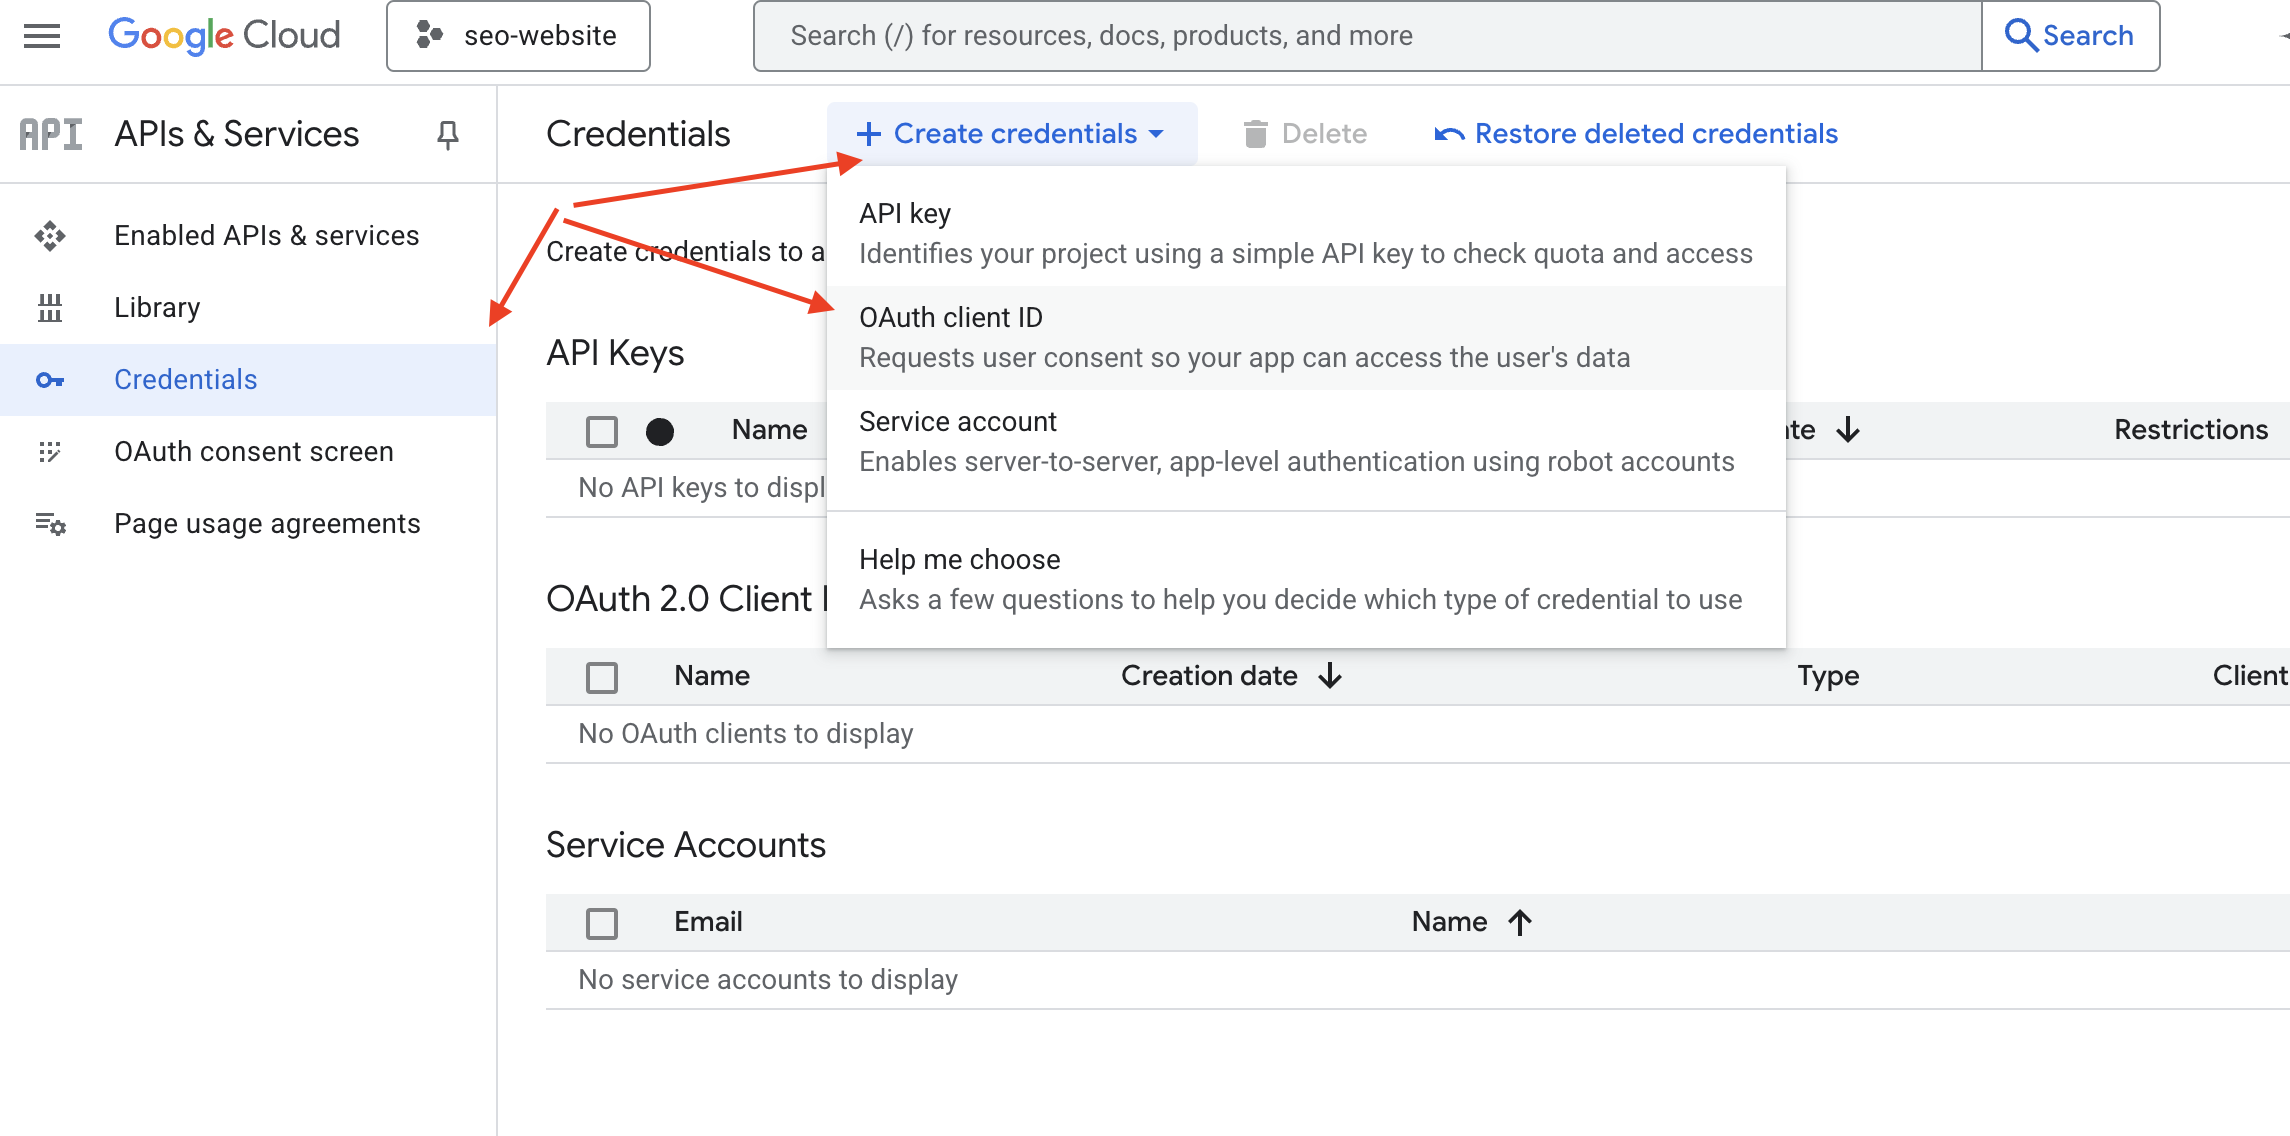
Go to the API Credentials page.
-
Click Create credentials and choose OAuth Client ID.
-
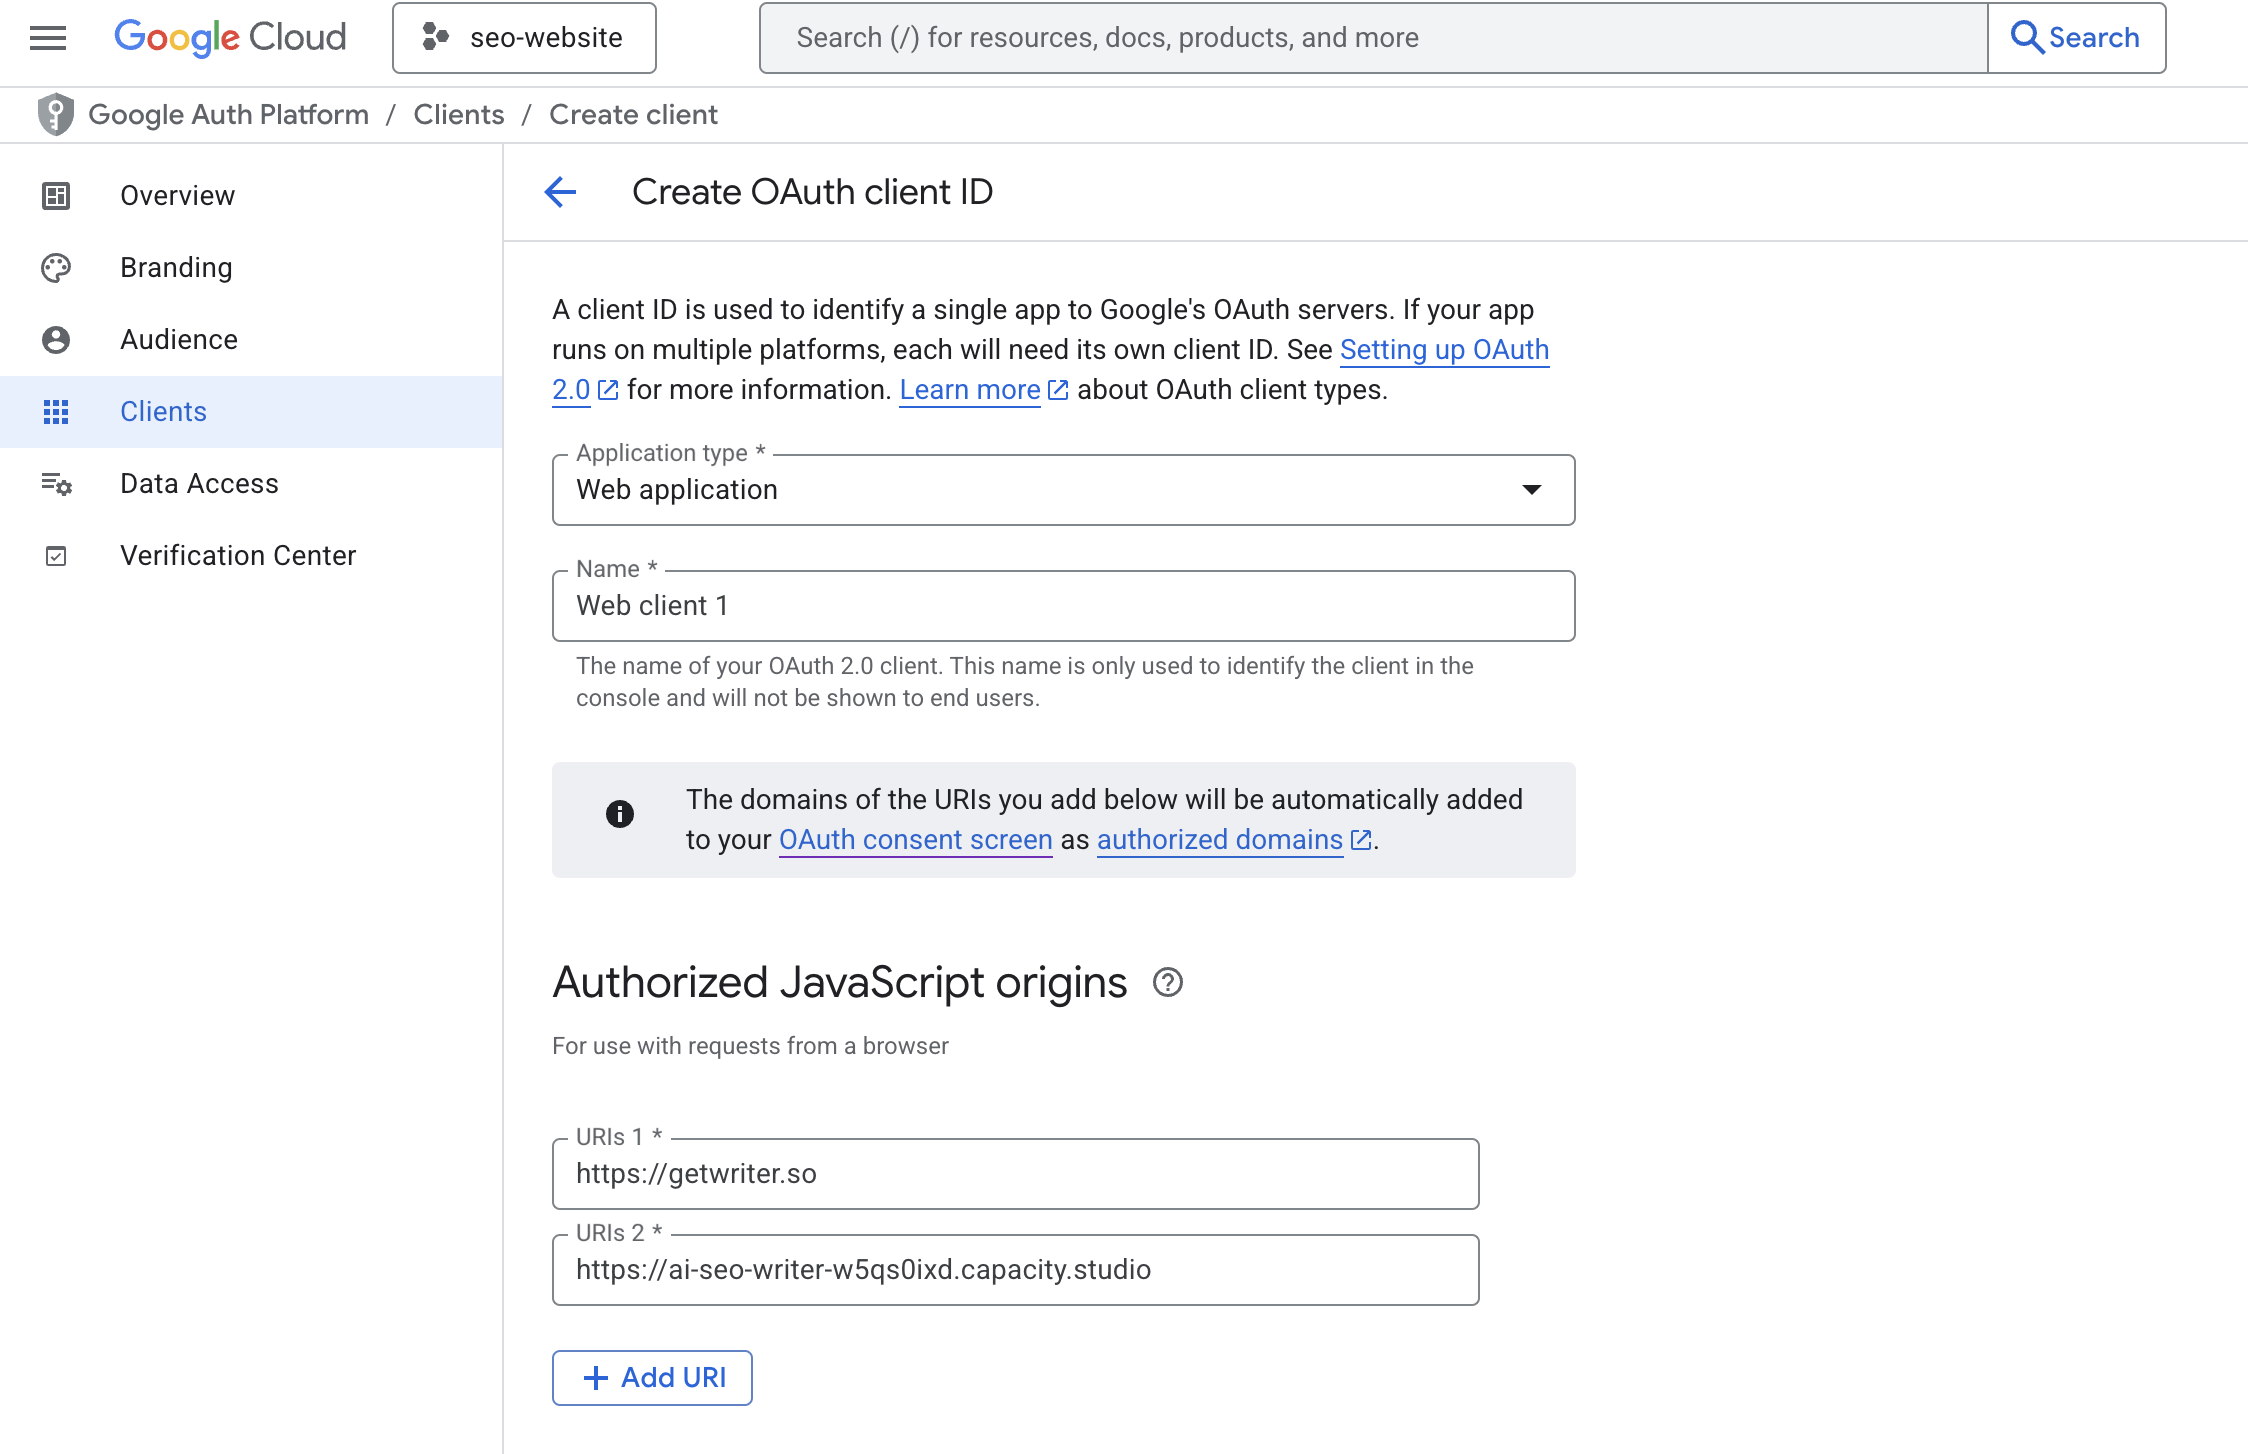
For application type, choose Web application.
-
Under Authorized JavaScript origins, add your site URL. You can find it on Capacity, in the domain section. You can add both your custom domain and the preview domain.
- Under Authorized redirect URLs, enter the callback URL from the Supabase dashboard. Expand the Google Auth Provider section to display it.
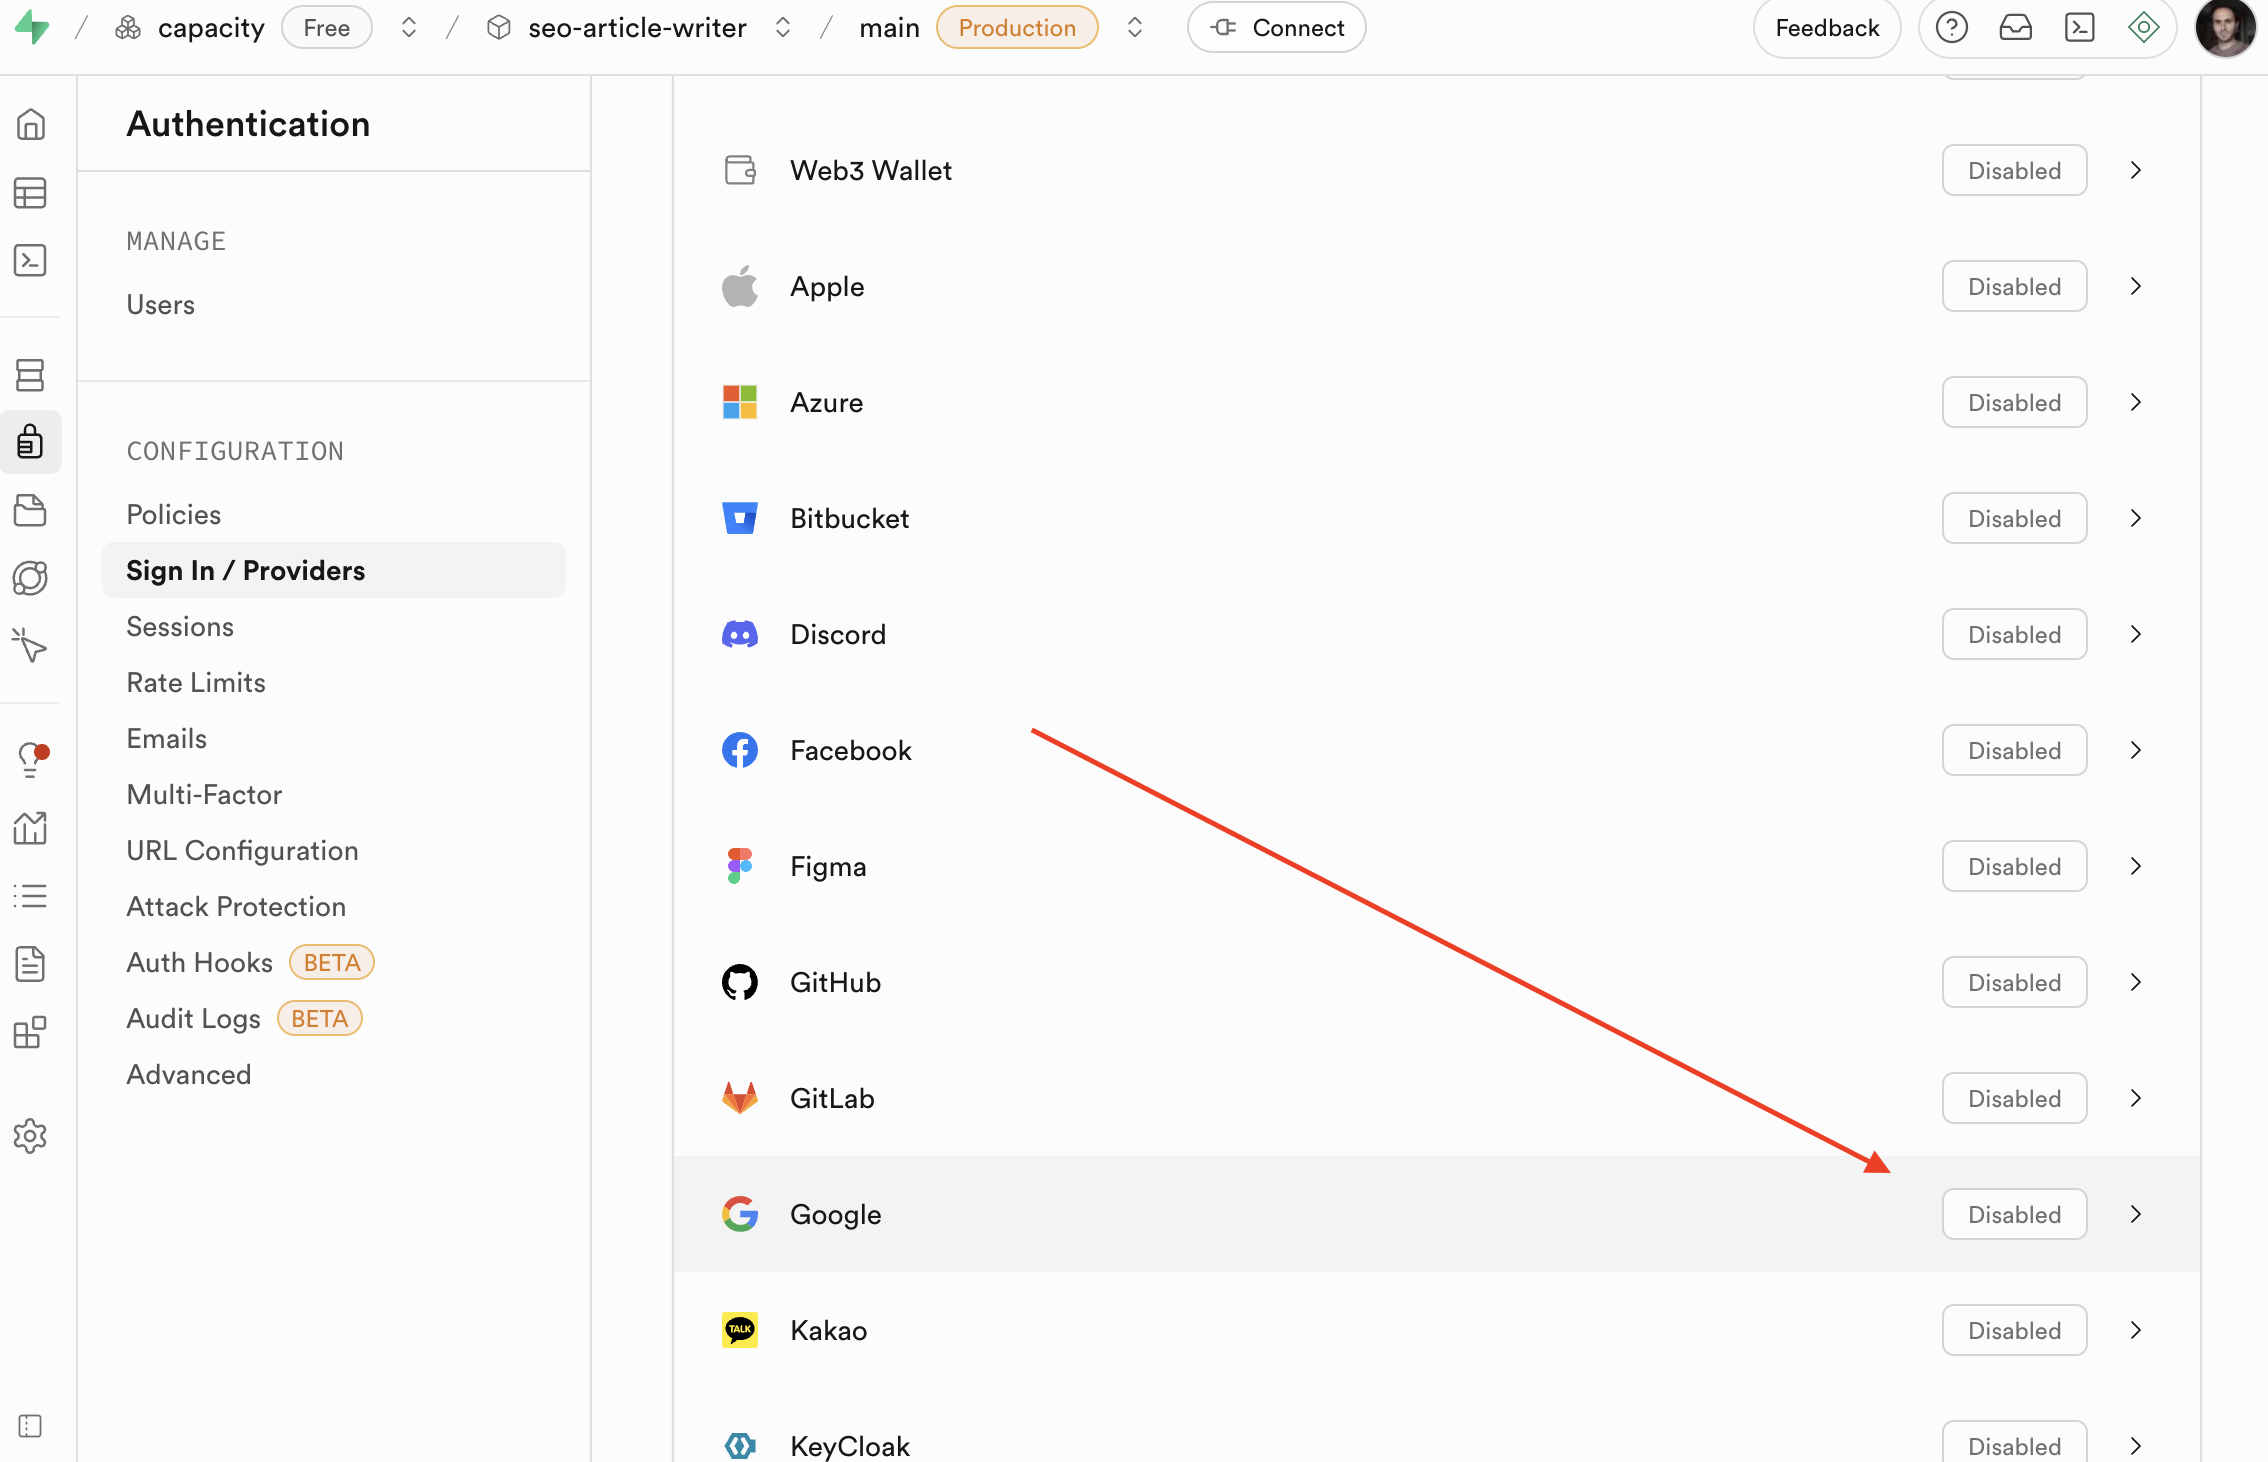
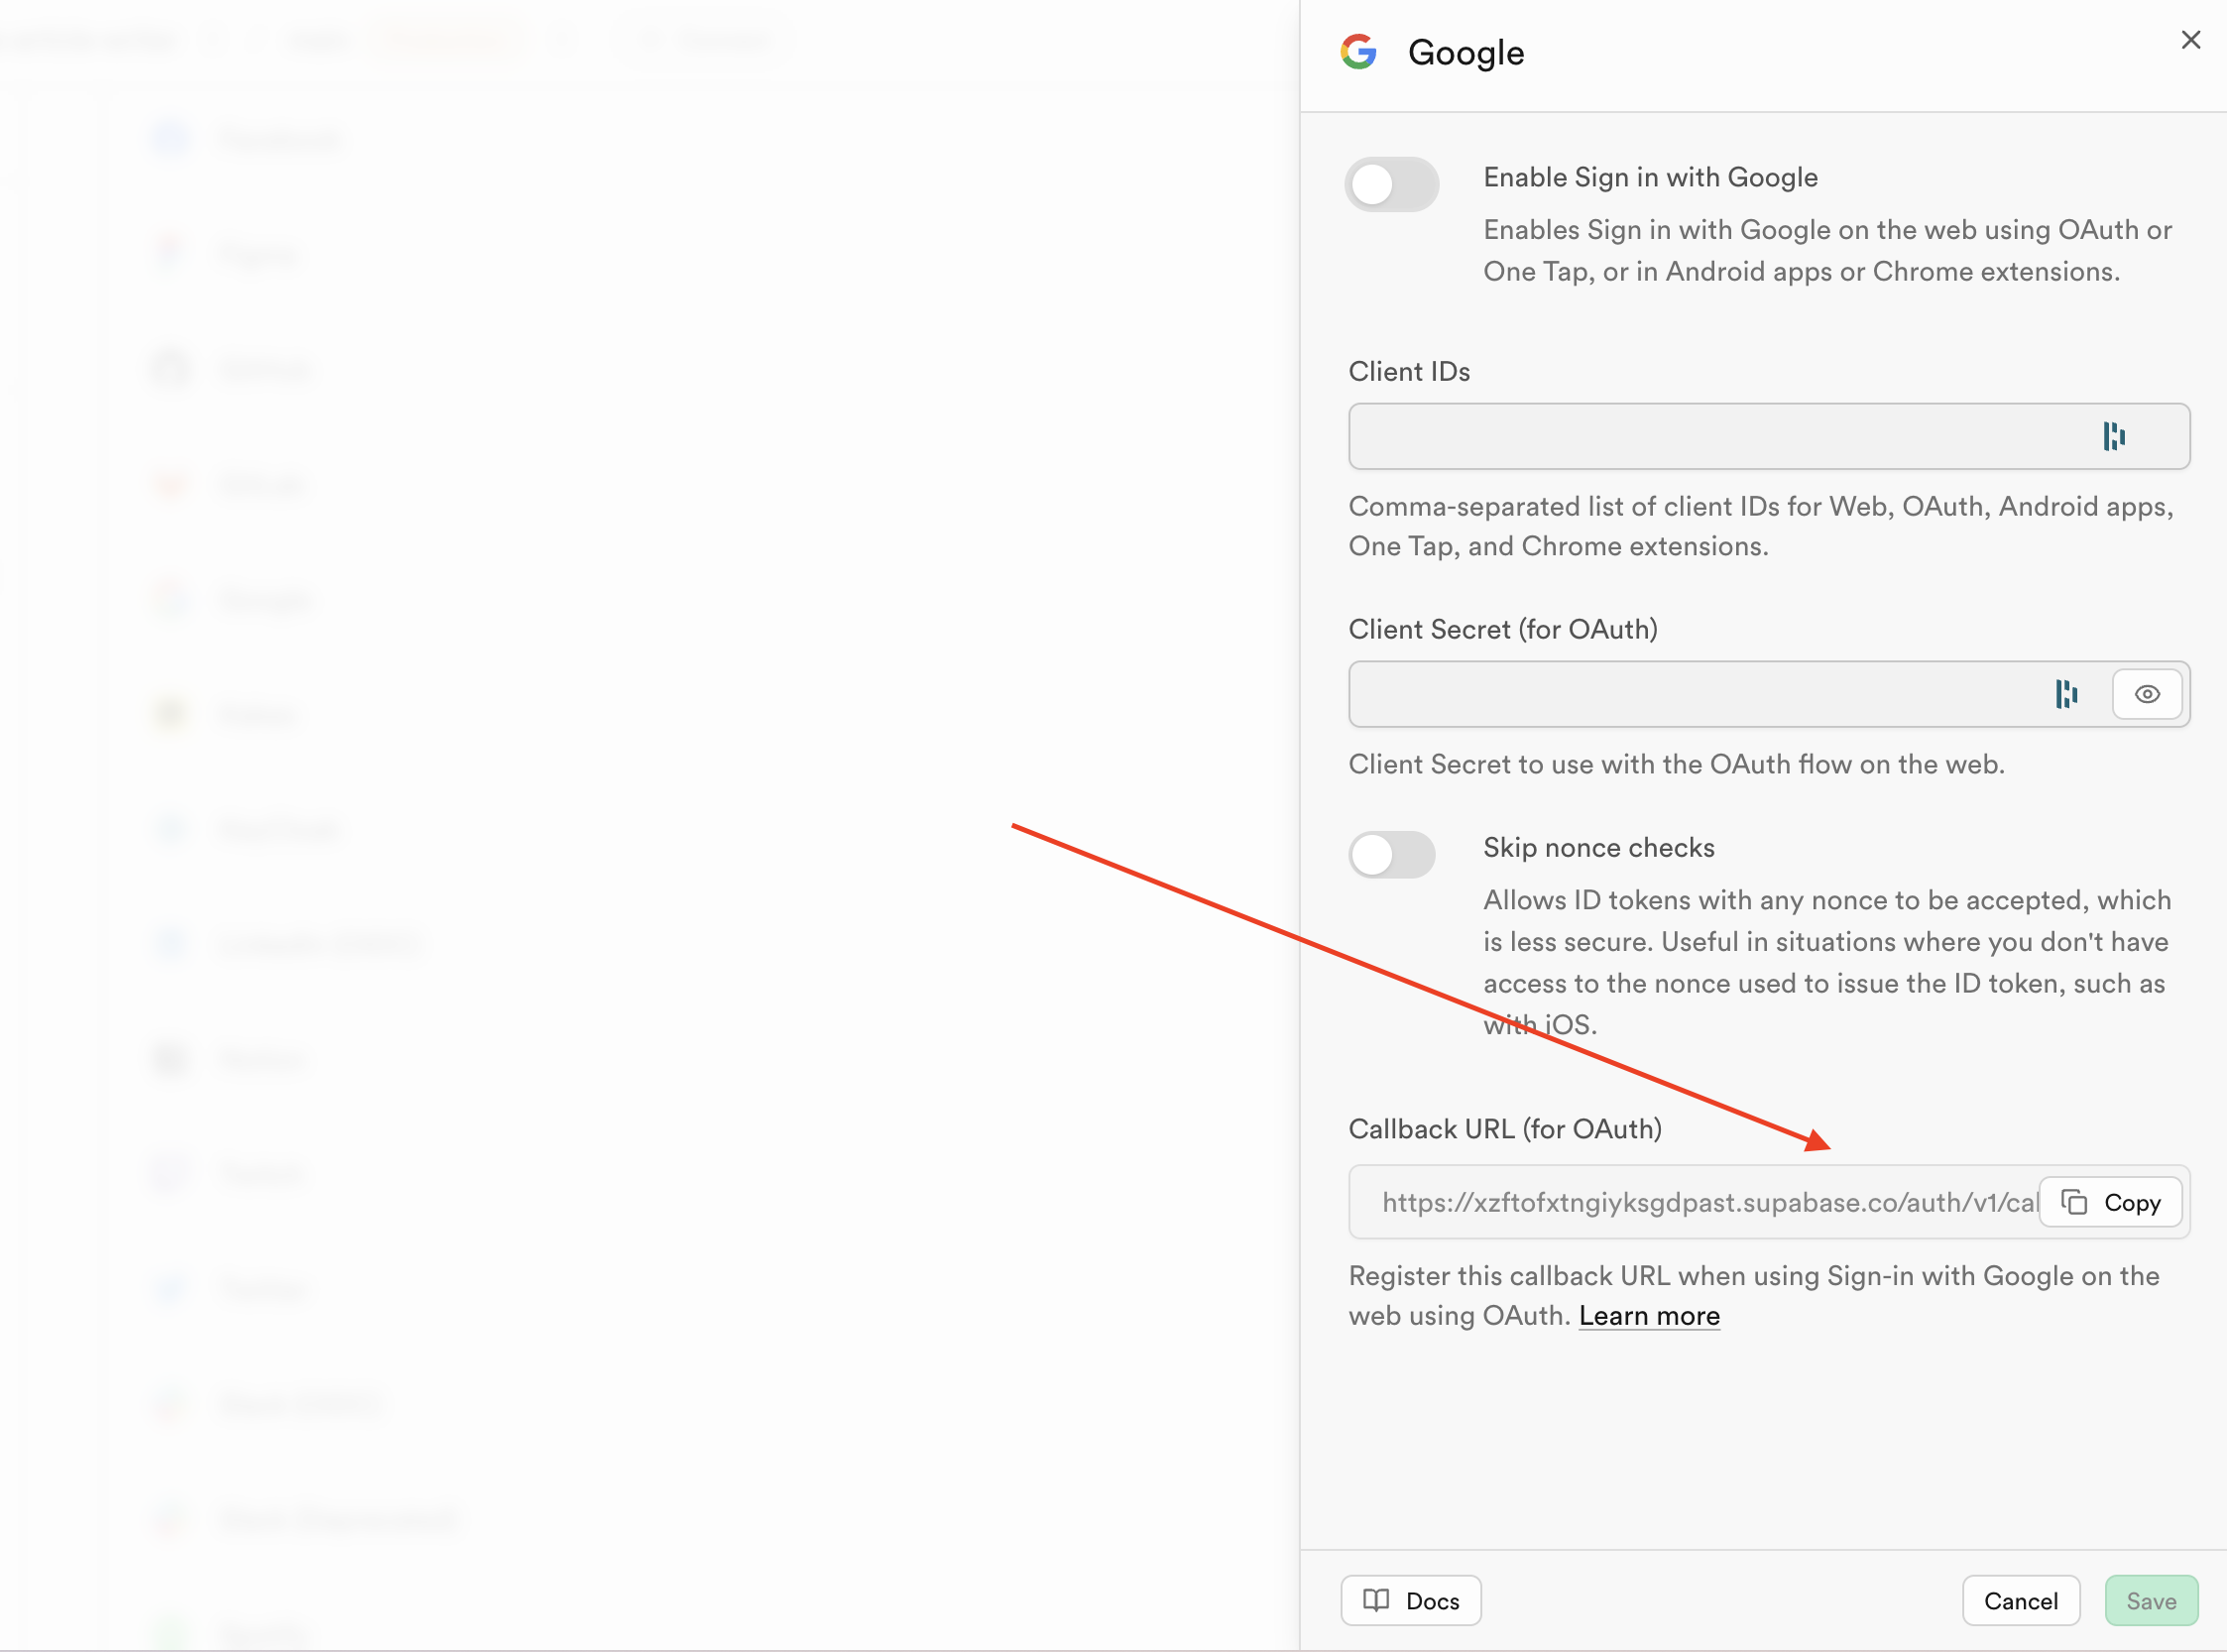
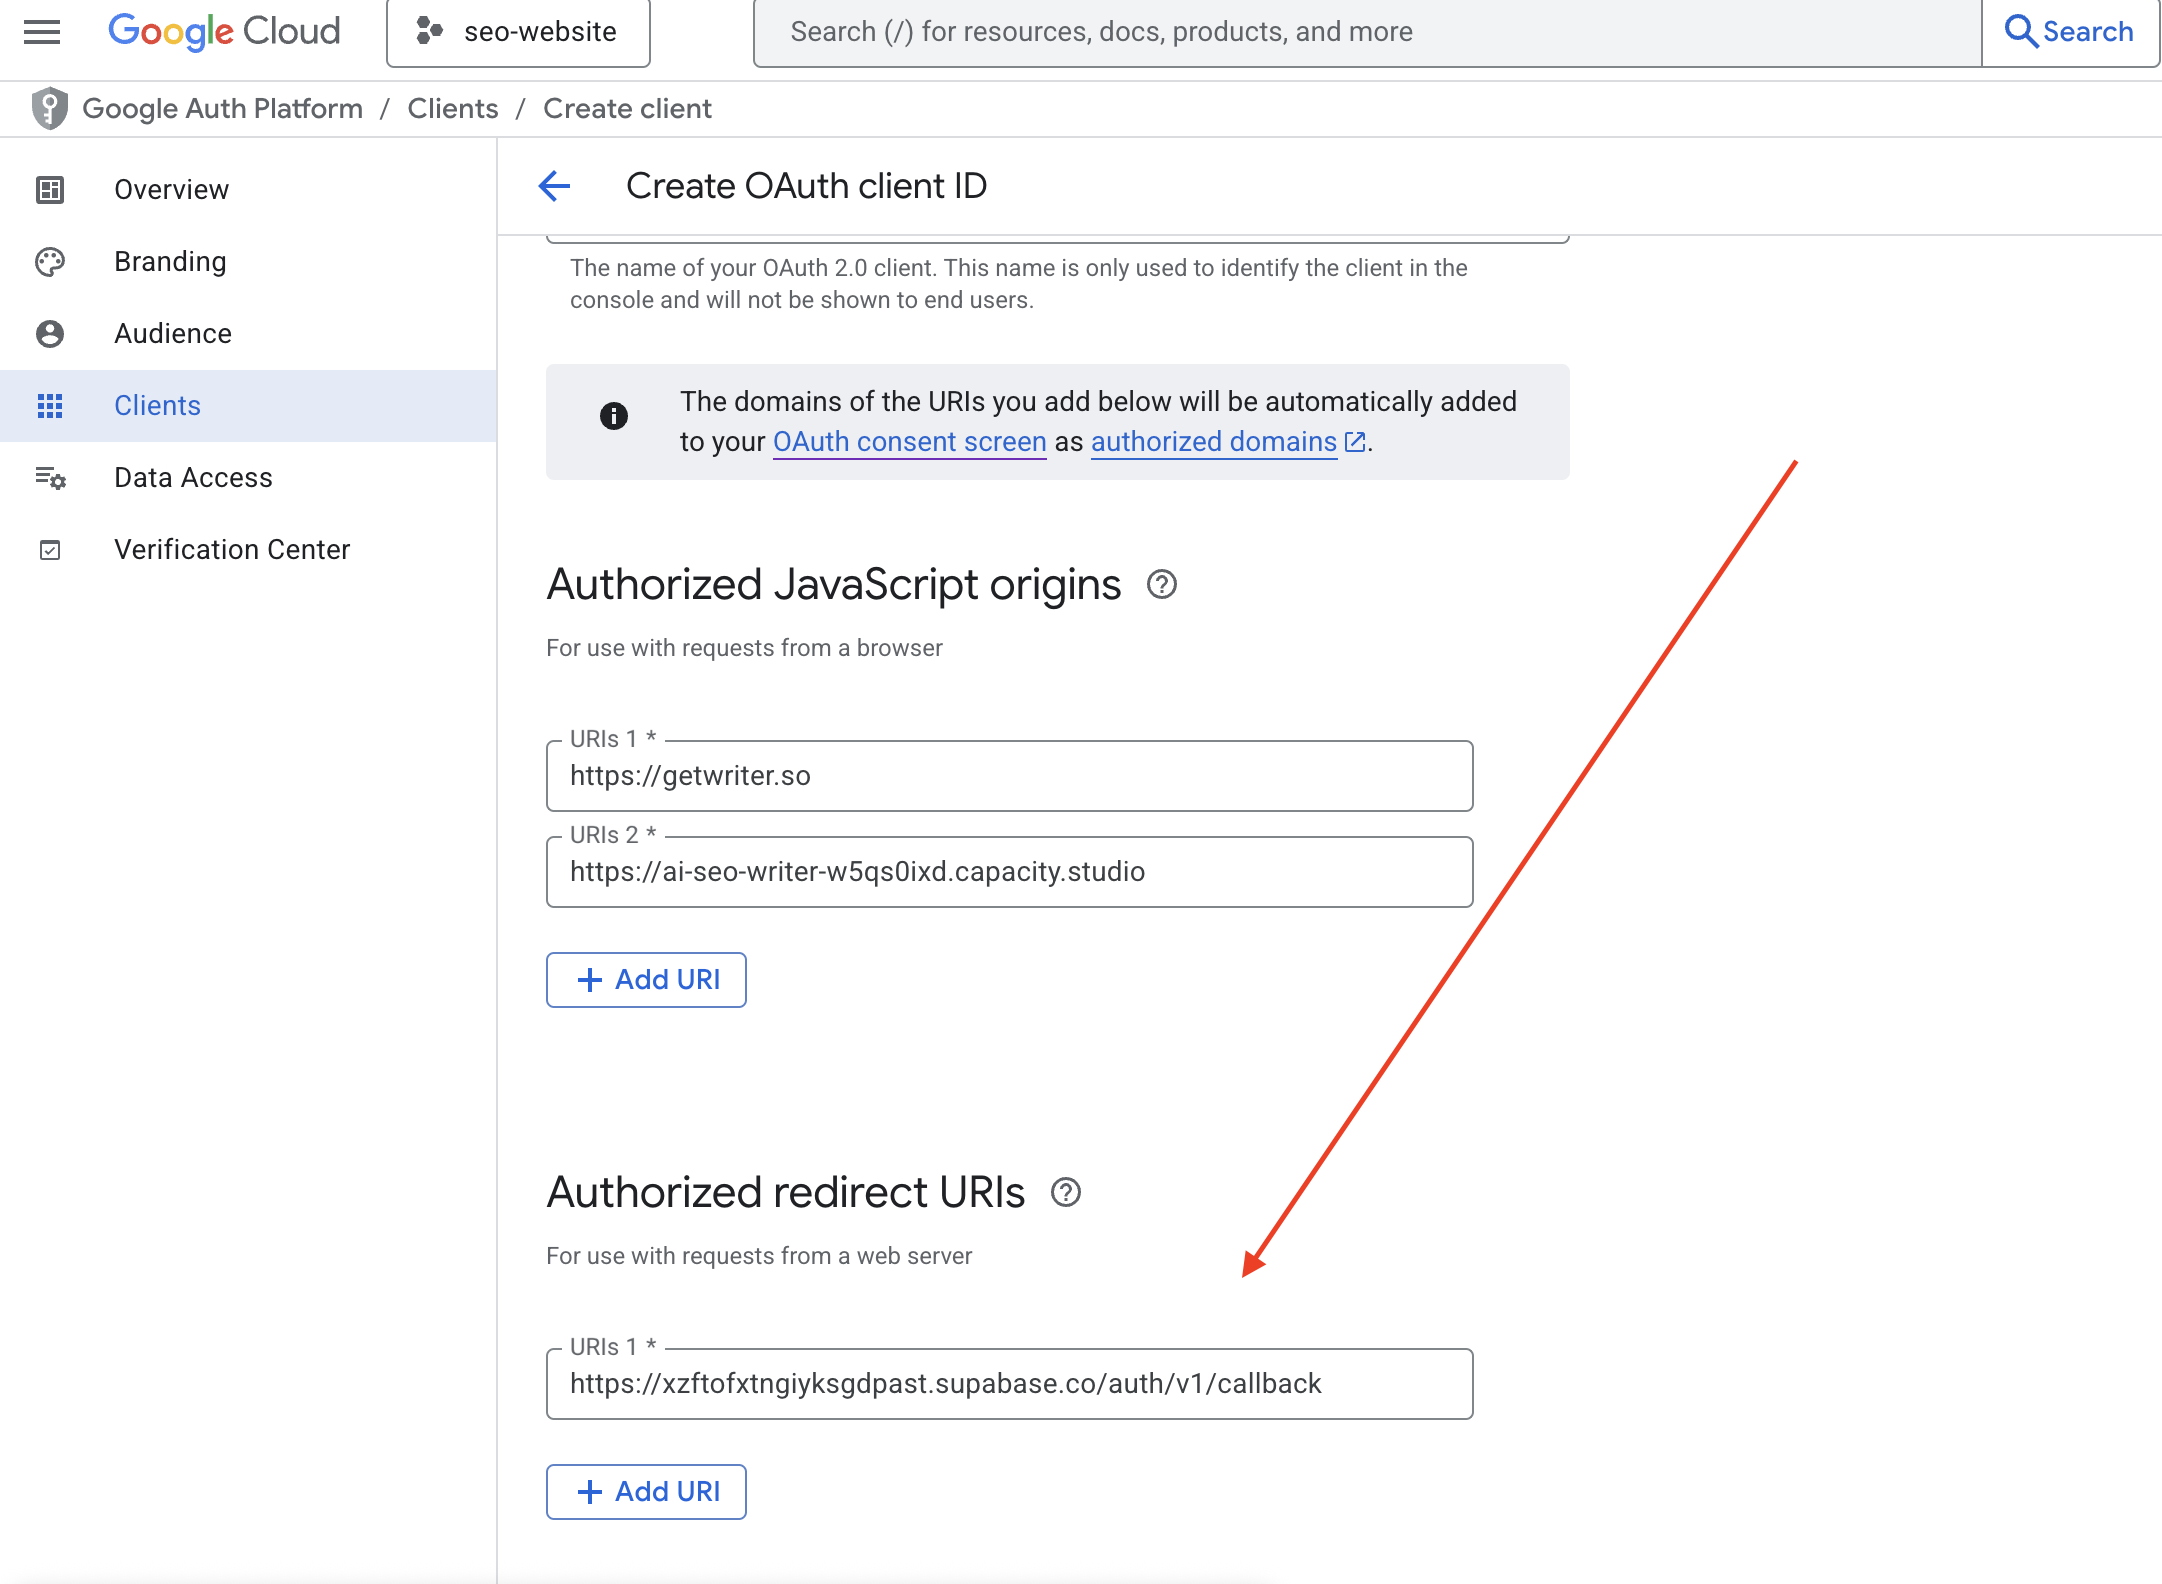
Note:
You can find the exact callback URL in your Supabase Dashboard → Authentication → Providers → Google section. It will be in the format: https://your-project-ref.supabase.co/auth/v1/callback
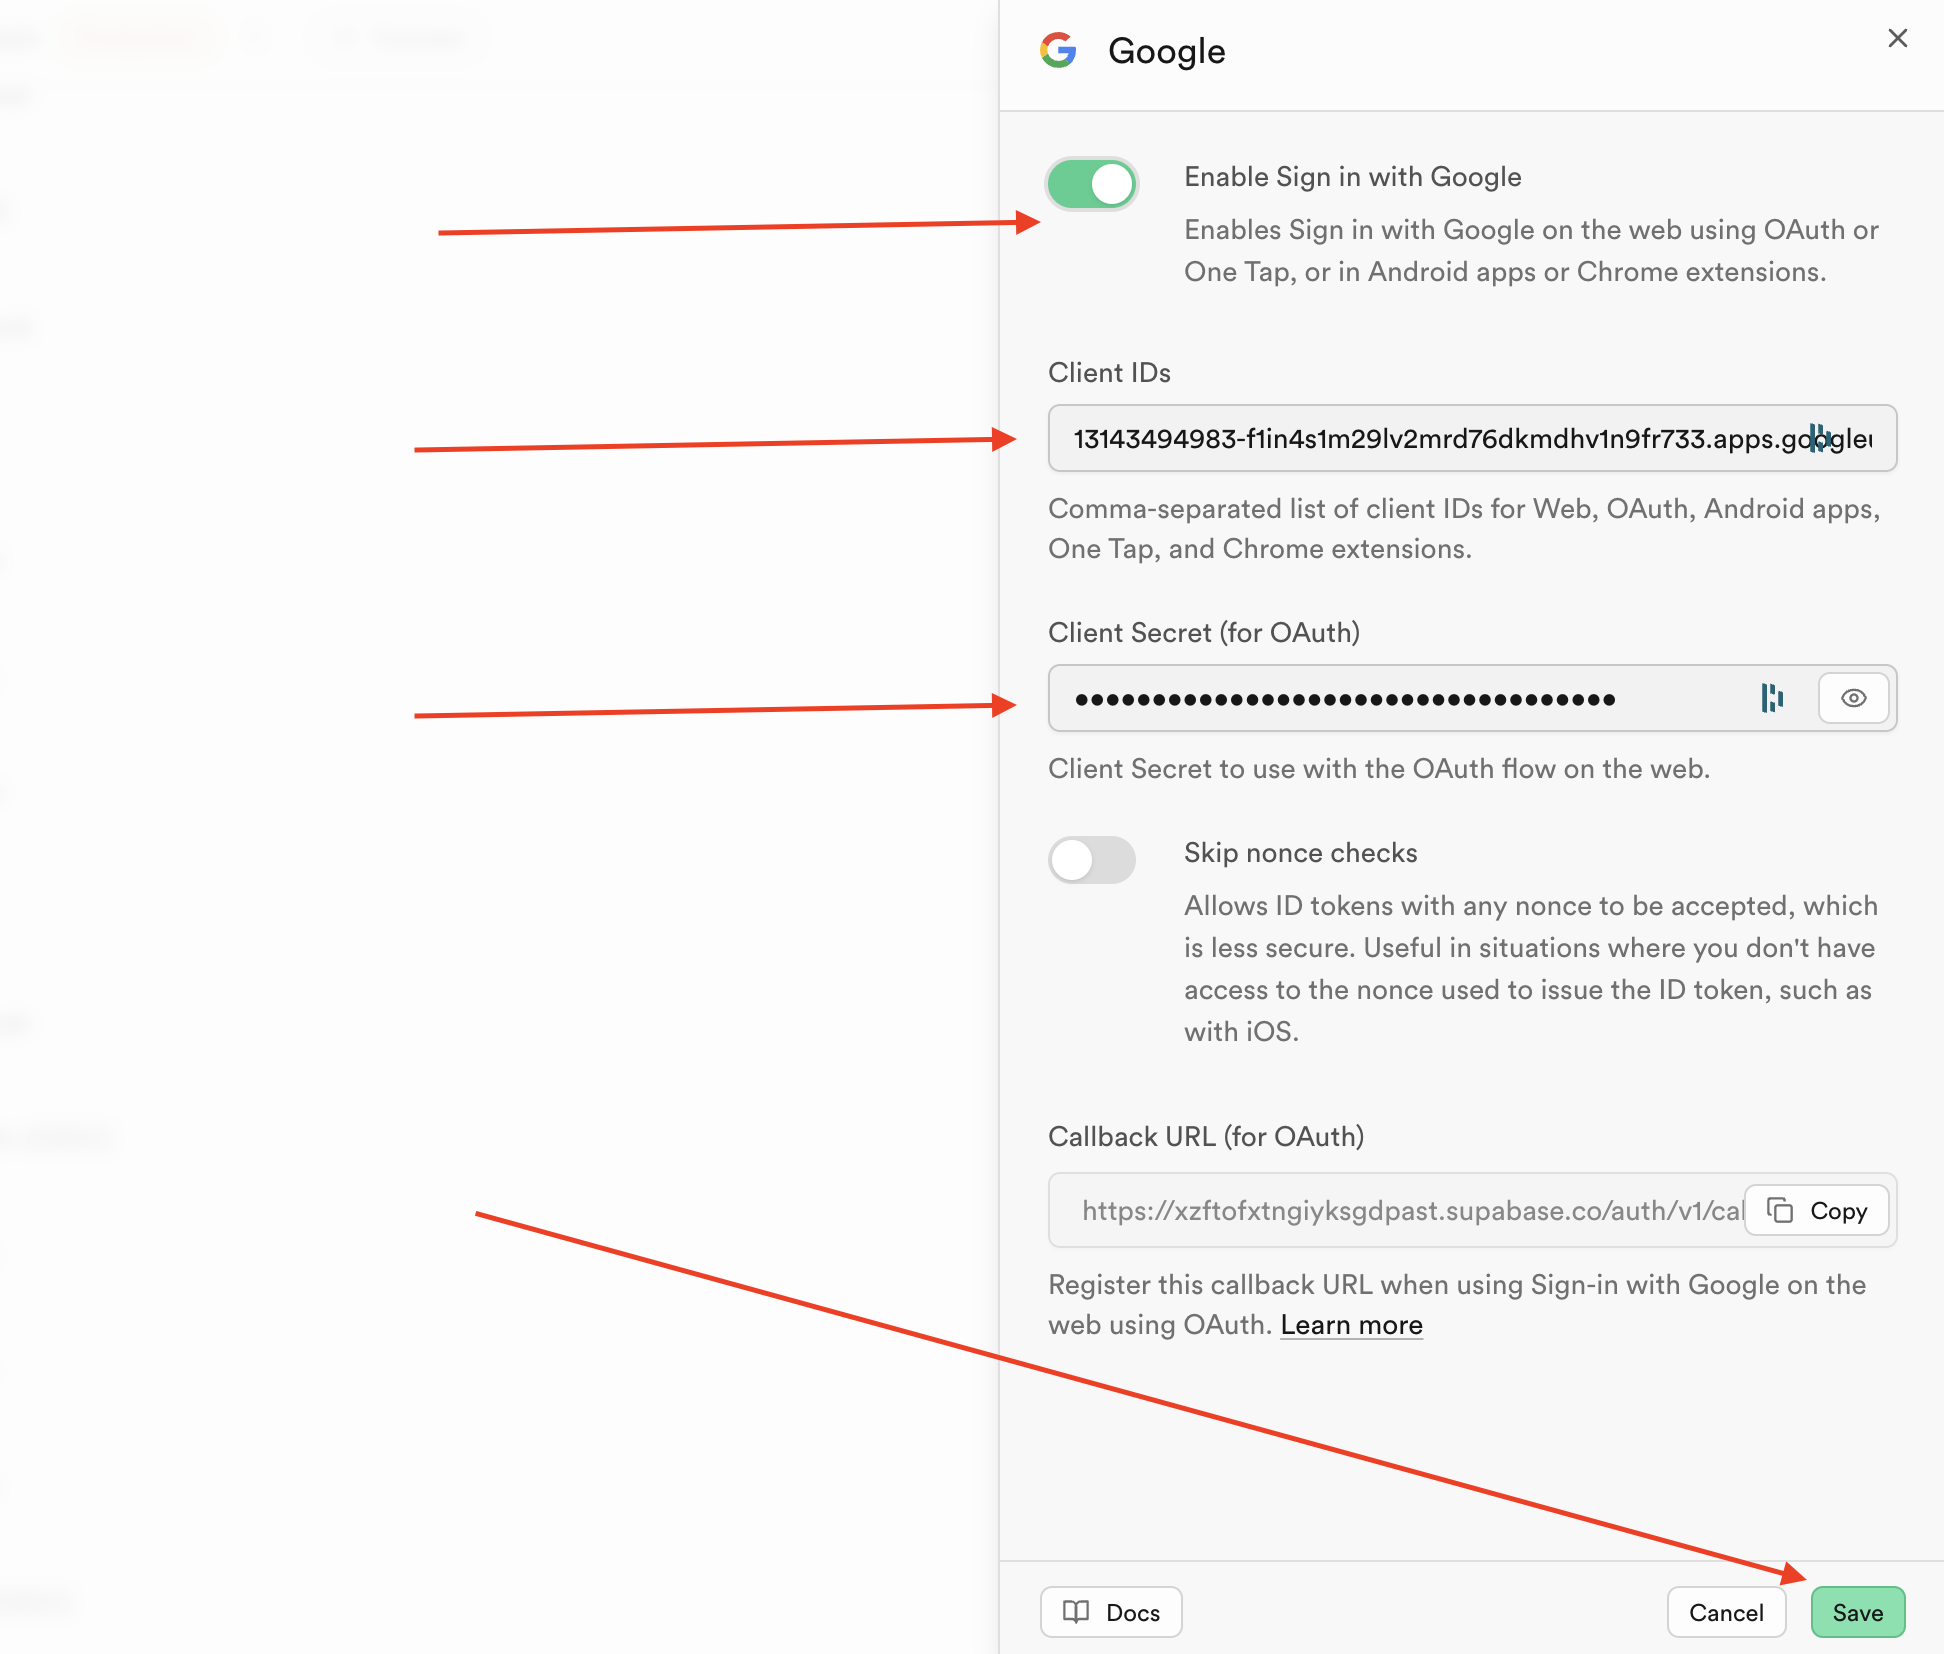
- Click Create and copy your Client ID and Client Secret and past them into your Supabase Google Auth settings.
Step 3: Test Your Integration
Note:
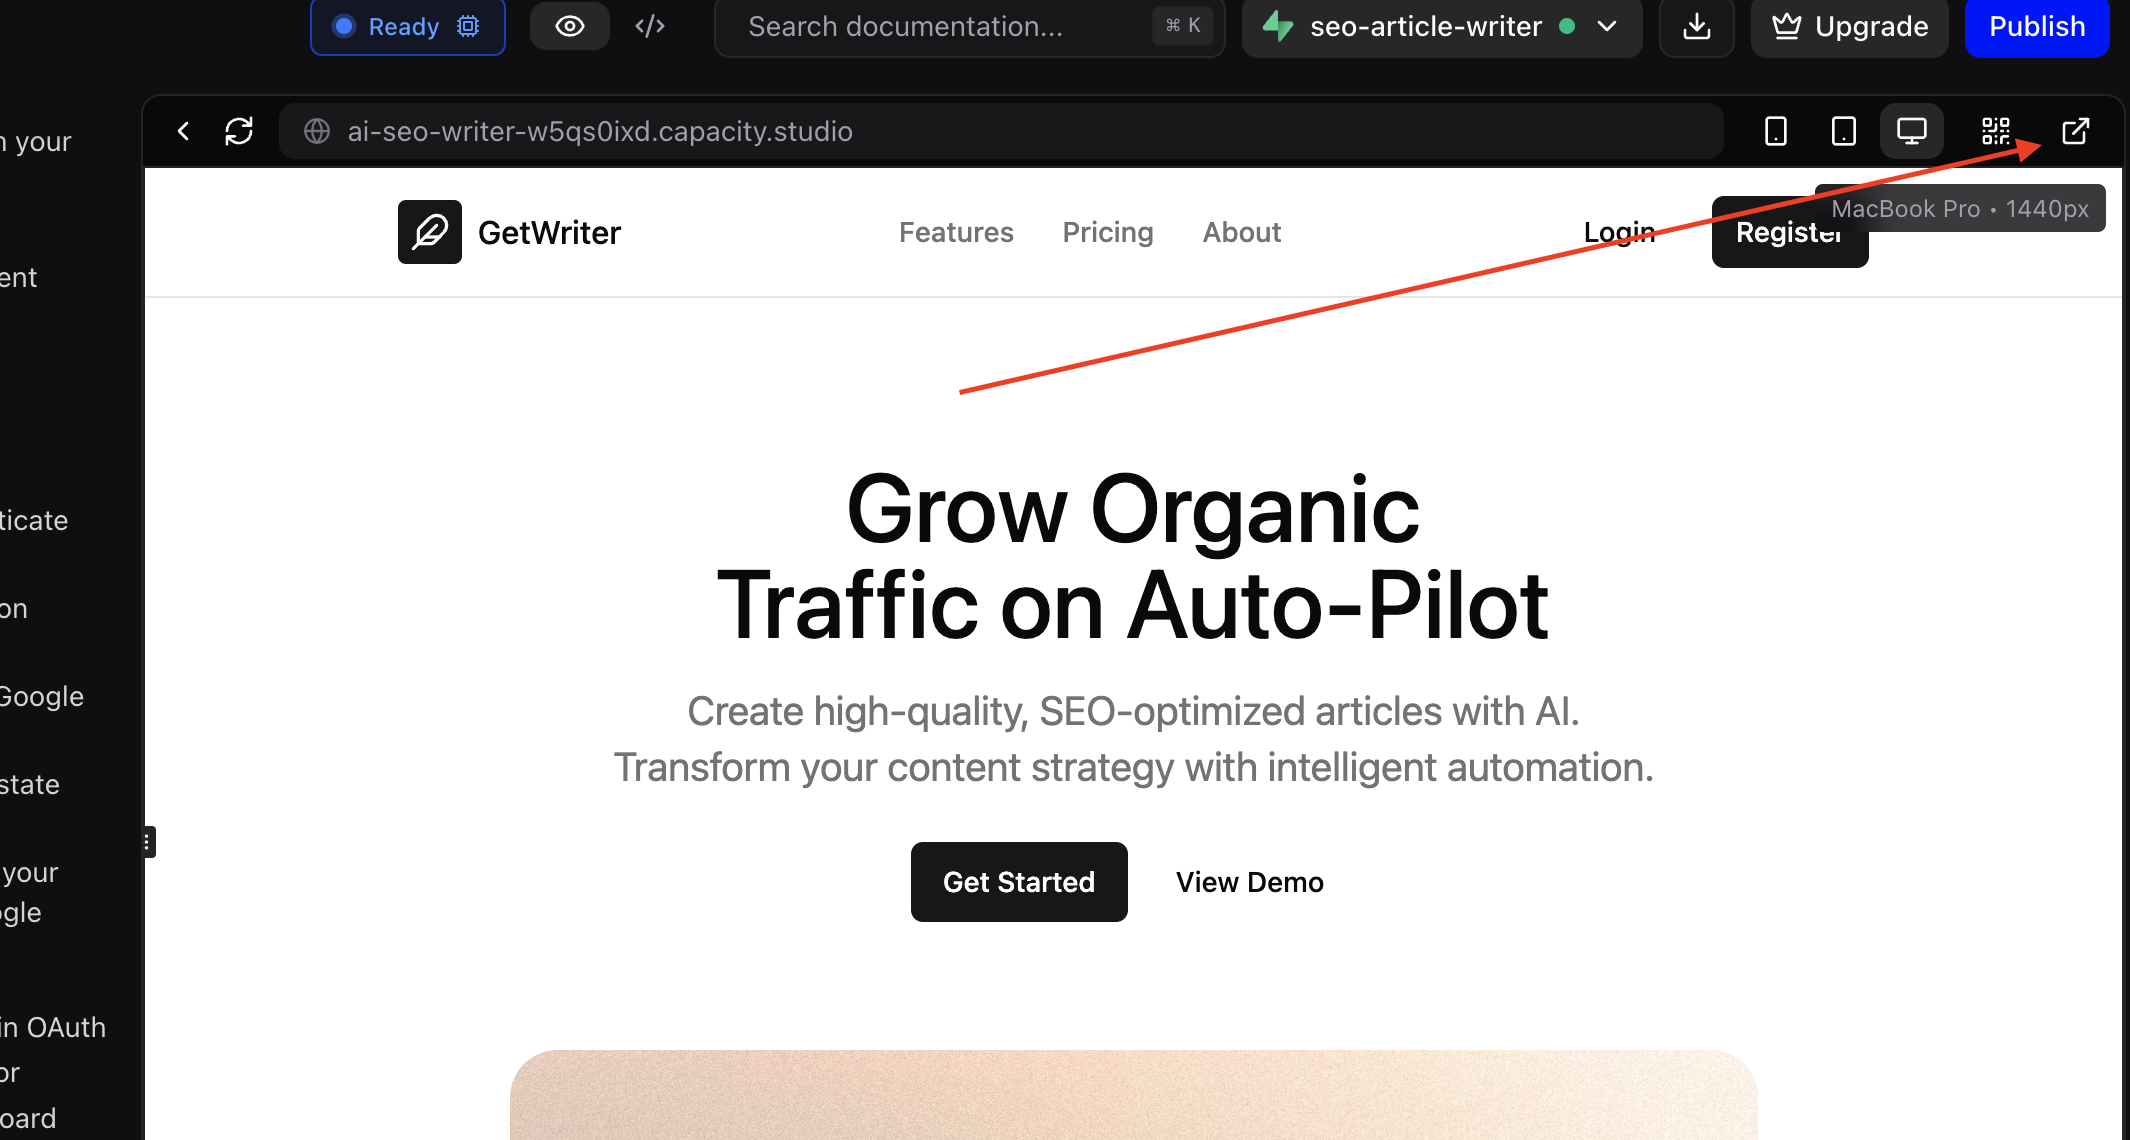
You need to open your Capacity project in a separated window as Capacity won't be able to display the Google Auth page in its development environment.
- Open your project in a separated window
- Navigate to your login or registration page
- Click the Continue with Google button
- Complete the Google OAuth flow
- Verify you're redirected back to your dashboard
Troubleshooting
Common Issues
"OAuth redirect URI mismatch"
- Verify your redirect URIs in Google Cloud Console match your Supabase project
- Ensure you're using the correct Supabase project reference
- Check that URLs use HTTPS in production
"Google auth button not working"
- Confirm Google provider is enabled in Supabase dashboard
- Verify Client ID and Secret are correctly entered
- Test on deployed application, not localhost
"User not redirected after authentication"
- Check your redirect URL configuration
- Ensure the target page exists and is accessible
- Verify there are no JavaScript errors preventing redirect
Debugging Steps
- Check Supabase Auth logs: Monitor authentication events in your Supabase dashboard
- Inspect browser console: Look for JavaScript errors during OAuth flow
- Verify Google credentials: Test your Client ID and Secret are active
- Test redirect URLs: Manually visit your callback URL to ensure it's accessible
Support
For Google OAuth specific issues:
For Capacity integration help:
- Ask in your project chat: "Help me debug my Google authentication"
- Check the browser console for authentication errors
- Review Supabase authentication logs